Table of Contents
Advertisement
Quick Links
Advertisement
Table of Contents

Related Manuals for Havener Enterprises BRADLEY MOWERS 32


Summary of Contents for Havener Enterprises BRADLEY MOWERS 32
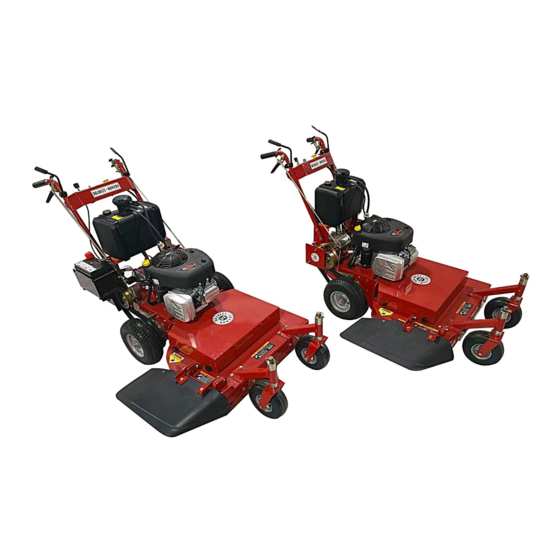
- Page 1 Sep. 10th 2023...
-
Page 2: Table Of Contents
TABLE OF CONTENTS About This Manual ................................2 Warranty Statement ................................3 SAFETY INFORMATION ..............................4 Training ..................................4 Before Use of Equipment ............................4 Operation of Equipment ..............................5 Assembly Instructions ..............................6-18 OPERATING THE MOWER ............................19 Starting The Engine ............................... 20 Going Forward .................................. -
Page 3: About This Manual
Bradley Belt-Drive With Electric Clutch Mower Parts About This Manual This owner’s manual is considered a permanent part of the mower. It must be available to all of the operators and/or person(s) servicing the mower. Should the mower be resold, this manual must remain with the mower. -
Page 4: Warranty Statement
Bradley Belt-Drive With Electric Clutch Mower Parts Warranty Statement The mowers are warranted for two (2) years from the original date of purchase against defects in material or workmanship, when operated and maintained in accordance with the mowers Owner’s Manual. Commercial operators: first year is parts and labor; second year is parts only. Residential operators: first two years parts and labor;... -
Page 5: Safety Information
Bradley Belt-Drive With Electric Clutch Mower Parts SAFETY INFORMATION Read This Manual Carefully And Thoroughly Before Operating The Mower Training Carefully and thoroughly read the owner’s manual. Allow adequate time to fully understand the controls and operation of the equipment. Never allow anyone to operate the mower that has not read and fully understood the owner's manual. -
Page 6: Operation Of Equipment
Bradley Belt-Drive With Electric Clutch Mower Parts Operation of Equipment DANGER: GASOLINE IS HIGHLY FLAMMABLE AND EXPLOSIVE. DO NOT ADD FUEL WHILE THE ENGINE IS RUNNING OR IS HOT. KEEP OPEN FLAMES, SPARKS, AND HEAT AWAY FROM THE FUEL AND STORE FUEL IN CONTAINERS SPECIFICALLY DESIGNED FOR THAT PURPOSE. -
Page 7: Assembly Instructions
Bradley Belt-Drive With Electric Clutch Mower Parts Assembly Instructions Remove the fuel tank from the mower, unbolt the crate,removing the top and side rails Tools needed:17mm or 5/8 wrench/ratchet " Fuel Tank Remove the bolts that securing the back of the mower... - Page 8 Bradley Belt-Drive With Electric Clutch Mower Parts Unpack the mower Parts B Parts A Remove parts packages A and B...
- Page 9 Bradley Belt-Drive With Electric Clutch Mower Parts Parts A Parts B...
- Page 10 Bradley Belt-Drive With Electric Clutch Mower Parts Remove the handlebar assembly Handlebars Remove the bolts securing the deck to The frame...
- Page 11 Bradley Belt-Drive With Electric Clutch Mower Parts Prepare the 2 front wheel assemblies Install the front Wheel yoke Tools needed: 17mm or 5/8" wrench/ratchet...
- Page 12 Bradley Belt-Drive With Electric Clutch Mower Parts Install the front wheels Mower Remove the mower From the crate Base crate...
- Page 13 Bradley Belt-Drive With Electric Clutch Mower Parts 32 BDE gear shift lever 36 BDE gear shift lever Install the gear shift lever Install the shifting position plate...
- Page 14 Bradley Belt-Drive With Electric Clutch Mower Parts Remove the fuel tank pads from the manual package Adhere the pads to the fuel tank; a spray adhesive is recommended Fuel tank straps Install the fuel tank straps Tools needed:10mm or3/8 " wrench/ratchet...
- Page 15 Bradley Belt-Drive With Electric Clutch Mower Parts Fuel line hose Vent hose Connect the line hose vent hose Connect the handle with the frame, NO NOT TIGHTEN Measure the distance from the handle to the ground, make sure the height is 40-1/2 and then "...
- Page 16 Bradley Belt-Drive With Electric Clutch Mower Parts Release the grip Adjust the tension by turning the rod clockwise or counterclockwise Rotating the rod connector to adjust the tension of the belt, if the belt is loosen, remove the cotter pin and disconnect the rod connector with the diamond bracket and then follow the direction of the yellow arrow rotating the rod connector and then reconnect the rod connector with the diamond bracket,...
- Page 17 Bradley Belt-Drive With Electric Clutch Mower Parts the wire connect to the electric clutch Connect the transmission safety switch to the plug and zip tie it Connect the engine wiring 2022 upgrade design...
- Page 18 Bradley Belt-Drive With Electric Clutch Mower Parts Push the throttle control All the way forward Connect the throttle cable Install grass chute cover Add engine oil and fuel in accordance With engine instructions...
- Page 19 Bradley Belt-Drive With Electric Clutch Mower Parts connect the positive line to the battery Enjoy your new Bradley Mowers lawn mower!...
-
Page 20: Operating The Mower
Bradley Belt-Drive With Electric Clutch Mower Parts OPERATING THE MOWER It is recommended that before you operate the mower, you allow adequate time to fully understand the controls and operation of the equipment. When reading this manual, it is recommended that you do so with the equipment nearby for quick orientation, reference of controls and maintenance adjustments. -
Page 21: Starting The Engine
Bradley Belt-Drive With Electric Clutch Mower Parts Starting The Engine: DANGER: DO NOT OPERATE THE ENGINE IN A CONFINED SPACE WHERE DANGEROUS CARBON MONOXIDE FUMES CAN COLLECT CARBON DIOXIDE IS ODORLESS, TASTELESS, AND CAN BE FATAL. After going through the steps as discussed on pages (4) and (5), you are now ready to start the engine. -
Page 22: Turning The Mower
Bradley Belt-Drive With Electric Clutch Mower Parts Turning The Mower To turn the mower in the direction you want to go, gently squeeze the side’s traction control lever (i.e. to go right,squeeze the right traction control lever; to go left, squeeze the left traction control lever). The more a particular traction control lever is squeezed, the sharper a turn the mower will make. -
Page 23: Changing The Height Of Cut
Bradley Belt-Drive With Electric Clutch Mower Parts Changing The Height Of Cut: DANGER: BEFORE MAKING ANY ADJUSTMENTS AND/OR SERVICING YOUR MOWER, MAKE SURE THE MOWER IS ON LEVEL GROUND, BLADES DISENGAGED, KEYS REMOVED, AND THE ENGINE OFF WITH THE SPARK PLUG WIRE(S) REMOVED FROM THE SPARK PLUGS(S) TO PREVENT ACCIDENTAL CONTACT. - Page 24 Bradley Belt-Drive With Electric Clutch Mower Parts 1/4"Spacer Blade Blade " Spacers Flat Steel Washer(Do Not Remove) Blade Bolt“C” “B” Flat Steel Washer(Do Not Remove) Blade Bolt“C” Figure 6 Figure 5 Flip pin Flat steel washer(do not remove) 1/4"Spacers“B” Spacers "...
-
Page 25: General Maintenance
Bradley Belt-Drive With Electric Clutch Mower Parts GENERAL MAINTENANCE Proper maintenance and adjustment of your Red Hawk mower is necessary to keep the mower in good and safe condition. The maintenance of the mower is the responsibility of the owner/operator and must be performed at regular intervals. -
Page 26: Fuel
Bradley Belt-Drive With Electric Clutch Mower Parts Fuel DANGER: GASOLINE IS HIGHLY FLAMMABLE AND EXPLOSIVE. DO NOT ADD FUEL WHILE THE ENGINE IS RUNNING OR IS HOT. KEEP OPEN FLAMES, SPARKS, AND HEAT AWAY FROM THE FUEL AND STORE FUEL IN CONTAINERS SPECIFICALLY DESIGNED FOR THAT PURPOSE. -
Page 27: Lubrication Points
Bradley Belt-Drive With Electric Clutch Mower Parts Lubrication Points To assure proper lubrication on moving parts, it is recommended that you lubricate the following components with a high-quality EP2 high temperature based grease or equivalent. Should the conditions of operation be more severe than normal, the lubrication interval may be than recommended GTR/OPE Grease is the recommended lubricant. -
Page 28: Service Adjustments
Bradley Belt-Drive With Electric Clutch Mower Parts SERVICE ADJUSTMENTS DANGER: BEFORE MAKING ANY ADJUSTMENTS AND/OR SERVICING YOUR MOWER, MAKE SURE THE MOWER IS ON LEVEL GROUND, BLADES DISENGAGED, KEY REMOVED, AND THE ENGINE OFF WITH THE SPARK PLUG WIRE(S) REMOVED FROM THE SPARK PLUG(S) TO PREVENT ACCIDENTAL CONTACT. -
Page 29: Engine To Transmission Belt Adjustment
Bradley Belt-Drive With Electric Clutch Mower Parts Engine To Transmission Belt Adjustment: (Refer to figure11) The engine to transmission belt, located underneath the rear deck, should move 3/16 with 5 lbs. of pressure applied midway on the belt between the transmission pulley and the engine output shaft pulley. -
Page 30: Trouble Shooting
Bradley Belt-Drive With Electric Clutch Mower Parts TROUBLE SHOOTING Problem Possible Cause Solution Key in the OFF position Turn key to ON Transmission shift lever not Move lever into the neutral in then neutral position (Page 20). Blade control not in the OFF Move blade control lever to position Fuel tank empty... - Page 31 Bradley Belt-Drive With Electric Clutch Mower Parts TROUBLE SHOOTING Problem Possible Cause Solution Move transmission lever Transmission is in neutral (page20) Engine to transmission belt Check and adjust (page 28) Mower Does Not loose Move When Traction Incorrect drive wheel belt Levers Are Released Check and adjust (page 27) adjustment...
- Page 32 Bradley Belt-Drive With Electric Clutch Mower Parts Bradley Mowers Belt Drive with Electric Clutch Parts...
-
Page 33: Engine Assembly
Bradley Belt-Drive With Electric Clutch Mower Parts Engine Assembly... - Page 34 Bradley Belt-Drive With Electric Clutch Mower Parts Engine Assembly Item No. Part No. Description 100C-023 Engine 100-138 Key C6.35*6*28 100-099a Adjust spacer I 100-137 Sigle sleeve pulley 336-235 Large belt wheel adjustment pad 200-029 Nut flange M8 GB6187 200-025 Hexagon Bolt M8-1.25x30 GB5783 100C-022 Clutch (BD) 601-020...
-
Page 35: Frame Assembly
Bradley Belt-Drive With Electric Clutch Mower Parts Frame Assembly Recoil start Electric start... - Page 36 Bradley Belt-Drive With Electric Clutch Mower Parts Frame Assembly Item No. Part No. Description 100-005 Side baffle 200-001 Nut M10 GB923-88 600-201-0010 Nut M10 GB889 336-173 Connecting bolt 200-010 Washer10 GB95 100C-018 Belt wheel cover for 36” 100C-018A Belt wheel cover for 32” 100-009A Saucer Nut 200-003...
-
Page 37: Front Deck Assembly
Bradley Belt-Drive With Electric Clutch Mower Parts Front Deck Assembly... - Page 38 Bradley Belt-Drive With Electric Clutch Mower Parts Front Deck Assembly Item No. Part No. Description WM2836-041 Regulate nut WM2836-040a Spring Ⅰ 100C-012 Belt engage linkage 132-004 Deck belt 32” 136-004 Deck belt 36” 200-007 Nylon Nut M12 GB889 200-342 Plain washer 12 GB96 100C-011 linkage bushing 100C-010...
-
Page 39: Rear Wheel Assembly
Bradley Belt-Drive With Electric Clutch Mower Parts Rear Wheel Assembly Item No. Part No. Name 200-346 Bolt M8-1X35 GB5786 200-024 Washer 8 GB93 200-021 Washer 8 GB95 100-112 Brake hub 100-110 Traveling sheave 100-111 Spacer 11.5 132-008 Rear wheel for 32″ 300-019 Rear wheel for 36″... -
Page 40: Front Caster Assembly
Bradley Belt-Drive With Electric Clutch Mower Parts Front Caster Assembly Item No. Part No. Name 600-001-12140 Bolt M12-1.75X140 100-093a Front wheel bushing 700-158 Front wheel Washer 100-095a Front tire assembly 336-139 Adjust the pad 200-192 Washer 12 GB96 200-007 Nut M12 GB889-86 100-098 Front wheel washer 100C-019... -
Page 41: Transmission Assembly
Bradley Belt-Drive With Electric Clutch Mower Parts Transmission Assembly... - Page 42 Bradley Belt-Drive With Electric Clutch Mower Parts Transmission Assembly Item No. Part No. Description 200-217 key 5.0X7.5X19 100-049 Flange bearing 100-053 Output shaft 100-047 Output pulley 100-050 Traction Belt for 32”&36” 132-009 Rear wheel assembly for 32” 132-009a Rear wheel assembly for 36” 100-136 Rear wheel washer for 32”...
-
Page 43: Handle Control Assembly
Bradley Belt-Drive With Electric Clutch Mower Parts Handle Control Assembly... - Page 44 Bradley Belt-Drive With Electric Clutch Mower Parts Handle Control Assembly Part No. Description Item No. 336-150 Rubber sleeve 100-089 Traction lock with grip RH 200-327 Hex bolt M6-1X45 100-087 Bushing, Traction lock 100-077 Opc spring 200-051 Nut M6 GB923-88 100-084 Opc lever RH WM2836-056 Traction control lever grip...
-
Page 45: Rear Deck Assembly
Bradley Belt-Drive With Electric Clutch Mower Parts Rear deck Assembly... - Page 46 Bradley Belt-Drive With Electric Clutch Mower Parts Rear deck Assembly Item No. Part No. Description 200-132 Nut M10 GB889 200-010 Washer 10 GB95 100-034 Idler arm RH 100-004 Pivot tube 200-052 Bolt M10-1.5X45 GB5782 600-202-0010 Nut Flange M10 QC864 100-057 Traction spring 200-022 Bolt M10-1.5X65 GB5782...
-
Page 47: Label
Bradley Belt-Drive With Electric Clutch Mower Parts 100C-021... - Page 48 Bradley Belt-Drive With Electric Clutch Mower Parts 100C-021A...
-
Page 49: Fuel Tank Assembly
Bradley Belt-Drive With Electric Clutch Mower Parts Fuel Tank Assembly Item No. Part No. Description 200-328 Bolt M6-1×75 GB5782 200-301 Washer 6 GB95 200-009 Nut M6 GB8899.1 336-143 Fuel Tank Strap 601-111 Fuel Line Clamp 100-106 Gasoline pipe WM2836-089 Fuel tank 100-107 Tank pad 336-234... -
Page 50: Electrical Diagram
Bradley Belt-Drive With Electric Clutch Mower Parts ELECTRICAL DIAGRAM(Recoil start) Item No. Part No. Name 100C-020 Wiring hamess... -
Page 51: Electrical Diagram
Bradley Belt-Drive With Electric Clutch Mower Parts ELECTRICAL DIAGRAM(Electric start) Item No. Part No. Name 100C-025 Wiring hamess... -
Page 52: Bradley Mower Product Registration
Warranties should be performed by an authorized Bradley Mowers dealer. All other warranty service requires prior approval. Your product wamanty is only valid if this file is completed signed, and returned to Havener Enterprises, Inc. within two weeks of product purchase. See the warranty statement for more details.