Advertisement
Quick Links
Advertisement

Subscribe to Our Youtube Channel
Related Manuals for Hoshizaki HW 600B


Summary of Contents for Hoshizaki HW 600B
- Page 1 HW 600B HOOD TYPE DISHWASHER USER’S MANUAL...
-
Page 2: Table Of Contents
TABLE OF CONTENTS TOPICS PAGE 1-INTRODUCTION 2-TECHNICAL DATA 3-WARNING SIGNS AND SAFETY DETAILS 4-TRANSPORTING AND MOVING 5-OPERATION OF THE MACHINE 6-CLEAN-UP AND MAINTENANCE 7-ELECTRICAL CIRCUIT DIAGRAM 8-TROUBLESHOOTING... -
Page 3: 1-Introduction
1-INTRODUCTION Dear User, Thank you for purchasing our device and for your reliance upon our company. Our devices have been used within our customers kitchen, your kitchen in 100 countries. Our devices are produced in compliance with international standards. Important notice: Please read or ensure that the users read this user’s manual in order to achieve the desired performance in line with your expectations and to use your device for long years. -
Page 4: 2-Technical Data
2-TECHNICAL DATA: MODEL HW 600 B 380 V ~ 3NPE/50 415 V ~ 3NPE/50 Total Rating Total Rating(kW) 9.66 11,46 Washing Capacity 1108 1108 (Plate/Hour) Washing Capacity 69/35/27/23/18 69/35/27/23/18 (Basket/Hour) Washing/Boiler Tank 22/7 22/7 Capacity Washing Program Number 52/102/132/152 52/102/132/152/ Program Times(sn.) Washing Water Temp. - Page 5 2.1 Device Dimensions:...
-
Page 6: 3-Warning Signs And Safety Details
WARNING SIGNS AND SAFETY DETAILS 3.1 Warning Signs Power Network Grounding Electricity Attention Important Grounging • The machine should never be exposed to direct sunlight. • The machine should never be left in water and its outer surface should never be cleaned with high pressure water. -
Page 7: 4-Transporting And Moving
TRANSPORTING AND MOVING • The machine should be placed vertically on a palette by manpower. • Transportation should be carried out by inserting the forklift forks under the machine. • If the transported distance is far, the machine should be moved slowly and fixed to the palette or supported by another personnel to prevent jolt, if necessary. - Page 8 4.1 Installation Diagram 1480 ( 1960 )
- Page 9 4.3 Electrical Connections: • All electrical connections must be made by authorized service personnel in accordance with local and national standards and directives. • All products must be connected to the residual current device of 30mA. • Use the power socket and an appropriate connector to connect the appliance. Power socket is on the side. This connection is additional to existing grounding.
- Page 10 4.6.2. Models With a Drain Pump: • If drain vent is below the appliance’s drain outlet, attach the hose to the drain vent with a downward slope. Otherwise, drain vent height should be 60 cm max. The Ø28 mm (3/4ʺ) drain vent should not be below the appliance base.
- Page 11 4.8 Washing and Rinsing Water Temperatures Water temperatures can be adjusted. During production, our appliance is set to the following temperature values. The temperature should not be set higher than these temperatures. Models: Rinsing Water Temp.(Boiler) 80-85°C Washing Water Temp.(Tank) 55-60°C Machine Assembly 4.9.
-
Page 12: 5-Operation Of The Machine
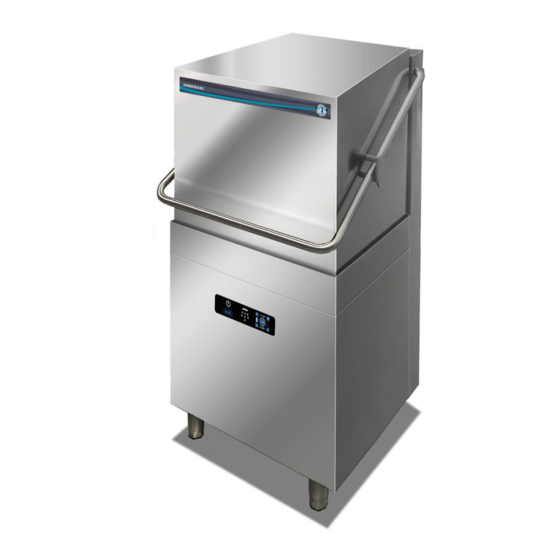
5- OPERATION OF THE MACHINE 5.1 Getting to know our device: To understand the information in the user manual correctly, the main parts of the machine should be known, please have the information by examining the picture below. HANDLE WASHING/RINSING ARMS RACK HOUSING CONTROL PANEL ADJUSTABLE FEET... - Page 13 5.2 Operation: 5.3 Description of the Appliance Unlike domestic appliances, industrial dish and glass washers are designed for almost uninterrupted operation. 5.4 Control Panel Before starting the appliance, first get familiar with the control buttons and signal items on the front panel. In addition, get familiar with the location of power and water cut-off switches.
- Page 14 Heating starts automatically when the set amount of water is taken. The machine will first heat the boiler and then the boiler water. In order for the water to heat up faster during this process, the machine door must be closed. Before the wash tank and boiler reach the factory set temperature. will not start the washing process.
- Page 15 5.8 Draining: Excess water generated during the operation of the machine will be automatically removed from the drain. machine at the end of each day the door should be left open to drain and dry. Before the machine is turned off at the end of the job boiler water must be completely drained.
- Page 16 5.9 Deactivating the Appliance: If you need to remove or deactivate the appliance for any reason, appropriate local or national regulations should be observed. Öztiryakiler recommends the following procedures. • Remove chemical hoses from their drums carefully, then close the container lids to avoid chemical spillage. Refer to safety notes for the chemical drums to prevent any damage due to spillage.
- Page 17 1. Remove the plug on the rear part of the appliance and connect the hose from the detergent dosing unit to the wash tank using a proper coupling. 2. Dirt level of dishes and detergent characteristics should be considered to assess water hardness and consumption in the dishwasher.
-
Page 18: 6-Clean-Up And Maintenance
6- CLEAN-UP AND MAINTENANCE 6.1 Periodical Maintenance and Clean-up Daily maintenance should be carried out by people informed about the safety instructions as following, after disconnecting power supply and water connections. 6.1.1 Daily Maintenance: Daily maintenance should be carried by the user. In order to clean up the machine within the day following should be carried out periodically after the washing operation: 1. -
Page 19: 7-Electrical Circuit Diagram
7-ELECTRICAL CIRCUIT DIAGRAM... -
Page 20: 8-Troubleshooting
8- TROUBLESHOOTING Please check the following items before calling the call centre: 1. Equipment does not run partially or completely, check the electrical supply to the appliance. 2. Check mains water and electrical connection is in place and active. 3. Electrical supply to the appliance should be 230 V~3PE/60 Hz. 4. - Page 21 10. Appliance does not drain; • Check and clean the filters. • Check if drain hose and drain vent are not clogged. • In appliances with a motorized drain unit, drain system should comply with section 4.6. 11. Water intake is slow; •...
- Page 22 NOTE:…………………………………………………………………………… ……………………………………………………………………………………… ……………………………………………………………………………………… ……………………………………………………………………………………… ……………………………………………………………………………………… ……………………………………………………………………………………… ……………………………………………………………………………………… ……………………………………………………………………………………… ……………………………………………………………………………………… ……………………………………………………………………………………… ……………………………………………………………………………………… ……………………………………………………………………………………… ……………………………………………………………………………………… ……………………………………………………………………………………… ……………………………………………………………………………………… ……………………………………………………………………………………… ……………………………………………………………………………………… ……………………………………………………………………………………… ……………………………………………………………………………………… ……………………………………………………………………………………… ………………………………………………………………………………………...
Need help?
Do you have a question about the HW 600B and is the answer not in the manual?
Questions and answers