
Subscribe to Our Youtube Channel
Related Manuals for Hoshizaki HW-600A


Summary of Contents for Hoshizaki HW-600A
- Page 1 DISHWASHER HW-600A HW-600A-1 INSTRUCTION MANUAL FOR END USER No. 15 Qingqiu Street, Suzhou Industrial Park, Suzhou 215126 China L1J030103 (060421)
-
Page 2: Table Of Contents
WARNING Only qualified service technicians should install, service and maintain the product. No installation, service or maintenance should be undertaken until the technician has thoroughly read this Instruction Manual. Likewise, the owner/manager should not proceed to operate the product until the installer has instructed them on its proper operation. - Page 3 7. UNLOADING ------------------------------------------------------------------------------------------- 10 8. INSUFFICIENT WASHING RESULTS------------------------------------------------------------11 9. SHUTDOWN ------------------------------------------------------------------------------------------- 12 10. INTERRUPTION -------------------------------------------------------------------------------------- 13 11. STANDBY/CLEANING BUTTON ----------------------------------------------------------------- 14 12. INTERNAL BOOSTER TANK ENERGY SAVING CONTROL ----------------------------- 14 13. ALERT FUNCTION ----------------------------------------------------------------------------------- 14 14. LOW TEMPERATURE LOCK FUNCTION ----------------------------------------------------- 14 15.
- Page 4 Important Safety Information Throughout this manual, notices appear to bring your attention to situations which could result in death, serious injury, or damage to the unit. WARNING Indicates a hazardous situation which could result in death or serious injury. NOTICE Indicates a situation which could result in damage to the unit.
-
Page 5: Construction
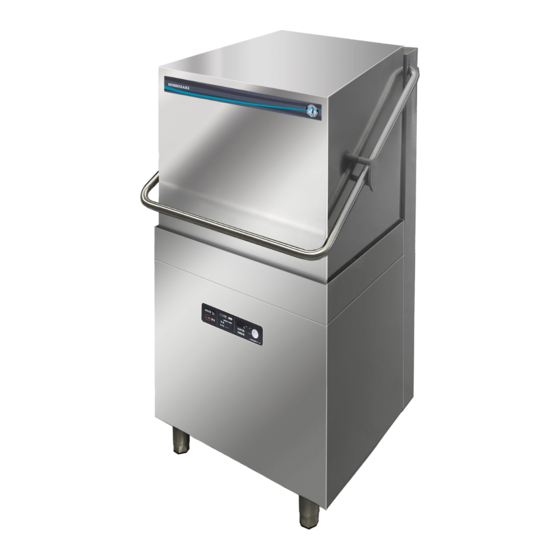
1. CONSTRUCTION [a] GENERAL [10] [11] Front [1] Upper Rinse Spray Arm, Lower Rinse Spray Arm Rotates and sprays rinse water onto dishes to rinse off detergent. [2] Upper Wash Spray Arm, Lower Wash Spray Arm Rotates and sprays wash water onto dishes to remove stains. [3] Heater Keeps wash water at a proper temperature. [4] Water Level Pressure Switch Sensing Hole... -
Page 6: [B] Operation Panel
[5] Handle [6] Door [7] Operation Panel See “[b] OPERATION PANEL”. [8] Rack Support Frame [9] Drain Pipe Pull out to drain. [10] Strainer Separates wash water and scraps. [11] Filter Prevents scraps from being drawn into the pump. [b] OPERATION PANEL [1] “READY” Lamp Lights up when the auto fill cycle completes and the dishwasher is ready to wash. [2] “AUTO FILL” Lamp Flashes during the auto fill cycle, and goes off at the end of the cycle. [3] Mode Lamps Light up to indicate the selected operation mode, and flash during operation. -
Page 7: [C] Accessories
[4] Standby Lamp Lights up when the dishwasher is in the standby mode. The unit will not start even when the door is closed with this lamp on. See “11. STANDBY/CLEANING BUTTON”. [5] Up Button, Down Button Indicates the total number of operation in six digits by two digits each time. Example: 123,456 times are indicated by Press to indicate rinse water temperature instead of wash water temperature while the dishwasher is on standby. Serv ice personnel also use these buttons to change the controller settings. -
Page 8: Checks Before Operation
* If an inspection of the dishwasher or internal booster tank reveals lime build-up after the equipment has been in service, in-line water treatment should be considered, and, if recommended, should be installed and used as directed. Contact an authorized Hoshizaki service company for specific recommendations. -
Page 9: [C] Checks Before Operation
See “15. DAILY MAINTENANCE”. * Check the electrical, water, and drain connections before starting up the unit. See “18. MONTHLY INSPECTION”. * Always use a dishwasher detergent instead of a neutral detergent for kitchen use. (Some dishwasher detergents are not suitable. Contact an authorized Hoshizaki service company for further details.) -
Page 10: Checking Detergent Tank And Rinse Aid Tank
3. CHECKING DETERGENT TANK AND RINSE AID TANK * Follow the instructions of the detergent and rinse aid suppliers to check the detergent tank and rinse aid tank safely. IMPORTANT Be sure to read the warning and caution labels attached to the detergent tank and rinse aid tank. 4. PREPARING THE WASH COMPARTMENT * Check that the wash compartment has been cleaned with all the parts in place. If not, clean the wash compartment according to “15. DAILY MAINTENANCE”, and install the parts following the instructions below. -
Page 11: [A] Auto Fill
1) Check that the strainer, filter and drain pipe Strainer are in place. IMPORTANT Drain Pipe Make sure that the drain pipe is securely inserted in the drain outlet. Filter 2) Open the water supply line shut-off valve. 3) Turn on the main power supply. 4) Press the “ON/OFF” button. The display lights up. (If the door is closed, the auto fill cycle begins.) [a] AUTO FILL The auto fill cycle refers to automatically repeated starts and stops of the unit to fill the wash tank with enough hot water for washing. The unit starts and stops about 12 times. -
Page 12: Loading
Dishes or cups with a deep bottom rim cannot be rinsed thoroughly with wash water left inside the rim. Load them as shown below. Correct Incorrect Water remains If the above loading is not practical, the rinse cycle time must be extended. Contact an authorized Hoshizaki service company for further details. -
Page 13: [C] Loading Rack
5) The door opening is about 445 mm high. Keep the loaded rack lower than this height. Do not force large items into the dishwasher, otherwise they may be damaged or block the spray arms. [c] LOADING RACK 1) Slowly open the door. 2) Push the rack into the center of the dishwasher until it touches the rack guide at the back. Otherwise, the rack and dishes may get caught on the back of the door, resulting in damaging the wash and rinse spray arms and dishes. NOTICE Do not stack racks. Otherwise, this will cause reduction in wash performance or failure. 6. WASH AND RINSE [a] OPERATING TEMPERATURES The recommended operating temperatures are as follows: Wash Temperature... -
Page 14: Unloading
1) Press the “MODE” button until the desired mode is selected and its lamp lights up. 2) Slowly close the door. The selected mode lamp flashes (“READY” lamp goes off), and washing operation (wash and rinse) starts. 3) When the washing operation completes, the “READY” lamp lights up (mode lamp goes off), and the buzzer sounds. IMPORTANT 1. To change the duration of each mode, contact an authorized Hoshizaki service company. 2. If the display has changed from temperature indication to circling indication, the dishwasher is waiting for water supply. In a wash cycle, the unit will automatically extend the wash cycle and start a rinse cycle after completion of water supply. -
Page 15: Insufficient Washing Results
* The detergent tank is out of detergent. Replace it with a new tank. See “3. CHECKING DETERGENT TANK AND Header RINSE AID TANK”. * Wash water is not clean. Press the “ON/OFF” button, check that the display goes off, and pull out the drain pipe to drain the wash water. Reinsert the drain pipe, then press the “ON/ OFF” button to supply fresh wash water. * The wash or rinse water temperature becomes too low in some conditions. Wait until the proper temperature is reached. * The dishes are heavily soiled. Preclean before loading the dishes. * Iron or tannin content in wash water turns the dishes yellowish or faintly black. Soak the dishes in a plastic bucket containing hot water and commercial bleach. * White spots left on clear glassware can be caused by different reasons. Consult with an authorized Hoshizaki service company or the detergent supplier. * Adjustments of the wash and rinse cycle times, hot water temperature, and detergent concentration may be required depending on the water quality, dish types and materials, and soil conditions. -
Page 16: Shutdown
9. SHUTDOWN NOTICE If there is a possibility that the ambient temperature may fall below 0°C and Dishwasher freeze the unit, be sure to drain the unit. The water supply line could be Water Supply Line Shut-off Valve damaged and leak water, resulting in damage to the surrounding property. -
Page 17: Interruption
7) Pull out the drain pipe to drain water from the wash tank. Drain Pipe WARNING When pulling out the drain pipe, be careful not to touch the wash water. It may cause burns or skin irritation. Turn the drain pipe if it is hard to pull out. IMPORTANT For the drain pump model, when the power supply (display) is on, press and hold the “ON/OFF” button for 3 seconds after pulling out the drain pipe. The drain pump starts to fully drain the wash tank. The display shows as follows during the full drain flush cycle. The operation panel goes off at the end of the cycle. Then, turn off the main power supply. -
Page 18: Standby/Cleaning Button
The “STANDBY/CLEANING” button function is not available during washing operation. Press it while the “READY” lamp is on. 12. INTERNAL BOOSTER TANK ENERGY SAVING CONTROL When the dishwasher is left idle for a while, the internal booster tank water temperature can be temporarily set lower to save energy. For further details, consult with an authorized Hoshizaki service company. 13. ALERT FUNCTION To keep water in the wash tank clean, this unit is provided with functions to beep and flash “Ch” (= Change) in the display when wash water should be changed and to continue this alert until the wash water tank is refilled (factory default: OFF). For further details, consult with an authorized Hoshizaki service company. -
Page 19: Daily Maintenance
15. DAILY MAINTENANCE IMPORTANT Be sure to clean the dishwasher after closing time every day. It is difficult to remove heavy soils left overnight. In high temperature conditions, food scraps will rot and affect sanitary operation. 1) Take out scraps from the removed strainer, filter and drain pipe, and wash them clean with a scourer. IMPORTANT To prevent damage, do not hit the strainer, filter and drain pipe on the sink to drop scraps or to empty these parts. - Page 20 5) Replace the filter in its correct position. 6) Insert the drain pipe securely into the drain outlet. Filter 7) Replace the strainer in its correct position. Strainer 8) Use one hand to hold the upper wash spray arm Upper Wash Spray Arm on the upper spray arm shaft, and use the other hand to tighten the upper spray arm nut in the direction of the arrow. Upper Rinse Spray Arm 9) Place the lower wash spray arm on the lower header, and tighten the lower spray arm nut in the direction of the arrow.
-
Page 21: Self-Cleaning
Otherwise the detergent may be supplied during the self-cleaning cycle. After the cycle completes, turn the detergent feeder back on. If this is not practical, consult with an authorized Hoshizaki service company. 1) Open the water supply line shut-off valve and turn on the main power supply. 2) Pull out the drain pipe. -
Page 22: Weekly Maintenance
18. MONTHLY INSPECTION [a] WATER SUPPLY LINE Check the water supply line for damage, deformation, or water leak marks (stains). If any of these conditions are found, contact an authorized Hoshizaki service company. Recommendation of safety inspection by service personnel Even if there is no problem with its use, a product out of warranty may have a risk of electric shock, fire, or water leak due to insulation degradation or aging of the electrical parts. Ask an authorized Hoshizaki service company for the following inspections (charged):... -
Page 23: [B] Drain Hose (Wash Tank)
If something seems wrong with the unit, check for possible causes according to the following instructions. If the problem still exists, immediately contact an authorized Hoshizaki service company. When contacting a service company, let them know the model name, serial number, date of installation (see warranty card) and type of trouble (e.g. error code). -
Page 24: [C] Troubles Without Error Code Indication
When the power resumes, start up the unit according to sections 3 - 6. If the power does not resume on the same day, shut down the unit according to section 9. Turn on the main power supply. If it switches off again, Main power immediately contact an authorized Hoshizaki service supply off company. The unit is not operable by opening/closing the door while the standby lamp on the operation panel is on. To Unit is not... -
Page 25: Long Storage, Relocation, Disposal, Transfer
If something seems wrong when restarting the unit after long storage, turn off the power supply, and immediately contact an authorized Hoshizaki service company. WARNING 1. When restarting the unit after long storage, contact an authorized Hoshizaki service company. To prevent electric shock, do not restart the unit by yourself. 2. In case of relocation, contact an authorized Hoshizaki service company. Improper installation may cause water leak, electric shock or fire. 3. When disposing of the unit, contact an authorized Hoshizaki service company. Leaving the unit may violate laws or cause an unexpected accident. NOTICE When selling or transferring this product, tape this instruction manual and the installation manual to the exterior to provide the new owner with information on safe and proper use of the product. -
Page 26: Warranty
“warranty period”. The warranty shall be effective for one year from the date of installation. Hoshizaki’s liability under the terms of the warranty are limited and shall exclude routine servicing, cleaning, essential maintenance and/or repairs occasioned by misuse and installations not in accordance with Hoshizaki guidelines. -
Page 27: Specifications
22. SPECIFICATIONS Model HW-600A Product Code J030-D002 J030-D003 Destination Thailand, Indonesia, Vietnam Hong Kong Power Supply 3 phase 4-wire Frequency 50Hz Voltage 380V Electric Wash tank heater Consumption Booster tank heater 12kW Pump motor 850W Dimensions 615mm(W) x 718mm(D) x 1485mm(H) [1955mm(H) with door open] Weight 105kg Standard Cycle Time 60 seconds 64 seconds... - Page 28 Model HW-600A Product Code J030-D004 J030-D006 J030-D007 J030-D009 Destination Philippines India, less than 30A Less than 30A area area Power Supply 3 phase 4-wire Frequency 60Hz 50Hz 60Hz Voltage 380V 380 / 400 / 415V Electric Wash tank heater 1.7 / 1.9 / 2.0kW Consumption Booster tank heater 12kW 9.3 / 10.2 / 11.1kW Pump motor...
- Page 29 Model HW-600A-1 HW-600A Product Code J030-D012 J030-D013 Destination Thailand, Indonesia, Vietnam Hong Kong Power Supply 3 phase 4-wire Frequency 50Hz Voltage 380V Electric Wash tank heater Consumption Booster tank heater 12kW Pump motor 850W Dimensions 615mm(W) x 718mm(D) x 1485mm(H)
- Page 30 Model HW-600A-1 Product Code J030-D014 J030-D016 J030-D017 J030-D019 Destination Philippines India, less than 30A Less than 30A area area Power Supply 3 phase 4-wire Frequency 60Hz 50Hz 60Hz Voltage 380V 380 / 400 / 415V Electric Wash tank heater 1.7 / 1.9 / 2.0kW Consumption Booster tank heater 12kW 9.3 / 10.2 / 11.1kW Pump motor...
Need help?
Do you have a question about the HW-600A and is the answer not in the manual?
Questions and answers