Table of Contents
Advertisement
OWNER'S MANUAL
DISHWASHER
Before beginning installation, read these instructions carefully. This
will simplify installation and ensure that the product is installed
correctly and safely. Leave these instructions near the product after
installation for future reference.
ENGLISH
SKSDW2402P
MFL70282466
Rev.02_063021
www.signaturekitchensuite.com
Copyright © 2021 Signature Kitchen Suite. All Rights Reserved.
Advertisement
Table of Contents

Related Manuals for Signature SKSDW2402P


Summary of Contents for Signature SKSDW2402P
- Page 1 Before beginning installation, read these instructions carefully. This will simplify installation and ensure that the product is installed correctly and safely. Leave these instructions near the product after installation for future reference. ENGLISH SKSDW2402P www.signaturekitchensuite.com MFL70282466 Rev.02_063021 Copyright © 2021 Signature Kitchen Suite. All Rights Reserved.
-
Page 2: Table Of Contents
Operation Overview..................24 Before Using .....................25 Control Panel ....................29 Programme Table ....................34 Information for Energy Test (EN60436) ............38 Loading the Dishwasher .................39 Adding Cleaning Agents..................44 Refilling......................46 Useful Tips......................46 SMART FUNCTIONS SIGNATURE KITCHEN SUITE Application............47 Smart Diagnosis ....................49 MAINTENANCE Cleaning and Caring ..................51... - Page 3 TROUBLESHOOTING Before Calling for Service................55 APPENDIX WARRANTY......................61...
-
Page 4: Safety Instructions
SAFETY INSTRUCTIONS SAFETY INSTRUCTIONS READ ALL INSTRUCTIONS BEFORE USE The following safety guidelines are intended to prevent unforeseen risks or damage from unsafe or incorrect operation of the appliance. The guidelines are separated into ‘WARNING’ and ‘CAUTION’ as described below. Safety Messages This symbol is displayed to indicate matters and operations that can cause risk. - Page 5 • If the power cord is damaged or the hole of the socket outlet is loose, do not use the power cord and contact an authorized service centre. • Do not modify the power cord provided with the appliance. Please contact the SIGNATURE KITCHEN SUITE (www.signaturekitchensuite.com) Customer information centre to advise of its incompatibility.
- Page 6 • Connect the ground wire to the green ground connector in the terminal box. Operation • Immediately unplug the power plug and contact an SIGNATURE KITCHEN SUITE (www.signaturekitchensuite.com) customer information centre if you detect a strange sound, odour, or smoke...
- Page 7 • In case of flood, disconnect the power plug and contact the SIGNATURE KITCHEN SUITE (www.signaturekitchensuite.com) Customer Information Centre. • Under certain conditions, hydrogen gas may be produced in a hot- water system that has not been used for two weeks or more.
- Page 8 SAFETY INSTRUCTIONS • Do not operate the appliance unless all enclosure panels are properly in place. • Use only detergents or wetting agents recommended for use in a appliance and keep them out of the reach of children. • Do not wash and dry articles that have been soaked in explosive substances such as gasoline, solvents, solvent-based detergent.
-
Page 9: Caution Statements
SAFETY INSTRUCTIONS • The door should not be left in the open position since this could present a tripping hazard. Maintenance • Never unplug the appliance by pulling on the power cable. Always grip the power plug firmly and pull straight out from the socket outlet. - Page 10 SAFETY INSTRUCTIONS Operation • Turn off the water tap and unplug the appliance if the appliance is to be left for an extended period of time, such as during vacations. • Do not place objects on the top of the appliance. •...
-
Page 11: Caring For The Environment
SAFETY INSTRUCTIONS CARING FOR THE ENVIRONMENT Disposal of Your Old Appliance • All electric and electronic products, marked with this symbol (the “crossed-out wheeled bin”) must be disposed of separately from regular household waste, via designated collection facilities appointed by the government or the local authorities. -
Page 12: Installation Parts And Specifications
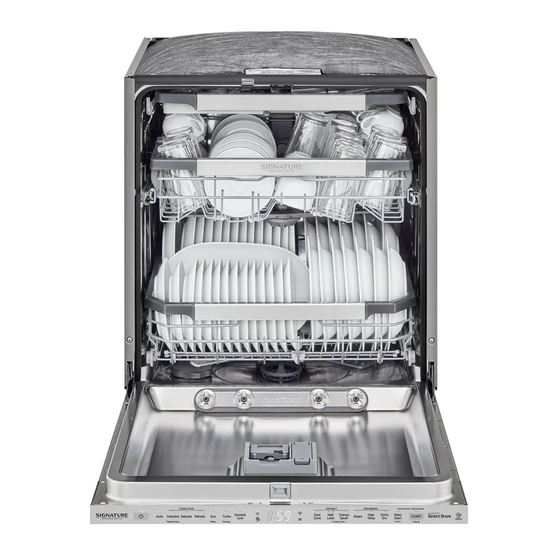
INSTALLATION INSTALLATION Parts and Specifications NOTE • Appearance and specifications may change without notice to improve the quality of the appliance. Front View Interior View Control Panel Top Wash Impeller Levelling Feet Upper Spray Arm Power Cord Lower Spray Arm Water Supply Hose Salt Container Cap Drain Hose... - Page 13 Bracket Screws (Φ 4 x 14 mm): 12 EA Wood Screws (Φ 4 x 14 mm): 2 EA Door Adjustment Screws (Φ 4 x 34 mm): 2 EA Specifications Model SKSDW2402P Power Supply 220 - 240 V~, 50 Hz Dimension 598 mm X 554 mm X 815 mm...
-
Page 14: Preparing Cabinet Opening
INSTALLATION contact the LG Electronics customer information CAUTION centre. Do not attempt removal of the LED lighting. • Any bare wood surrounding the appliance should be sealed with a waterproof paint or sealant to prevent it from swelling. • Slide the dishwasher into the cabinet, opening carefully. - Page 15 INSTALLATION Checking the Door Panel Attach the side strip to the front of the side cabinet and then push down the side strip so This dishwasher is designed to work with a cabinet that the side strip adheres well to the cabinet. front panel (not provided) which slides up as the door is opened.
-
Page 16: Levelling The Appliance
INSTALLATION Remove the protective film from the tape. Install the fleece tape close to the bracket openings to make sure the door slides smoothly. Install the tape to the underside of the counter top. 1 5 0 m 2 0 7 m 1 7 0 m 3 4 5 m NOTE... -
Page 17: Securing Door Panel To Dishwasher
INSTALLATION Case 1. The Door is Slanted to the NOTE Right • Place the appliance on a solid, level floor. Unscrew (counter-clockwise) the front left leg • Do not install the appliance on an elevated and correct the level. surface. Check the opening of door and repeat if Adjusting Front Levelling Feet necessary until the door opens and closes... - Page 18 INSTALLATION Adjusting Door Spring Tension surrounding cabinet doors or drawer fronts as possible. If the door panel weighs between 8 kg and 11 kg, adjust the door spring tension to make the door easier to open. Open the dishwasher door to about 30 °. •...
- Page 19 INSTALLATION harder than 15 kgf·cm may result in a crack in Use a 2 mm diameter drill bit to drill 10 mm the screw boss. deep pilot holes at the 12 points marked on the template. 10 mm Ø 2 mm Preparing Door Panel Mark a centre line lengthwise down the back of the door panel.
-
Page 20: Securing Dishwasher To Cabinet Opening
INSTALLATION Securing Dishwasher to Attach a handle to the front of the door panel before mounting the panel on the dishwasher. Cabinet Opening Make sure to countersink the screws so the panel slides smoothly. Securing Dishwasher to Cabinet Framework Remove the 2 plastic caps from the mounting bracket access holes. -
Page 21: Installing The Drain Hose
INSTALLATION provide clearance for the door panel when opening • Make sure that the line is not kinked or sharply the door. bent. • Make sure the drain hose is straight before feeding the end of it through the hole for the water supply. -
Page 22: Preparing Water And Electrical Connections
INSTALLATION Preparing Water and • Use sealant tape or sealing compound on the tap’s thread to avoid water leaks. Electrical Connections • Make sure that the line is not kinked or sharply bent. Connecting the Hose to the Water Tap NOTE Connect the water supply hose to the water tap. -
Page 23: Final Installation Check
INSTALLATION Final Installation Check Error Possible Cause and Solution Code Testing the Dishwasher Water supply line kinked under dishwasher. Turn on electrical power. • Feed the drainage and supply hoses through the hole under Turn on house water supply. the sink. Then gradually slide the dishwasher into the cabinet while pulling on the hoses under The door should open and close smoothly and... -
Page 24: Operation
OPERATION OPERATION Operation Overview • Make certain that no dishes or utensils are in the path of the spray arms. Using the Appliance • Do not place one dish on top of another. Press the Power button. • The unit will turn on. Check the indicators. Check that there is rinse aid and dishwasher salt present. -
Page 25: Before Using
OPERATION Method 2 • It is not recommended to rinse the dishes manually before operating the dishwasher You can check water hardness by using the test because it increases water and energy strip included in the product. consumption. Immerse all reaction zones of the test strip for •... - Page 26 OPERATION Water Hardness Table Water Hardness Softeni Ratio mmol/l mg/l ng level °d °e °f Range (Ca+Mg) (Ca) <4 <5 <7 <0.7 <29 Soft 4 - 7 5 - 9 7 - 13 0.7 - 1.3 29 - 50 1:24 7 - 14 9 - 17.5 13 - 25...
- Page 27 OPERATION Remove the lower rack and remove the cap of rust or damage to the appliance if the left the salt dispenser located on the left side of the unwashed. filters. Before using the appliance for the first time, it is necessary to pour 1 kg of dishwasher salt and 1 litre of water at the same time if intending to use the water softener system.
- Page 28 OPERATION Close the lid to lock the dispenser. Rinse aid is NOTE dispensed automatically during the final rinse cycle. • The Rinse Aid Refill icon will illuminate when more rinse aid is needed. CAUTION • If you notice cloudy spots, streaks or water •...
-
Page 29: Control Panel
OPERATION Control Panel Control Panel Features For Steam Models Power • Press Power button to turn power on and off. • After the cycle is complete, the power automatically turns off for purposes of safety and economy. • If there is a power surge, power outage, or disruption of any kind, power is automatically turned off for safety. - Page 30 OPERATION • To activate or deactivate the button sounds, press and hold Dual Zone and Energy Saver simultaneously for 3 seconds. The error alert sound cannot be turned off. Cancel • The drain pump activates and the cycle cancels. Once the appliance finishes draining, the power turns off.
- Page 31 OPERATION Machine Clean This cycle is for cleaning the inside of the appliance. Use the cycle without dishes in the appliance. It eliminates residual soils, odor, white spots, limescale, and other dirt. Add citric acid or another cleaning agent for more effective results. •...
- Page 32 OPERATION High Temp Raises the main wash or heating rinse temperature to improve cleaning. • A chime will sound to alert you of any residual temperatures inside the appliance. Wait for the appliance to completely cool down before opening the door. Extra Dry Select this option for better drying results.
- Page 33 OPERATION • The display shows whether this feature is on or off. WARNING • Keep children away from the appliance while the appliance is operating. Exposure to high temperature steam may cause scalding or burns.
-
Page 34: Programme Table
OPERATION Programme Table Programme Guide For Steam Models Wash Rinse Program Soil Level Pre-wash Main wash Rinse Heating rinse Auto All levels (65 - 70 ℃) (62 ℃) (70 ℃) Intensive Heavy (75 ℃) (62 ℃) (70 ℃) Delicate Light (55 ℃) (62 ℃) (70 ℃) - Page 35 OPERATION NOTE • Running time may vary according to the water temperature, ambient temperature, water pressure and voltage. • Information that the values given for programmes other than the eco programme are indicative only. • When the Auto Open Dry feature is activated, the heating rinse temperature may vary.
- Page 36 OPERATION Regulation for Europe(On Steam Models) Energy Consumption Programme Water Consumption Duration (min) (kWh) Auto 12.9 0.91 - 0.97 Intensive 23.1 1.60 Delicate 16.5 1.07 0.85 Refresh 10.0 0.76 Turbo 18.5 0.84 Express 0.58 Rinse 0.01 Machine Clean 0.78 *1 Auto Open Dry feature is on. NOTE •...
- Page 37 OPERATION Available Options NOTE • The Energy Saver option is not available with the High Temp or Extra Dry option. • The Delay Start option can be selected for every washing programme in this table. For Steam Models Programm Energy Dual Zone Half Load Steam...
-
Page 38: Information For Energy Test (En60436)
OPERATION Information for Energy Loading the Dishes Test (EN60436) Cutlery Rack Appliance loaded in accordance with standard specifications. NOTE • When the salt dispenser is operated, the data below increases. - Water Consumption: 4 Liter - Energy Consumption: 30 W - Duration: 4 minutes For Models with Auto Open Dry Function... -
Page 39: Loading The Dishwasher
OPERATION Upper Rack Lower Rack Glasses(Milk) Dinner plates(Egg) Melamine Dessert Plates(Egg) *1 There are 7 glasses stained with milk. Dessert Bowls(Oat flake) *2 Milk Glass for EN60704-2-3: 2020 Soup plates(Oat flake) Saucers(Black tea) Oval Platter(Meat) Mugs(Black tea) Small Pot(Spinach + Margarine) Cups(Black tea) Oven Pot(Meat) Dessert bowl(Oat flake) - Page 40 OPERATION • Make sure that all items do not touch each other. To make it easier to load larger dishes, the front row of tines can be folded down. Items not Suitable for Dishwashers The combination of high water temperature and dishwasher detergents may damage certain items.
- Page 41 OPERATION Loading the Upper Rack CAUTION Daily Use Load • The spray arms must not be blocked by items that are too tall or hang through the baskets. The upper rack is suitable for delicate items such Test for free movement by manually rotating the as, small plates, long cutlery, cups, glasses and spray arms.
- Page 42 OPERATION • The rack on the left pops free at the back. There are three available positions for adjusting The rack on the right pops free at the front. the height of the upper rack to create more space. Lowering the Rack Hold the rack at the centre of each side to support its weight.
- Page 43 OPERATION Raising the Rack then raise each side of the rack individually until it clicks into place. Lift the rack at the centre of each side until the rack locks into place in the upper position. It is not necessary to lift the lock levers to raise the rack. •...
-
Page 44: Adding Cleaning Agents
OPERATION rack help keep utensils separated to avoid damage of different sizes. Remove dishes before adjusting and improve cleaning. the tray. Adjust the tray by sliding the lever. Removing the Cutlery Rack The entire cutlery rack can be removed if more space is needed on the upper rack for larger items. - Page 45 OPERATION • The amount of detergent needed depends on the cycle, load size, and soil level of dishes. Amount of detergent • Put detergent into the detergent compartment Programme Main wash before starting any cycle, except the Rinse cycle. (dispenser) Push the button on the dispenser lid to open Auto 20 g...
-
Page 46: Refilling
OPERATION any spilled salt inside the appliance may cause rust CAUTION or damage to the appliance if the left unwashed. When the salt refill icon illuminates, it means the • Only use the detergent and rinse aid that has been qualified with standard. Use of an salt is almost empty. -
Page 47: Smart Functions
Push Alert When the cycle is complete or the appliance has problems, you have the option of receiving push notifications on a smartphone. The notifications are triggered even if the SIGNATURE KITCHEN SUITE application is off. - Page 48 Internet service provider or refer to your On your smartphone, disconnect to your home Wi- wireless router manual. Fi network. • SIGNATURE KITCHEN SUITE is not responsible for any network connection problems or any Run the SIGNATURE KITCHEN SUITE faults, malfunctions, or errors caused by application.
-
Page 49: Smart Diagnosis
• Launch the SIGNATURE KITCHEN SUITE SIGNATURE KITCHEN SUITE will also provide open application and select the Smart Diagnosis source code to you on CD-ROM for a charge feature in the menu. Follow the instructions for... - Page 50 Customer Care and Service Contact an SIGNATURE KITCHEN SUITE customer information centre. • To find an SIGNATURE KITCHEN SUITE authorised service personnel, visit our website at www.signaturekitchensuite.com and follow the instructions found there. • Self-repair is not recommended as it could further damage the device and void the guarantee.
-
Page 51: Maintenance
MAINTENANCE MAINTENANCE To maintain performance and prevent problems, Food residue may be stuck in the narrow gaps check the outside and inside of the appliance, inside the appliance after completion of washing. including filters and spray arms regularly. Wipe off all food residue. WARNING •... - Page 52 MAINTENANCE white vinegar into shallow bowl and place in upper Clean the filters with a soft brush under rack. Run Auto cycle. Do not use detergent. When running water. Reassemble the filters before the cycle is finished, restart. reinstalling them. CAUTION •...
- Page 53 MAINTENANCE When cleaning is necessary, remove the upper NOTE spray arm by turning the nut on the bottom of the spray arm 1/8 turn counterclockwise and • When assembling, rotate it firmly until it clicks. pulling down. Cleaning the Spray Arms If the spray arm holes are blocked by any food residue, dishes may not be cleaned well due to Remove food particles by rinsing or shaking...
- Page 54 MAINTENANCE After assembly, check whether the spray arms • When reassembling the seal and the filter, rotate freely. ensure that they free from dirt or grit that may have come from the water supply. Cleaning the Water Supply Hose Filter Seasonal Maintenance and Storage Unplug the appliance.
- Page 55 The appliance is equipped with an automatic error-monitoring system to detect and diagnose problems at an early stage. If this appliance does not function properly or does not function at all, check the following before you call SIGNATURE KITCHEN SUITE service centre. Symptoms Possible Cause &...
- Page 56 TROUBLESHOOTING Symptoms Possible Cause & Solution Motor trouble • Call for service if the same problem occurs again. Vario motor trouble • Call for service if the same problem occurs again. Operation Symptoms Possible Cause & Solution Noise Some level of noise is normal during operation. •...
- Page 57 TROUBLESHOOTING Symptoms Possible Cause & Solution Water remains in sump Drain hose is kinked or clogged. after completion of • Adjust hose or clear blockage. cycle. Water may remain if the power supply was lost before normal end of the course or was manually disconnected.
- Page 58 TROUBLESHOOTING Symptoms Possible Cause & Solution Black or gray marks on Aluminum items rubbing dishes during cycle dishes • Reposition the dishes. Yellow or brown film Coffee or tea stains on inside surfaces of • Eliminate the stain by using a stain removal product. appliance Yellow water remains When initially using the appliance, Yellow water may generate in the...
- Page 59 TROUBLESHOOTING Symptoms Possible Cause & Solution Odour The previous cycle was stopped before completion and residual water remains in the appliance. • Turn on the power, run the Cancel cycle option to remove the residual water, then run the Turbo cycle using detergent but with the appliance empty.
- Page 60 • Find the Wi-Fi network connected to your smartphone and remove it, then not connected to the register your appliance on SIGNATURE KITCHEN SUITE. Wi-Fi network. Mobile data for your smartphone is turned on. • Turn off the Mobile data of your smartphone and register the appliance using the Wi-Fi network.
- Page 61 La garanzia di LG Electronics sui prodotti della gamma SIGNATURE KITCHEN SUITE ha validità a partire dalla data di acquisto del prodotto e si applica solo dietro presentazione della prova di acquisto originale (non manoscritta).
- Page 62 LG Electronics Italia S.p.A. x Questo prodotto SIGNATURE KITCHEN SUITE è garantito per un periodo di ventiquattro (24) mesi. x La garanzia di 10 anni sulle parti copre il solo costo dei seguenti componenti, come applicabile: Compressore frigorifero;...
- Page 63 Memo...
Need help?
Do you have a question about the SKSDW2402P and is the answer not in the manual?
Questions and answers