Table of Contents
Advertisement
Available languages
Available languages
Quick Links
Advertisement
Chapters
Table of Contents

Subscribe to Our Youtube Channel
Related Manuals for Progress Lighting AirPro P250062


Summary of Contents for Progress Lighting AirPro P250062
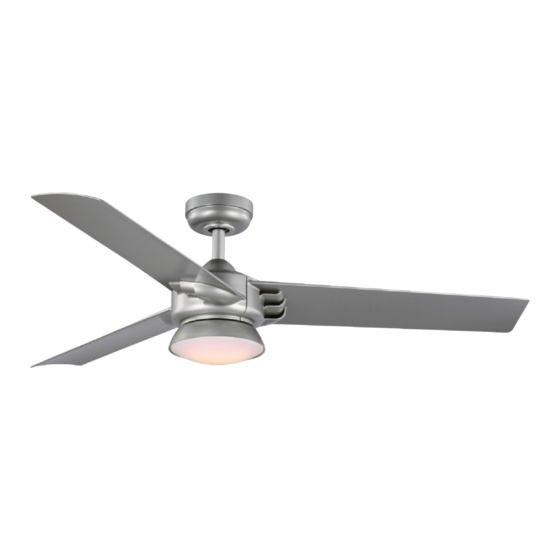
- Page 1 Ceiling Fan Installation Manual P250062 93133626_C...
- Page 2 Limited Lifetime Warranty Progress Lighting fan motors are warranted to the original purchaser to be free of electrical and/or mechanical defects for so Date Purchas ed long as the original purchaser owns the fan. Pull chain switches, reverse switches, capacitors and metal finishes are warranted to be free from defects in materials or workmanship for a period of 1 year from the date of purchase.
-
Page 3: Table Of Contents
Safety Rules..................................... Unpacking Your Fan ..................................Installing Your Fan ..................................Operating Your Transmitter ................................Care of Your Fan ................................... Troubleshooting .................................... Specifications ....................................Table of Contents... -
Page 4: Safety Rules
To reduce the risk of electric shock, ensure electricity has been turned off This device complies with Part 15 of the FCC Rules. Operation is subject at the circuit breaker or fuse box before beginning. to the following two conditions: (1) This device may not cause harmful interference, and (2) this device All wiring must be in accordance with the National Electrical Code must accept any interference received, including interference that may... -
Page 5: Unpacking Your Fan 2
Unpack your fan and check the contents. You should have the following items: 1. Fan blades (3) 9. LED light kit 14. Loose parts bag containing: 2. Hanger bracket 10. Shatterproof Cover a. Blade attachment hardware 3. Ball/downrod assembly 11. Receiver with 6 wire nuts (7 screws, 7 washers) b. -
Page 6: Installing Your Fan
BE ACCEPTABLE FOR FAN SUPPORT AND fixture but no ceiling joist, you may need an MAY NEED TO BE REPLACED. CONSULT A installation hanger bar as shown in Figure 4 QUALIFIED ELECTRICIAN IF IN DOUBT. (available at your Progress Lighting Retailer). 3. Installing Your Fan... - Page 7 Hanging the Fan REMEMBER to turn off the power. Follow the steps below to hang your fan properly: Step 1. Pass the 120-volt supply wires through the center hole in the ceiling hanger bracket as shown in Fig. 5. Step 2. Secure the hanger bracket to the ceiling outlet box with the screws and washers provided with your outlet box.
- Page 8 WARNING Set screws FAILURE TO PROPERLY INSTALL 6to9in LOCKING PIN AS NOTED IN STEP 5 Downrod COULD RESULT IN FAN LOOSENING AND POSSIBLY FALLING. Canopy Installing the Blades Canopy cover Step 1. Attach the blades to the fan motor Coupling assembly using blade up-screws as shown in cover Figure 6.
- Page 9 Making the Electrical Connect green wires from EMI Filter and related parts according to the wiring diagram as shown in Washer Connections Spring washer Figure 11, make sure EMI Filter is properly seated in outlet box. Hanger NOTE bracket Wood AC IN L(Black) TO AVOID POSSIBLE ELECTRICAL SHOCK, BE screw...
- Page 10 Installing the Switch Housing 3. (Figure 11) Receiver to house supply wires Step 3. Align the circular hole on canopy with the electrical connections: Connect the black (hot) remaining hole on the mounting bracket, secure wire from the ceiling to the black wire marked by tightening the two set screws.
- Page 11 Blade Balancing All blades are grouped by weight. The fan may Touching wobble even though the blades are weighed ceiling equally. The following procedure should correct most fan wobbling problems. Check after each step. 1. Check that all blade and blade arm screws are secure.
-
Page 12: Operating Your Transmitter
Restore power to ceiling fan and test for proper operation. 1. “0 , 1 , 2 , 3 , 4 , 5 , 6” buttons: These seven buttons are used to set the fan speed as follows: 0 = Turn the fan ON/OFF 1 = Minimum speed 2 = Low speed 3 = Medium low speed... -
Page 13: Care Of Your Fan 10
Speed settings for warm or cool weather depend Here are some suggestions to help you maintain your fan on factors such as the room size, ceiling height, number of fans, etc. 1. Because of the fan's natural movement, some Check the connections may become loose. -
Page 14: Troubleshooting
Problem Solution 1. Check circuit fuses or breakers. Fan will not start. 2. Check line wire connections to the fan and switch wire connections in the switch housing. CAUTION: Make sure main power is off. 1. Make sure all motor housing screws are snug. Fan sounds noisy. -
Page 15: Specifications
2.05 1631.89 12.34 15.21 2.34' 52" 0.29 18.77 5983.50 High These are approximate measures. They do not include Amps and Wattage used by the light kit. 2019 Progress Lighting, Inc. 701 Millennium Blvd., Greenville, SC 29607 All Rights Reserved Specifications... - Page 16 Manual de Instalación del Ventilador de Techo P250062 93133626_C...
- Page 17 30 días para su sustitución. Después de 30 días, el comprador original DEBE contactar a Progress Lighting al (864) 678-1000 para su reparación o reemplazo, lo cual será determinado a discreción de Progress Lighting y será el único y exclusivo 785247249374 remedio del comprador.
- Page 18 Normas de Seguridad..................................Desempaquetando el Ventilador ..............................Cómo Instalar el Ventilador ................................Cómo controlar el Ventilador Remotamente........................... Cuidando del ventilador ................................Solución de problemas ................................Especificaciones................................... Índice...
- Page 19 1. Para reducir el riesgo de una descarga eléctrica, asegúrese de que la electrici- 10. Este dispositivo cumple con la sección 15 de los reglamentos de la FCC. dad se haya apagado en el cortacircuitos o en la caja de fusibles antes de Su funcionamiento está...
- Page 20 Desempaque su ventilador y revise el contenido. Los siguientes componentes deberían encontrarse en el embalaje: 1. Las aspas del ventilador (3) 9. Kit de luz LED 14. Bolsa de partes sueltas que contiene: 2. Soporte colgante 10. Tapa inastillable a. Piezas metálicas para el acoplamiento de 3.
- Page 21 Herramientas necesarias Techo inclinado, Destornillador Phillips, destornillador de ranura recta, Proporcionar máximo 24 grados llave ajustable, escalera de mano y cortaalambres. un fuerte apoyo Opciones de Montaje Si no existe una caja de montaje homologada por Soporte colgante Caja de del techo UL, lea las siguientes instrucciones.
- Page 22 Instalación del Ventilador RECUERDE desconectar/apagar la corriente. Siga los siguientes pasos para colgar el ventilador correctamente: Paso1. Pase los cables de suministro de 120 voltios a través del agujero central del soporte colgante del techo como se muestra en la Imagen 5.
- Page 23 ADVERTENCIA Tornillos de 6to9in SI NO SE INSTALA CORRECTAMENTE EL PASADOR DE fijación Tija BLOQUEO COMO SE INDICA EN EL PASO 5, EL Florón VENTILADOR PODRÍA AFLOJARSE Y CAER. superior Colocación de las Aspas Chapa Paso 1. Fije las aspas al ensamblaje del motor intermedia del ventilador usando los pernos superiores en Florón...
- Page 24 Conexiones Eléctricas CA EN L (cable negro) Arandela CA EN N (cable blanco) AVISO Arandela elástica Cable de tierra Cable de tierra PARA EVITAR ELECTROCUCIONES POTENCIALES, Soporte ASEGÚRESE DE QUE LA ELECTRICIDAD ESTÉ Cable de tierra colgante APAGADA EN LA CAJA DE FUSIBLES O EL PANEL Cable de tierra del techo DE INTERRUPTORES ANTES DEL ALAMBRADO.
- Page 25 Instalación de la Caja de 3. (Imagen 11) Conexiones eléctricas del receptor a Paso 3. Alinee el agujero circular del florón los cables de alimentación doméstica:: Conectar superior con el agujero restante del soporte de Interruptores el cable negro (caliente) del techo al cable negro montaje, asegúrelo apretando los dos tornillos de marcado "AC en L"...
- Page 26 Equilibrado de las Aspas Todas las aspas están agrupadas por peso. El Tocando ventilador puede tambalearse, aunque las aspas el techo pesen por igual. El siguiente procedimiento debería corregir la mayoría de los problemas de bamboleo del ventilador. Haga una comprobación después de cada paso.
- Page 27 Encienda la corriente al ventilador de techo y compruebe su correcto funcionamiento. 1. Botones "0, 1, 2, 3, 4, 5, 6": Estos siete botones se utilizan para ajustar la velocidad del ventilador como se indica a continu- ación: 0 = Encender y apagar el ventilador 1 = Velocidad mínima 2 = Velocidad baja 3 = Velocidad media baja...
- Page 28 Los ajustes de velocidad para clima cálido o frío Le damos algunas sugerencias a tener en cuenta dependen de factores como el tamaño de la para mantener en condiciones su ventilador. habitación, la altura del techo, el número de ventila- 1.
- Page 29 Problema Solución 1. Revise los fusibles o los disyuntores del circuito. El ventilador no se enciende. 2. Revisa las conexiones de los cables del ventilador y las conexiones de los cables del interruptor en la caja del interruptor. ADVERTENCIA: Asegúrese de que la alimentación principal esté apagada. 1.
- Page 30 6,60 52” 2,34’ 0.29 18.77 5983,50 Alta Estas son medidas aproximadas. No incluyen los amperios y vataje usados por el kit de luz. 2019 Progress Lighting, Inc. 701 Millennium Blvd., Greenville, SC 29607 Se reserva todos los derechos. Especificaciones 12.
- Page 31 Manuel d’installation du ventilateur de plafond P250062 93133626_C...
- Page 32 Après 30 jours, l’acheteur d’origine DOIT contacter Progress Lighting au (864) 678-1000 pour toute réparation ou tout 785247249367 remplacement qui sera déterminé à la seule discrétion de Progress Lighting. Cela constituera également le seul et unique recours de l’acheteur.
- Page 33 Règles de sécurité.................................... Déballage de votre ventilateur ................................ Installation de votre ventilateur ..............................Utilisation de votre émetteur ................................Entretien de votre ventilateur ............................... Dépannage ....................................Caractéristiques techniques ................................. Table des matières...
-
Page 34: Règles De Sécurité
1. Pour réduire le risque de choc électrique, assurez-vous que l’électricité a été 10. Cet appareil est conforme à la section 15 des règlements du FCC. L’utilisa- tion du ventilateur est soumise aux deux conditions suivantes : coupée au niveau du disjoncteur ou du coffret de fusibles avant de (1) Cet appareil ne peut pas causer d’interférences nuisibles, et (2) cet appar- commencer. -
Page 35: Déballage De Votre Ventilateur 2
Déballez votre ventilateur et vérifiez le contenu. Le paquet devrait contenir les éléments suivants : 1. Pales de ventilateur (3) 9. Kit d’éclairage LED 14. Sachet de pièces détachées contenant : 2. Support de suspension 10. Couvercle incassable a. Matériel de fixation des pales 3. -
Page 36: Installation De Votre Ventilateur
ABLE POUR LE SUPPORT DU VENTILATEUR ET NÉCESSITER REMPLACEMENT. CONSULTEZ UN pourriez avoir besoin d’une tringle comme ÉLECTRICIEN QUALIFIÉ EN CAS DE DOUTE. l’indique la Figure 4 (disponible chez votre reven- deur Progress Lighting). 3. Installation de votre ventilateur... - Page 37 Accrocher le ventilateur N’OUBLIEZ PAS de couper l’alimentation. Suivez les étapes ci-dessous pour accrocher correctement votre ventilateur : Étape 1 : Faites passer les fils d’alimentation de 120 volts à travers le trou central du support de plafond pour tringle comme indiqué...
- Page 38 Fils d’alimentation AVERTISSEMENT L’INSTALLATION INAPPROPRIÉE DE LA GOUPILLE 6to9in Tige de D’ARRÊT COMME INDIQUÉ À L’ÉTAPE 5 PEUT suspension ENTRAÎNER UN DÉVISSAGE DU VENTILATEUR ET UNE CHUTE ÉVENTUELLE DE CELUI-CI. Auvent Installation des pales Couvercle Auvent Étape 1 : Fixez les pales au moteur du ventila- teur à...
- Page 39 Raccordements électriques AC IN L(noir) AC IN N(blanc) Rondelle REMARQUE fil de terre Rondelle à ressort fil de terre AFIN D’ÉVITER TOUT CHOC ÉLECTRIQUE, Support de fil de terre ASSUREZ-VOUS QUE L’ÉLECTRICITÉ EST suspension fil de terre Vis à COUPÉE AU NIVEAU DU COFFRET À fil de terre bois FUSIBLES PRINCIPAL AVANT LE CÂBLAGE...
- Page 40 Installation du boîtier de 3. (Figure 11) Raccordement électrique du Étape 2 : Faites glisser l’auvent jusqu’au support récepteur aux fils d’alimentation électrique de montage, placez l’entrée de clé de l’auvent commutateur au-dessus de la vis du support de montage et domestique : Connectez le fil noir (chaud) du tourner l’auvent jusqu’à...
- Page 41 Équilibrage des pales Toutes les pales sont regroupées par poids. Le En contact ventilateur peut vaciller même si le poids des pales avec le plafond est également réparti. La procédure suivante devrait corriger la plupart des problèmes de tremblement des ventilateurs. Vérifiez après chaque étape.
-
Page 42: Utilisation De Votre Émetteur
Rétablissez l’alimentation électrique du ventilateur de plafond et vérifiez-en le bon fonctionnement. 1. Boutons « 0, 1, 2, 3, 4, 5, 6 » : Ces sept boutons permettent de régler la vitesse du ventilateur comme suit : 0 = Allumer/éteindre le ventilateur 1 = vitesse minimale 2 = basse vitesse 3 = vitesse moyenne basse... -
Page 43: Entretien De Votre Ventilateur 10
Les réglages de vitesse par temps chaud ou froid Voici quelques suggestions d’entretien de votre dépendent de facteurs tels que la taille de la pièce, ventilateur la hauteur du plafond, le nombre de ventilateurs, 1. En raison du mouvement naturel du ventilateur, etc. -
Page 44: Dépannage
Problème Solution 1. Vérifiez les fusibles ou les disjoncteurs. Le ventilateur ne démarre pas. 2. Vérifiez les raccordements électriques du ventilateur et ceux du commutateur dans le boîtier du commutateur. MISE EN GARDE : Assurez-vous que l’alimentation secteur est coupée. 1. -
Page 45: Caractéristiques Techniques 12
52 po 0.29 18.77 5983,50 Elevée Ces mesures sont approximatives. Elles ne comprennent pas les intensités et la puissance utilisées par le kit d’éclairage. 2019 Progress Lighting, Inc. 701 Millennium Blvd., Greenville, SC 29607 Tous droits réservés. Caractéristiques techniques 12.
Need help?
Do you have a question about the AirPro P250062 and is the answer not in the manual?
Questions and answers