Advertisement
Quick Links
OPERATING INSTRUCTIONS:
Approximate Working Pressures:
• 2 0 lbs. or Less: Stipple and granulated effects, pressure will vary with viscosity of fluid.
• 20 to 30 lbs.: Medium consistency water colors, inks & dyes.
• 30 lbs. or More: Heavy fluids, acrylics, reduced lacquers, varnishes, paints or ceramic glaze.
Sizes:
• HS-1 (.45mm)Head and HC-1-3 Aircap for light fluids.
• HS-3 (.64mm)Head and HC-1-3 Aircap for medium fluids.
• HS-5 (1.06mm)Head and HC-5 Aircap for heavier fluids.
1. A ttach hose to air supply and allow air to blow a few seconds. Shut off before attaching to Airbrush. This procedure will
remove dirt from airline and hose.
Caution: Hold firmly and point away from face.
2. Attach hose coupling to the airbrush.
3. A ttach Color Cup or Bottle to HNS-1-3, or 5 Needle by exerting a firm twisting motion to fit tapered tube securely into
tapered Needle inlet. Then wrench tighten locking nut.
4. Fill Color Cup or Bottle 1/2 to 3/4 full. Use eyedropper or brush for adding small amounts of color to metal color cup. When
using Color Bottle, vent hole must be kept open.
5. T o Spray, hold Airbrush like a pencil comfortably between thumb and forefinger using middle finger as a guide and support.
Like writing, hold forefinger easily on H-155 Finger Button and Press to open air valve.
6. R egulate volume of color and size of spray by rotating HT-1, 3 or 5 Tip clockwise to increase and counter clockwise to
decrease flow of color.
7. S tipple Adjustment: Reducing the airline pressure is the easiest method used when creating a stippled effect with the
airbrush. Pressure can be reduced by using any of the following items: 3A Needle Valve installed on the H-128A Valve
Casing of the Airbrush or by using the R-75 Air Regulator and reducing the pressure.
8. T o adjust for heavier fluids, turn tip wide open, loosen set screw, slide needle back to obtain better flow.
CARE AND CLEANING:
1. P our any remaining color back into its original container.
2. W ipe Color Cup or Bottle clean, using cloth moistened with proper solvent.
3. H old Airbrush at a downward angle and put a few drops of solvent through Color Adjusting Part Assembly. To flush out
the remaining color in the HS Color Adjusting Part Assembly, apply pressure to the H-155 Finger Button.
4. A pply a tiny dab of Vaseline to the H Color Adjusting Part and HC- Aircap threads every two or three months to prevent color
build up and consequent freezing of the Color Adjusting Part Assembly and Aircap.
HOW TO OPEN CLOGGED FLUID PASSAGES:
1. A gitate color in Bottle Assembly by placing finger momentarily over HC- Aircap while air is passing through the Airbrush.
This will blow color back into bottle thus opening clogged fluid passages. Do not do this with a cup as color may blow
out of cup.
2. S hould HS-1, 3 or 5 Color Adjusting Part Assembly become clogged, loosen H-153 Set Screw, unscrew HT-1, 3 or 5 Tip
from HN Needle, gently pull back through ball-shaped support and remove Tip.
3. C lean Parts carefully, using nothing harder than a wooden toothpick.
4. To reassemble, reverse this procedure, making sure the shoulder of the Needle seats up against ball-shaped support.
5. I f the needle and tip are completely clogged, soak in a closed bottle of proper solvent until clean.
For Multi-Language Manuals Go To: www.paascheairbrush.com
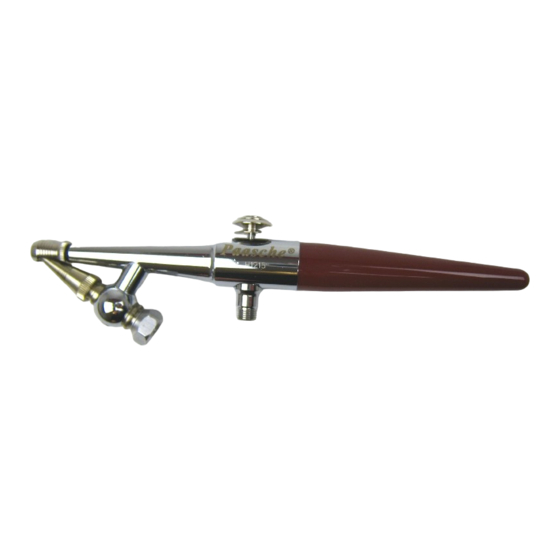
HS Model Airbrush
Single Action–External Mix–Siphon Feed
Added Bottle Connection
Instruction Manual & Replacment Parts
INTRODUCTION:
Paasche® model HS Airbrush features machined Brass Body and Nickel
Silver Color Part, simplicity of design and ease in operation. The air and color
feeds are independent and adjustable to give a fixed line, shade or stipple
effect.
INSTRUCTIONS AND PARTS LIST HS AIRBRUSH 9/06/2019
Advertisement

Subscribe to Our Youtube Channel
Related Manuals for paasche H Series


Summary of Contents for paasche H Series
- Page 1 Single Action–External Mix–Siphon Feed Added Bottle Connection Instruction Manual & Replacment Parts INTRODUCTION: Paasche® model HS Airbrush features machined Brass Body and Nickel Silver Color Part, simplicity of design and ease in operation. The air and color feeds are independent and adjustable to give a fixed line, shade or stipple effect. OPERATING INSTRUCTIONS: Approximate Working Pressures: • 2 0 lbs. or Less: Stipple and granulated effects, pressure will vary with viscosity of fluid.
- Page 2 Valve Casing 28. A-143 Needle Guide Spring H-156 Stipple Adjuster H-157 Finger Lever Assembly WARNING: Spray materials may be harmful if inhaled or allowed to come into contact with the skin or eyes. Consult the product label and Material Safety Data Paasche Airbush Co. Sheet supplied for the spray material. Follow all safety 9511 58th Place Kenosha, WI 53144 precautions. CAUTION: Well Ventilated Area Required Phone:773/867-9191 Email:info@paascheairbrush.com to remove fumes, dust or overspray. Maximum Air Website:Paascheairbrush.com Pressure 75 P.S.I. For Multi-Language Manuals Go To: www.paascheairbrush.com...
Need help?
Do you have a question about the H Series and is the answer not in the manual?
Questions and answers