Advertisement
Table of Contents
Check that you have all your
parts and accessories.
SPANNER WRENCH
DRILL ATTACHMENT
ROTATION PIN
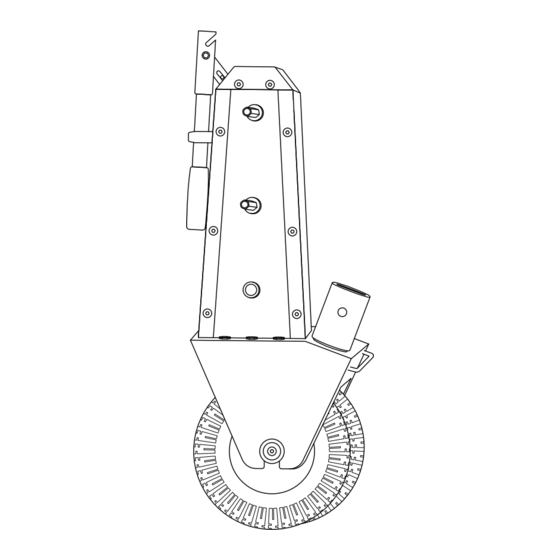
XL UNIT
COUPLING PLATE
HITCH BALL
HAND CRANK
1.
Check trailer height and raise
the trailer tongue to where the
frame is about 16 inches off
the ground to give adequate
space to attach the dolly.
BALL BASE
4.
Using your trailer jack, lower the
hitch towards the unit's rotating
coupler and attach rotation pin
to secure.
To use the XL with a drill, read the manual for
step-by-step instructions. For supporting
documents, visit us at
MANUAL
TRAILER VALET XL W/ BALL MOUNT
Quick Start Guide
16"
2.
Attach hitch ball w/ ball base to
coupler.
LOCKED
5.
Make sure the XL is securely
tightened and not rocking.
support.trailervalet.com.
3.
Use spanner wrench and tighten
that base!
6.
Attach the crank handle, lift the
steering handle to disengage
brakes, and start moving!
Scan the QR code to access some
helpful videos to help you get started
and #MoveForward.
Advertisement
Table of Contents

Related Manuals for Trailer Valet XL W/ BALL MOUNT


Summary of Contents for Trailer Valet XL W/ BALL MOUNT
- Page 1 TRAILER VALET XL W/ BALL MOUNT Check that you have all your parts and accessories. Quick Start Guide SPANNER WRENCH 16” DRILL ATTACHMENT Check trailer height and raise Attach hitch ball w/ ball base to Use spanner wrench and tighten the trailer tongue to where the coupler.
- Page 2 TRAILER VALET XL W/ MOUNT BRACKET Check that you have all your parts and accessories. Quick Start Guide SECURITY ROTATION BOLT 16” CRANK DRILL HANDLE ATTACHMENT Check trailer height and raise the Install the XL Mount bracket to Attach mounting joint to the trailer tongue to where the frame your trailer frame.
Need help?
Do you have a question about the XL W/ BALL MOUNT and is the answer not in the manual?
Questions and answers