Subscribe to Our Youtube Channel
Summary of Contents for Trailer Valet XL Pro
- Page 2 Trailer Valet. Failure to follow these guidelines may result in serious injury to persons and property for which Trailer Valet will not be held liable. Do not allow persons to operate or assemble this trailer dolly until they have read this manual and have developed a thorough understanding of how the trailer dolly works.
- Page 3 Hitching, unhitching, and moving is now done with precision. The Trailer Valet XL Pro is designed for trailers up to 12,000 lbs. The Trailer Valet is for use only on paved surfaces and/or compact terrain that is free of debris.
- Page 4 DO NOT use the Trailer Valet on slopes and This product must be installed and used in inclines beyond stated limits. strict accordance with these instructions. DO NOT submerge the Trailer Valet in water Be sure to read and understand your (salt or fresh) as this can damage the gears drill/driver operator’s manual and...
-
Page 5: What's Included
Upon removing items from packaging, it is very important to thoroughly inspect all parts of the system before using the device. Any part that is missing or damaged must be immediately replaced. Contact Trailer Valet Customer Service at 1-844-846-9344 or Support@TrailerValet.com What’s Included:... - Page 6 Fasteners: Label Name M8x40 Screw M8 Locking Nut M8x45 Screw M8 Locking Nut M8x50 Screw M8 Locking Nut M8x12 Screw M8x75 Screw M8 Flat Washer M8 Locking Nut 5/8-11x1-3/4 Bolt Flat Washer Spacer U-Joint *Install locking nuts with the tapered end facing away from the screw head.
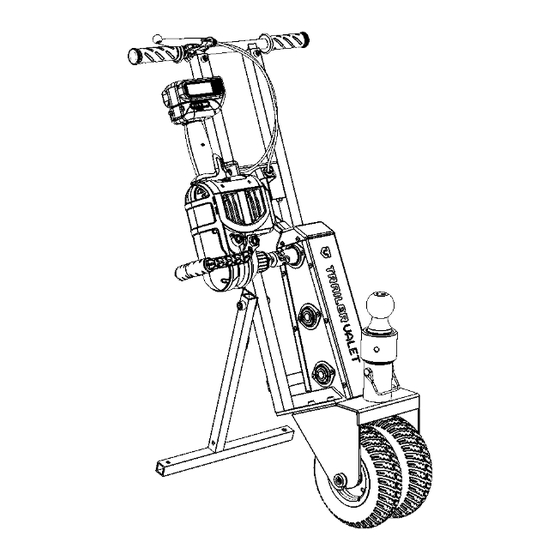
- Page 7 Step 1: Attach the Handle Bar Insert the Handlebar w/ Trigger (#12) into the extended bars at the top of the Frame Bracket (#11). Secure with contents of Fastener Bag A. Tighten the Trigger to handlebar in your desired position. Step 2: Attach the Drill Lever Using the contents of Fastener Bag B, Mount the Drill Lever (#13) onto the two uppermost thread slots on the side of the Frame Bracket (#11).
- Page 8 Drill Lever (#13). Step 4: Attach the Frame to the Trailer Valet Unit Using the contents of Fastener Bag D, mount the Frame Bracket (#11) to the top of the Trailer Valet Unit’s Wheel Housing (#1).
- Page 9 Step 5: Attach Kickstand Using the contents of Fastener Bag E, connect the Kickstand (#15) to the Frame Bracket (#11). The screw will fit into the single lowest thread slot on the bracket, below the Drill Mount (#14). Do not over tighten the kickstand screw. Be sure that Kickstand can rest flush against the Frame.
- Page 10 Step 6: Connect the Brake The brake cap (#3) will be fitted to the brake mechanism (#16) on the bracket. Lift the Brake Cap extensions upward to bring the hooks over the brake delay. Place the hooks over the screw and release.
- Page 11 Insert and tighten the U-Joint (Fastener No. 14) into your 60V Drill (#22). Then, connect the U-Joint to the Driveshaft (#6) on the Trailer Valet Unit. Using the contents of Fastener Bag F, slot the included bolt through the Drill Mount (#14.) Fit the included spacer over the bolt before screwing into the threading located on the side of the drill handle.
- Page 12 Step 8: Tension Adjustment If needed, calibration of both the Drill trigger and Brake Delay are done on the Trigger Handle. Adjust the rear Barrel Adjuster (shown below) to change the Drill Trigger tension. Adjust the front Barrel Adjuster (show below) to change the Brake Delay tension. The Drill Lever cable needs to be tensioned if the lever does not exact enough force onto the Drill Trigger to adequately drive the unit.
- Page 13 ATTACHING THE BALL TO COUPLER tightening until there is no movement by the device and the Locking Nut remains flat 1) Slide the Trailer Valet directly under the against the coupler. coupler. ALTERNATIVE METHOD FOR INSTALLING...
- Page 14 DO NOT pull up or push down an incline. The unit must always be on the lower end of any incline. If you have any questions concerning the use of your Trailer Valet on a slope or incline, please contact us at (844) 846-9344 or email us at: support@trailervalet.com...
- Page 15 REPLACEMENT OF EQUIPMENT AND PROPERTY. Customer Responsibilities: Customers may be required to provide proof of purchase date, respond to questions designed to assist with diagnosing potential issues, and follow Trailer Valet’s directions to make a claim on your warranty. To make a warranty claim:...
- Page 16 Copyright 2018 by Supertech S. Corporation. All right reserved. No portion of this manual or any artwork contained herein may be reproduced in any shape or form without the express written consent of Supertech S. Corporation. For further information or if you have any questions, please contact: SUPERTECH S.


Need help?
Do you have a question about the XL Pro and is the answer not in the manual?
Questions and answers