Table of Contents
Advertisement
Available languages
Available languages
Advertisement
Chapters
Table of Contents

Related Manuals for Stealth Cam STC-G26FX


Summary of Contents for Stealth Cam STC-G26FX
- Page 1 INSTRUCTION MANUAL MODEL: STC-‐G26FX V.01 ...
- Page 2 **IMPORTANT NOTE** To ensure the product is being utilized to its full potential, we recommend checking our website for new product updates. If your unit is having trouble, please check the website to determine you are using the latest firmware or software version.
-
Page 3: Table Of Contents
TABLE OF CONTENTS Camera Overview 4-‐5 General Information 6 Camera Programming Quick Set 1 (Q1) 7 Quick Set 2 (Q2) 7 Quick Set 3 (Q3) 7 ... -
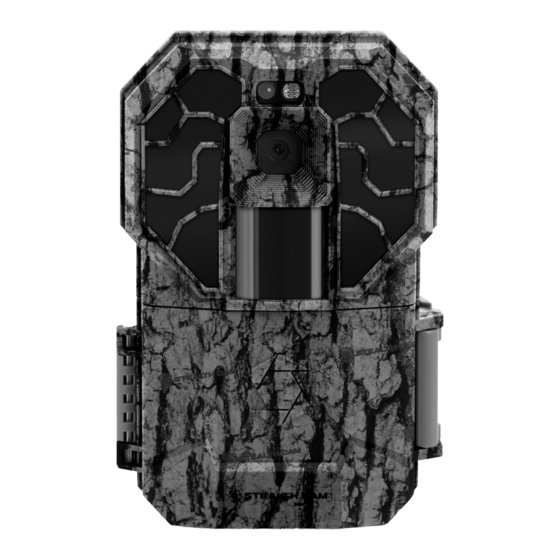
Page 4: Camera Overview
CAMERA OVERVIEW Inside Bottom 4 www.stealthcam.com Page 877-‐269-‐8490 ... - Page 5 CAMERA OVERVIEW (CONT) Side ...
-
Page 6: General Information
GENERAL INFORMATION Storing conditions Operating Environment: 14 to 104 deg F (-‐10 to 40 deg C). 20-‐85% relative humidity, non-‐condensing. Special care instructions!! The camera is designed to be weather resistant. Never attempt to immerse the unit in water or any other liquid. -
Page 7: Camera Programming
CAMERA PROGRAMMING This G26FX features 6 distinct modes of operation: Off / Q1 / Q2 /Q3 / Custom / Test. Each setting is activated based upon the position of the switch on the inside of the unit. -
Page 8: Quick Set 1 (Q1)
CAMERA PROGRAMMING – CUSTOM (CONT) Custom – This is the fifth setting and is defined by the user. When the camera is changed to this mode, ... - Page 9 CAMERA PROGRAMMING – CUSTOM (CONT) SETUP DATE – 01/01/15 (default): This setting is used to give the camera the correct date to use on the Info Bar of the images. The format is in a MM/DD/YY setup. With the MM (month) setting blinking, use the UP and DOWN arrows to be change the setting from 1 to 12.
- Page 10 CAMERA PROGRAMMING -‐ CUSTOM (CONT) TIME FORMAT – 12 HOUR (default): This setting is used to tell camera if the time programmed and displayed on the Info Bar should be in the basic 12 hour (AM/PM) format or the 24 hour (military) format.
- Page 11 CAMERA PROGRAMMING -‐ CUSTOM (CONT) PIR PHOTO (default): In this mode the camera will take a designated amount of picture with a designated time out when the camera senses activity in front of the unit. This mode is available for both day and night activities.
-
Page 12: Memory Card
CAMERA PROGRAMMING -‐ CUSTOM (CONT) PIR VIDEO: In this mode the camera will take a video clip at a designated resolution for a designated length with a designated time out when the camera senses activity in front of the ... - Page 13 CAMERA PROGRAMMING -‐ CUSTOM (CONT) TIME LAPSE (TL): In this mode the camera will take a designated amount of pictures with a designated time out between the designated hours of operation even if there is no activity in ...
- Page 14 CAMERA PROGRAMMING -‐ CUSTOM (CONT) Using the UP and DOWN arrows will allow the setting to be change from 00 to 59. Again when this setting is on the appropriate minute, press the RIGHT arrow key to move to the AP (am/pm) setting and ...
- Page 15 CAMERA PROGRAMMING -‐ CUSTOM (CONT) CAMERA NAME – STEALTH CAM (default): This setting is used to identify the camera on the Info Bar. It can be up to 13 characters long in the form of alpha (A-‐Z), numeric (0-‐9), or spaces. With this option blinking, use the UP or DOWN arrow buttons to change the initial character.
- Page 16 CAMERA PROGRAMMING -‐ CUSTOM (CONT) LATITUDE – 000.000000N (default): This setting is used for the GEO-‐TAG of the camera. It will not be displayed on the images directly, but rather on the background image information. The coordinates can be changed from 000.000000 to 179.999999 and either N (North) or S (South).
- Page 17 CAMERA PROGRAMMING -‐ CUSTOM (CONT) SECURITY KEY – 0000 (default): To change the key to an owner operated one press the ENTER button. With this option blinking, use the UP or DOWN arrow buttons change the first ...
- Page 18 CAMERA PROGRAMMING TEST – This is the final switch setting, and is used to test the camera’s PIR sensor coverage area.
-
Page 19: Test Mode
MEMORY CARD -‐ INSTALLATION To insert the SD memory card into the camera: first locate the SD card slot on the right hand side of the of the camera case. Next with the SD card label facing towards the front of the camera, insert the SD card. - Page 20 *Number of images/videos is approximate and subject to change based upon subject footage. *NOTE: For best results use cards with designation on memory cards 4GB or higher. 20 www.stealthcam.com ...
-
Page 21: Formatting
MEMORY CARD -‐ FORMATTING It always best to format your SD cards from the actual device your using, in this case the camera. This will allow the camera to format the card in the proper fashion. ... -
Page 22: Battery Removal & Installation
BATTERY REMOVAL & INSTALLATION To remove the batteries from the unit; open the case and press the EJECT button on the lower right hand corner. -
Page 23: View And Deleting Files
VIEW & DELETING IMAGES The camera allows for two (2) ways to view your images. First is the direct connection for the camera to the computer via a USB cable (not included). This is a USB mini to standard USB ... -
Page 24: Definitions
DEFINITIONS REFLEX (Advanced Low-‐Light Sensitivity) – Ultra-‐fast trigger speed, averaging < 1 second with recovery times programmable as low as 5 seconds. MATRIX (Blur Reduction Technology) –... -
Page 25: Frequently Asked Questions (Faqs) 24--25
FREQUENTLY ASKED QUESTIONS Q: Can I mix batteries together? A: NO, you should never mix old with new OR Alkaline with Lithium with Rechargeable. Q: Is my game camera Mac compatible? A: Yes, This camera model works with 10.6 and above. ... - Page 26 FREQUENTLY ASKED QUESTIONS (CONT) Q: Can I use my game camera through a window or glass door? A: Glass may disrupt your sensor beam we don’t advise using the camera in this fashion. Q: Do I need to recharge my 12V Battery Kit during the seasons if it’s not in use? A: The 12V Battery Kit should be recharge at least every 3 months, regardless if it is being ...
-
Page 27: Fcc Compliance
FCC COMPLIANCE GSM STC-‐G26FX NOTE: This equipment has been tested and found to comply with the limits for Class B digital device, pursuant to part 15 of the FCC Rules. -
Page 28: Limited Warranty Information
LIMITED WARRANTY INFORMATION Your Stealth Cam scouting camera is covered by a 365 Day Limited Warranty on parts and labor from the date of original purchase, and purchases must be made through an authorized ... - Page 29 MANUEL D'INSTRUCTIONS MODÈLE : STC-‐G26FX V.01 29 www.stealthcam.com Page 877-‐269-‐8490 ...
- Page 30 **NOTE IMPORTANTE** Pour vous assurer que le produit soit utilisé à son plein potentiel, nous vous recommandons de vérifier notre site Web pour obtenir les nouvelles mises à jour du produit.
- Page 31 TABLE DES MATIÈRES Aperçu de l'appareil photo 31-‐32 Renseignements généraux 33 Réglage de l'appareil photo Réglage rapide 1 (Q1) 34 Réglage rapide 2 (Q2) 34 ...
-
Page 32: Aperçu De L'appareil Photo
APERÇU DE L'APPAREIL PHOTO Devant ouvert Bas 32 www.stealthcam.com Page 877-‐269-‐8490 ... - Page 33 APERÇU DE L'APPAREIL PHOTO (SUITE) Côté Arrière Comparti ment à 33 www.stealthcam.com ...
-
Page 34: Renseignements Généraux
RENSEIGNEMENTS GÉNÉRAUX Conditions de rangement Environnement d'exploitation : -‐10 à 40 deg C (14 à 104 deg F). 20 -‐ 85 % humidité relative, sans condensation. Instructions pour les soins spéciaux L'appareil photo est conçu pour résister à l'eau. N'essayez jamais de plonger l'appareil dans l'eau ou dans tout autre liquide. -
Page 35: Réglage De L'appareil Photo
RÉGLAGE DE L'APPAREIL PHOTO Ce G26FX comprend 6 modes distincts d'opération : Arrêt/Q1/Q2/Q3/Personnalisé/Test. Chaque paramètre est activé en fonction de la position de l'interrupteur à l'intérieur de l'appareil. Arrêt – Cette position coupe complètement l'alimentation de l'appareil. ... - Page 36 RÉGLAGE DE L'APPAREIL PHOTO -‐ PERSONNALISÉ (SUITE) Personnalisé – Il s'agit du cinquième paramètre et est défini par l'utilisateur. Lorsque l'appareil est changé pour ce mode, l'écran d'affichage reflètera le dernier réglage du programme : Nombre d'images contenues sur la carte mémoire, la minuterie et le pourcentage de la pile.
- Page 37 RÉGLAGE DE L'APPAREIL PHOTO -‐ PERSONNALISÉ (SUITE) RÉGLAGE DE LA DATE: Ce paramètre est utilisé pour indiquer la bonne date à la caméra à utiliser ...
- Page 38 RÉGLAGE DE L'APPAREIL PHOTO -‐ PERSONNALISÉ (SUITE) FORMAT DE L'HEURE – 12 HEURES (par défaut) : Ce paramètre est utilisé pour indiquer à l'appareil photo si l'heure programmée et affichée sur la Barre d'infos doit être au format de ...
- Page 39 RÉGLAGE DE L'APPAREIL PHOTO -‐ PERSONNALISÉ (SUITE) PHOTO PIR (par défaut) : Dans ce mode, l'appareil photo prend une quantité désignée de photos dans un laps de temps établi lorsque l'appareil photo détecte une activité se déroulant devant l'appareil. Ce mode est disponible à...
- Page 40 RÉGLAGE DE L'APPAREIL PHOTO -‐ PERSONNALISÉ (SUITE) VIDÉO PIR: Dans ce mode, l'appareil photo prendre un clip vidéo à une résolution désignée pour une durée établie avec une temporisation spécifiées lorsque l'appareil photo détecte une activité se déroulant devant l'appareil.
- Page 41 RÉGLAGE DE L'APPAREIL PHOTO -‐ PERSONNALISÉ (SUITE) LAPSE DE TEMPS (Délai) : Dans ce mode, l'appareil photo prend une quantité désignée de photos dans un délai établi entre les heures d'opération désignée même s'il n'y a aucune activité...
- Page 42 RÉGLAGE DE L'APPAREIL PHOTO -‐ PERSONNALISÉ (SUITE) " ARRÊT DU DÉLAI (TL) – 08:00 AM (par défaut) : Ce paramètre est utilisé pour donner à l'appareil photo le temps d'arrêt pour arrêter le délai de la photographie. Le format par défaut est HH/MM/AP, si le format de l'heure doit être celui de 24 heures, qui est HH/MM.
- Page 43 RÉGLAGE DE L'APPAREIL PHOTO -‐ PERSONNALISÉ (SUITE) NOM DE L'APPAREIL PHOTO – STEALTH CAM (par défaut) : Ce paramètre est utilisé pour identifier l'appareil photo sur la Barre d'infos.
- Page 44 RÉGLAGE DE L'APPAREIL PHOTO -‐ PERSONNALISÉ (SUITE) LATITUDE – 000.000000N (par défaut) : Ce paramètre est utilisé pour le GEO-‐TAG de l'appareil photo. Il ne sera pas affiché sur les images directement, mais plutôt sur les renseignements de l'image de fond. Les coordonnées peuvent être changées de 000.000000 à...
- Page 45 RÉGLAGE DE L'APPAREIL PHOTO -‐ PERSONNALISÉ (SUITE) CLÉ DE SÉCURITÉ – 0000 (par défaut) : Pour modifier la clé d'un propriétaire utilisée, appuyez ...
-
Page 46: Mode Test
RÉGLAGE DE L'APPAREIL PHOTO LANGUE -‐ l'anglais (par défaut) : Cette nouvelle fonctionnalité vous permet de sélectionner la langue que vous préférez utiliser dans le menu . En appuyant sur la touche ENTER vous serez en mesure de faire défiler les options suivantes: Anglais / Allemand / Français / Espagnol. -
Page 47: Carte Mémoire
CARTE MÉMOIRE INSTALLATION Pour insérer la carte mémoire SD dans l'appareil: localisez la fente de la carte SD sur le côté droit du boîtier de l'appareil photo. ... -
Page 48: Formatage
FOMATAGE DE LA CARTE SD Il est toujours mieux de formater vos cartes SD à partir de l'appareil actuel que vous utilisez, dans ce cas l'appareil photo. -
Page 49: Installation Et Retrait De La Pile
INSTALLATION ET RETRAIT DE LA PILE Pour retirer les piles de l'appareil, ouvrez le boîtier et appuyez sur le bouton ÉJECTION situé dans le coin inférieur droit. Ce qui permettra de glisser et de retirer le Compartiment à... -
Page 50: Affichage Et Suppression Des Fichiers
AFFICHAGE ET SUPPRESSION DES IMAGES La caméra offre deux (2) façons de voir vos images. La première est la connexion directe de l'appareil photo à l'ordinateur via un câble USB (non fourni). Il s'agit d'un mini câble USB vers un câble USB standard (type A/B). -
Page 51: Définitions
DÉFINITIONS REFLEX (Sensibilité avancée à faible luminosité) -‐ Vitesse de déclenchement ultra-‐rapide, en moyenne < 1 seconde avec des temps de récupération programmables aussi bas que 5 secondes. MATRIX(Technologie de réduction du flou) – La réduction avancée du flou réduit de manière importante les effets du flou, résultant en des images plus claires et plus nettes. -
Page 52: Foire Aux Questions (Faq) 51--52
FOIRE AUX QUESTIONS Q : Mon appareil de jeu pour Mac est-‐i compatible? R : Oui, ce modèle d'appareil photo fonctionne avec la version 10.6 et plus. Q : Puis-‐je utiliser des piles rechargeables dans l'appareil photo? R : Les piles rechargeables sont très bien pour l'appareil;... - Page 53 FOIRE AUX QUESTIONS (SUITE) Q : Puis-‐je utiliser mon appareil de jeu par une fenêtre ou une porte de verre? R : Le verre peut perturber le faisceau de votre détecteur; nous ne vous conseillons pas d'utiliser l'appareil photo dans ce mode.
-
Page 54: Conformité Fcc
CONFORMITÉ FCC Remarque : Cet équipement a été testé et se conforme aux exigences des appareils numériques de classe B, conformément à la partie 15 des Règles FCC. Ces limites sont conçues ... -
Page 55: Renseignements Sur La Garantie Limitée
RENSEIGNEMENTS SUR LA GARANTIE LIMITÉE Votre appareil photo d'exploration Stealth Cam est couverte par une garantie limitée de 365 jours sur les pièces et la main-‐d'œuvre à partir de la date d'achat initial, et les achats doivent être effectués auprès d'un revendeur autorisé.
Need help?
Do you have a question about the STC-G26FX and is the answer not in the manual?
Questions and answers