Table of Contents
Advertisement
Quick Links
Centronic EasyControl
EC411A-III
Assembly and Operating Instructions
en
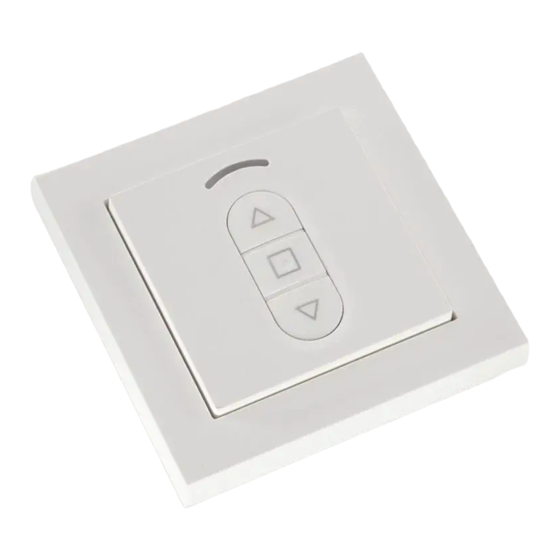
Wall transmitter 1-channel
Important information for:
• Fitters / • Electricians / • Users
Please forward accordingly!
These instructions must be kept safe for future reference.
4034 630 449 0a 14/07/2022
Becker-Antriebe GmbH
Friedrich-Ebert-Straße 2-4
35764 Sinn/Germany
www.becker-antriebe.com
Advertisement
Table of Contents

Related Manuals for Becker Centronic EasyControl EC411A-III


Summary of Contents for Becker Centronic EasyControl EC411A-III
- Page 1 Assembly and Operating Instructions Wall transmitter 1-channel Important information for: • Fitters / • Electricians / • Users Please forward accordingly! These instructions must be kept safe for future reference. 4034 630 449 0a 14/07/2022 Becker-Antriebe GmbH Friedrich-Ebert-Straße 2-4 35764 Sinn/Germany www.becker-antriebe.com...
-
Page 2: Table Of Contents
Table of contents General .................... 3 Warranty .................... 3 Safety instructions ................... 4 Intended use ................... 5 Explanation of displays and buttons ............ 6 Explanation of functions ................ 7 Commissioning of Centronic .............. 8 Programming the transmitter.............. 8 Installing the wall bracket................. 13 Changing batteries.................. 14 Cleaning.................... 14 Technical data .................. 14... -
Page 3: General
General You can control one or more receivers with this transmitter. This device is exceptionally easy to use. Please observe these Assembly and Operating Instructions when installing and setting up the equipment. Explanation of pictograms CAUTION indicates a hazardous situation CAUTION which, if not avoided, could result in in- jury. -
Page 4: Safety Instructions
Safety instructions General information • Please keep the instruction manual safe! • Only use in dry rooms. • Only use unmodified original parts from the control unit manufacturer. • Keep children away from control units. • Observe all pertinent country-specific regulations. •... -
Page 5: Intended Use
Intended use The transmitter described in these instructions must only be used for operat- ing Centronic-compatible radio drives and radio control units. • Please note that radio-controlled systems may not be used in areas with a high risk of interference (e.g. hospitals, airports). •... -
Page 6: Explanation Of Displays And Buttons
Explanation of displays and buttons 6 - en... -
Page 7: Explanation Of Functions
button button (STOP) 3. Transmission pilot light button programming button ( ) 6. Commissioning LED 7. Battery 8. Wall transmitter 9. Frame 10. Wall bracket Explanation of functions Channel A channel of the transmitter can be programmed into one or more receivers of a radio control system. -
Page 8: Commissioning Of Centronic
Commissioning of Centronic For the setting of limit positions and configurations please refer to the instructions for the Centronic receiver. Explanation of symbols Up/retract button STOP button Down/extend button Programming button (on the transmitter Receiver confirms once or multiple times by “clicking”... - Page 9 Programming the master transmitter The master transmitter refers to the very first transmitter programmed in a receiver. In contrast to subsequently pro- grammed transmitters, the master transmitter enables, among other things, the setting of limit positions (for drives with integrated radio receiver) and the programming or de- leting of further transmitters.
- Page 10 Programming additional transmitters The number of additional transmitters that can be pro- grammed depends on the receiver. This information can be found in the instructions for the receiver. Press the programmed master transmitter's pro- gramming button for 3 seconds. ▻ The receiver confirms. Now press the programming button of a new transmitter which has not yet been programmed in the radio receiver for 3 seconds.
- Page 11 Deleting transmitters Deleting individual transmitters The programmed master transmitter cannot be deleted. It can only be overwritten. Press the programming button on the master transmitter for 3 seconds. ▻ The receiver confirms. Now press the programming button of the trans- mitter to be deleted for 3 seconds.
- Page 12 Deleting all transmitters (except the master transmitter) Press the programming button on the master transmitter for 3 seconds. ▻ The receiver confirms. Re-press the programming button on the master transmitter for 3 seconds. ▻ The receiver confirms. Then press the programming button on the mas- ter transmitter again for 10 seconds.
-
Page 13: Installing The Wall Bracket
Overwriting the master Switch off the power supply to the receiver then switch it back on after 5 seconds, or press the programming button or radio switch on the receiver. ▻ The radio receiver remains in programming mode for 3 minutes. To ensure that the new master transmitter is programmed in the desired radio receiver only, all other receivers which are connected to the same power supply must be deactivated from the programming mode. -
Page 14: Changing Batteries
Changing batteries You will find the appropriate battery type in the "Technical data" chapter. Cleaning Only clean the device with a suitable cloth. Do not use aggressive cleaning agents that may damage the surface. Technical data Rated voltage 3 V DC Battery type CR 2430 Degree of protection... -
Page 15: What To Do If
What to do if...? Problem Remedy Tubular drive does not move. Insert a new battery. Insert the battery correctly. Reduce distance from receiver. Transmitter is not programmed into receiver. Program transmitter. 15 - en...
Need help?
Do you have a question about the Centronic EasyControl EC411A-III and is the answer not in the manual?
Questions and answers