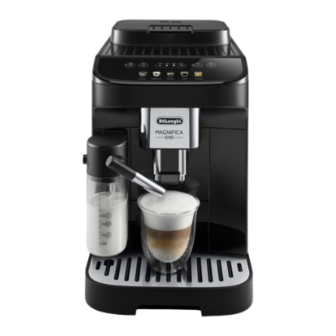
DeLonghi Magnifica Evo ECAM29 6 Series Instructions For Use Manual

Bean to cup espresso and cappuccino machine

Advertisement

ECAM29X.6Y - 29X.8Y EX:2
BEAN TO CUP ESPRESSO AND
CAPPUCCINO MACHINE
Instructions for Use

Advertisement

Table of Contents
loading

Summary of Contents for DeLonghi Magnifica Evo ECAM29 6 Series

  • Page 1 ECAM29X.6Y - 29X.8Y EX:2 BEAN TO CUP ESPRESSO AND CAPPUCCINO MACHINE Instructions for Use...
  • Page 2 A1 A1 A2 A2...
  • Page 3 page 4 Decalci cante per macchine da ca è Descaler for co ee machines Détartrant pour machines à café Entkalker für Ka eemaschinen De’Longhi Appliances s.r.l. Via L. Seitz, 47 31100 Treviso - ITALY Tel. +39 0422 4131 5413218631/04.15 ✕ ✕...
  • Page 4: Table Of Contents

    CONTENTS 16. DESCALING ...........18 1. INTRODUCTION ........5 17. EXPLANATION OF LIGHTS ......20 1.1 Letters in brackets ........5 18. TROUBLESHOOTING ......22 1.2 Troubleshooting and repairs ....5 19. TECHNICAL DATA ........23 2. DESCRIPTION ......... 5 2.1 Description of the appliance - A ....5 2.2 Description of control panel - B ....5 2.3 Description of indicator lights - C ....5 2.4 Description of accessories - D* ....5...
  • Page 5: Introduction

    D5. Hot water spout If repairs are required, contact De’Longhi customer services 2.5 Description of milk carafe - E only. Addresses can be found on the website www.delonghi. com. E1. Lid with milk frother E2. Milk spout connector (non removable) 2.
  • Page 6: Water Softener Filter

    2. The indicator (C2) will light up on the control panel For more information, visit the www.delonghi.com website. (B) (fig. 2): remove the water tank (A9) (fig. 3), fill up to the MAX level with fresh drinking water (fig. 4), then EAN: 8004399327252 reposition in the appliance.
  • Page 7: Replacing The Filter

    2. Follow the operations described in the previous section to activate the filter; 3. See instructions in section “12. Settings menu” to set the machine and repeat steps 9 to 12 of the preceding section. Please note: After two months (see date indicator), or after 3 weeks if the appliance has not been used, the filter should be replaced even if the warning message has not yet been displayed.
  • Page 8: Turning The Appliance On

    1. Fill the container (A4) with coffee beans (fig. 14); Medium Medium/High High See instructions in section “12. Settings menu” to set the ma- chine accordingly. 6. TURNING THE APPLIANCE ON Danger of scalding! During the rinse, a little hot water flows from the coffee spouts 2.
  • Page 9: Making Coffee Using Pre-Ground Coffee

    • To customise the drinks according to personal taste, see 3. Press the button (B2): the corresponding Led sections “8.5 Varying the intensity of the coffee” and “8.9 lights up; Customising the quantity in the cup”. 4. Press the Espresso button (B7);...
  • Page 10: Customising The Quantity In The Cup

    Please note: The adjustment dial must be turned only when the cof- Cow's milk fee grinder is in operation during the initial step of coffee preparation. Whole (fat >3,5%) To make an adjustment while the coffee grinder is in operation, turn the dial (A2) as follows: Semi-skimmed ✓...
  • Page 11: Selection Of Coffee Intensity Or Use Of Pre- Ground Coffee

    tomised as described in section “8.5 Varying the intensity of the coffee”, or alternatively, select pre-ground coffee and proceed to add one measure of coffee as indicated in the section “8.3 Making coffee using pre-ground coffee ” 9.5 Delivering milk-based drinks 1.
  • Page 12: Customising The Quantity In The Cup

    rapidly to indicate that the programming menu is active. Delivery begins; 2. Once the cup is filled to the desired level, press the drink but- ton again. Delivery of the first ingredient stops and delivery of the second ingredient begins; 3.
  • Page 13: Tips For Energy Saving

    Please note! • Set auto-off to 15 minutes (see “12. Settings menu”); • Enable Energy Saving (see “12. Settings menu”); To cancel the current setting, press a button corresponding to any • Always carry out the descaling cycle when prompted by drink the machine.
  • Page 14 Beep Confirm selection Press one of the bean symbols to enable the beep Press the pre-ground sym- bol to disable the beep Coffee temperature Confirm selection Press the bean symbol MEDIUM corresponding to the required temperature HIGH Energy saving Confirm selection Press one of the bean symbols to enable energy saving...
  • Page 15: Restore Factory Settings

    15 MINUTES Auto-off Confirm selection 30 MINUTES Press the symbol corresponding to the time 1 HOUR being set 3 HOURS 3. Exit the menu: Press the button: The machine is ready for use again. Please note! After 30 seconds without a button being pressed, the machine exits the settings menu automatically.
  • Page 16: Cleaning The Machine

    13. CLEANING THE MACHINE Important! • Do not use solvents, abrasive detergents or alcohol to clean the coffee machine. With De’Longhi superautomatic coffee machines, no chemical products are required for cleaning purposes. • Do not use metal objects to remove encrustations or coffee deposits as they could scratch metal or plastic surfaces. ✕...
  • Page 17: Thorough Cleaning Of Milk Carafe

    Component Frequency Procedure Inside of the machine Check periodically (about once a month) Switch the machine off and disconnect from the power that the inside of the machine (accessible supply. Never immerse the machine in water. • Remove coffee deposits with a brush and sponge; by removing the drip tray) is not dirty.
  • Page 18: Contents 16. Descaling

    Press the button (B1)to turn the machine off; 12. Remove the water tank (A9); 13. Open the infuser door, positioned on the right hand side (fig. 38); 14. Press the two coloured release buttons inwards (fig. 39), at the same time pulling the infuser outwards; 7.
  • Page 19 • Use only descaler supplied by De’Longhi. Using unsuitable 5. Place an empty container of at least 2 litres capacity under the descaler and/or performing descaling incorrectly may re- coffee spouts (A17) and the water spout (D5) (fig. 44). sult in faults not covered by the manufacturer’s guarantee. •...
  • Page 20: Explanation Of Lights

    11. Empty the container used to collect the water from the Indicator/Led Meaning first rinse. Remove and empty the water tank, then fill Insufficient water in tank: with fresh drinking water up to the MAX level (fig. 48) and fill the tank reinstate the softener filter, if in use;...
  • Page 21 Indicator/Led Meaning Indicator/Led Meaning The beans are too finely • A milk drink has been ground, so that the coffee selected, but the con- is delivered too slowly or nector (E6) has not not at all. Adjust the coffee been properly inserted: grinder (section “8.8 Adjust- check that the milk ca- ing the coffee grinder”)
  • Page 22: Troubleshooting

    Indicator/Led Meaning Indicator/Led Meaning Descaling has been inter- Descaling in progress rupted. Complete the cycle, restarting from the step indicated by the intensity selection Leds. Installation/Replacement of water filter softener progress → 18. TROUBLESHOOTING Possible malfunctions of the machine are listed below. If the problem cannot be resolved as described, contact customer services.
  • Page 23: Technical Data

    Problem Cause Solution The machine will not dispense any coffee. Impurities have been detected in the inter- Wait until the machine is ready for use again, nal circuits and proceed to select the required drink. Con- tact customer services if the problem persists. Coffee does not come out of one or both Coffee nozzles blocked.
  • Page 24 De’Longhi Appliances via Seitz, 47 31100 Treviso, Italy www.delonghi.com...

Table of Contents