Table of Contents
Advertisement
Quick Links
Safe Operation Practices • Set-Up • Operation • Maintenance • Service • Troubleshooting • Warranty
O
'
M
peratOr
s
anual
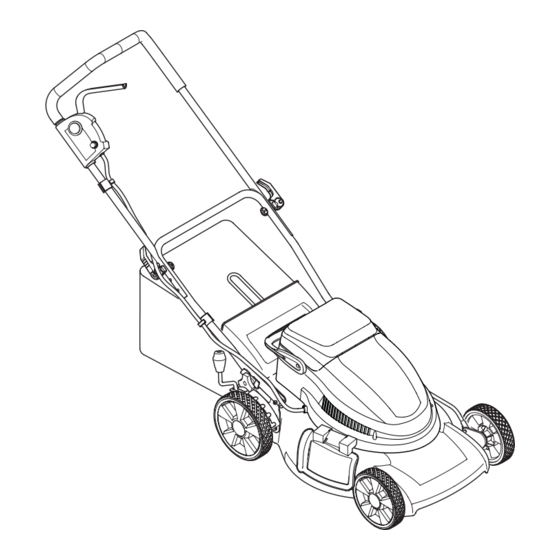
3-in-1 Battery Mower
WARNING
READ AND FOLLOW ALL SAFETY RULES AND INSTRUCTIONS IN THIS MANUAL
BEFORE ATTEMPTING TO OPERATE THIS MACHINE.
FAILURE TO COMPLY WITH THESE INSTRUCTIONS MAY RESULT IN PERSONAL INJURY.
P. O. Box 1386, 97 Kent Avenue, KITCHENER, ONTARIO, CANADA N2G 4J1
769-06659
1.7.11
Advertisement
Table of Contents

Related Manuals for Remington 18A-212B583


Summary of Contents for Remington 18A-212B583
- Page 1 Safe Operation Practices • Set-Up • Operation • Maintenance • Service • Troubleshooting • Warranty ’ peratOr anual 3-in-1 Battery Mower WARNING READ AND FOLLOW ALL SAFETY RULES AND INSTRUCTIONS IN THIS MANUAL BEFORE ATTEMPTING TO OPERATE THIS MACHINE. FAILURE TO COMPLY WITH THESE INSTRUCTIONS MAY RESULT IN PERSONAL INJURY. P.
-
Page 2: Table Of Contents
To The Owner Thank You Thank you for purchasing your new equipment. It was carefully Manual may cover a range of product specifications for engineered to provide excellent performance when properly various models. Characteristics and features discussed and/or operated and maintained. illustrated in this manual may not be applicable to all models. -
Page 3: Safe Operation Practices
Important Safe Operation Practices WARNING: This symbol points out important safety instructions which, if not followed, could endanger the personal safety and/or property of yourself and others. Read and follow all instructions in this manual before attempting to operate this machine. Failure to comply with these instructions may result in personal injury. - Page 4 Slope Operation: Never pull the mower back toward you while you are walking. If you must back the mower away from a wall or Slopes are a major factor related to slip and fall accidents which obstruction first look down and behind to avoid tripping can result in severe injury.
- Page 5 Maintain your mower with care — Keep mower blade sharp and clean for best and safest performance. Mower blades are sharp and can cut, wrap the blade or wear gloves and use extra caution when servicing them. Keep all nuts, bolts, and screws tight to be sure the equipment is in safe working condition.
- Page 6 Safety Symbols This page depicts and describes safety symbols that may appear on this product. Read, understand, and follow all instructions on the machine before attempting to assemble and operate. Symbol Description READ THE OPERATOR’S MANUAL(S) Read, understand, and follow all instructions in the manual(s) before attempting to assemble and operate DANGER —...
- Page 7 2 — i ectiOn MpOrtant peratiOn ractices...
-
Page 8: Assembly & Set-Up
Assembly & Set-Up Contents of Carton • One Battery Mower • One Side Discharge Chute • Two Cord Guides • One Operator’s Manual • Two Toggle Clamps • One Battery • One Charger • One Grass Bag Handle Assembly NOTE: All references to the left and right side of the mower are from the operator’s position behind the mower. - Page 9 Place the upper handle onto the lower handle, keeping the Tighten the clamps. See Fig. 3-4. motor cord over the handles. See Fig. 3-3. NOTE: Leave space between clamp and clamp seat. If For the lowest setting, line up the top holes of the upper clamp will not tighten, loosen wing knob half turn.
- Page 10 Grass Collection Place grass catcher on the pivot rod. Let go of discharge door so that it rests on the grass catcher. To assemble the grass catcher, secure the plastic channels See Fig. 3-8. of grass bag over frame rods. See Fig. 3-6. Figure 3-8 Figure 3-6 To remove grass catcher, lift rear discharge door on the mower.
- Page 11 Charging the Battery Secure the tabs of the side discharge chute onto the hooks below the side mulching baffle. See Fig. 3-9. WARNING: The battery contains corrosive fluid NOTE: Do not remove side mulch baffle at any time, even and toxic material - HANDLE WITH CARE. Keep away when you are not mulching.
-
Page 12: Controls & Features
Controls and Features Starter Button Motor/Blade Control Lever Battery Level Overload Protection Indicator Switch Safety Key Cutting Height Adjustment Lever Figure 4-1 WARNING: Cutting Height Adjustment Lever Read, understand, and follow all instructions and warnings on the machine and in The cutting height adjustment lever is located above the right this manual before operating. -
Page 13: Operation
Operation Starting Motor and Blade Press the starter button and hold it in. See Fig. 5-2. NOTE: Starting the mower’s motor also engages the blade. WARNING: Avoid accidental starting. Make sure you are in the operating position behind the mower when using it. - Page 14 Using Your Lawn Mower Removing the Battery Be sure that lawn is clear of stones, sticks, wires, or other objects If you have two batteries, you can use one battery while the which could damage the lawn mower or motor. Such objects other battery recharges.
-
Page 15: Maintenance & Adjustment
Maintenance & Adjustments General Recommendations Deck Care WARNING: To reduce the risk of electric shock, do not expose • Always observe safety rules when performing any the mower to water. maintenance. The underside of mower deck should be cleaned after each use •... - Page 16 If the overload protection switch pops out shortly after resetting: Battery Care Release the motor/blade control handle and do NOT restart IMPORTANT: Replace with only the identical batteries provided the mower for at least 15 minutes to allow the electric with this mower.
-
Page 17: Service
Service Blade Care Blade Installation Place the cutting blade, locking plates, and blade nut on WARNING: When removing the cutting blade for the motor shaft and thread the blade bolt in finger tight. sharpening or replacement, protect your hands with See Fig. - Page 18 Off-Season Storage The following steps should be taken to prepare your lawn mower for storage. • Clean and lubricate mower thoroughly as described in the lubrication instructions. • We do not recommend the use of a pressure washer or garden hose to clean your unit. •...
-
Page 19: Troubleshooting
Troubleshooting Problem Cause Remedy Mower fails to start Key not in switch. Insert Ignition key. Motor/blade control disengaged. Depress starter button, and engage motor blade control. Battery discharged. Charge battery. Mower deck clogged with grass and debris. Unclog mower deck. Make certain blade is free to move. - Page 20 Model/Modèle 18A-212B 77 65 23 79 25 28 For a new battery pack, order part 725-05089. Pour obtenir une batterie neuve, commandez la pièce 725-05089.
- Page 21 Model/Modèle 18A-212B PART PART N˚ DE N˚ DE N˚ DE N˚ DE RÉF PIÈCE RÉF PIÈCE Couvercle Deck Tablier Bat tery Pack Cover 787-01839A 731-07674 Carter 731-07671 Shroud Capot 731-07675 Bat tery Pack Hous ing Mulch ing Door Port de déchiqueteuse Han dle Poignée 731-07619...
-
Page 22: Replacement Parts
MANUFACTURER’S LIMITED WARRANTY FOR IMPORTANT: To obtain warranty coverage owner must present an Without limiting the foregoing, this limited warranty does not provide original proof of purchase and applicable maintenance records to the coverage in the following cases: servicing dealer. Please see the operator’s manual for information on a. - Page 23 Notes...
Need help?
Do you have a question about the 18A-212B583 and is the answer not in the manual?
Questions and answers