Table of Contents
Advertisement
Quick Links
Advertisement
Table of Contents

Related Manuals for Hioki CM4141-90


Summary of Contents for Hioki CM4141-90
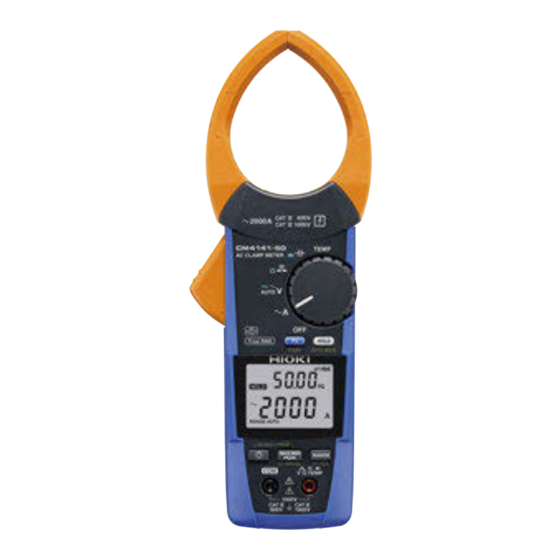
- Page 1 Test Equipment Depot - 800.517.8431 - 5 Commonwealth Ave, MA 01801 TestEquipmentDepot.com Instruction Manual CM4141-50 AC CLAMP METER Read carefully before use. Keep for future reference. Dec. 2021 Edition 1 CM4141C961-00 21-12H HIOKI CM4141C961-00...
- Page 2 HIOKI CM4141C961-00...
-
Page 3: Table Of Contents
Operating Precautions .....................12 Overview Product Overview and Features ............19 Part Names ....................20 Making Measurements Inspection Before Measurement ............21 Installing Batteries and the Z3210 Wireless Adapter ......22 Installation procedure ....................25 Use of Test Leads ..................28 L9300 Test Lead (accessory) .................30 HIOKI CM4141C961-00 CM4141C961-00... - Page 4 Wireless Communications Function (Z3210 required) ......49 Using GENNECT Cross ..................49 ® Z3210-to-Excel direct data entry function ® (Excel direct input function, HID function) ............54 Rotary Switch Combinations ...............58 Specifications 3.1 General Specifications .................61 3.2 Input Specifications, Measurement Specifications ......64 Accuracy table ..................72 HIOKI CM4141C961-00...
- Page 5 Contents Maintenance and Service Troubleshooting ..................89 Error and Operation Display ..............92 Cleaning ....................93 Index HIOKI CM4141C961-00...
- Page 6 Contents HIOKI CM4141C961-00...
-
Page 7: Introduction
Introduction Introduction Thank you for choosing the Hioki CM4141-50 AC Clamp Meter. To ensure your ability to get the most out of this instrument over the long term, please read this manual carefully and keep it available for future reference. -
Page 8: Notations
• The Bluetooth word mark and logos are registered trademarks owned by Bluetooth SIG, Inc. and any use of such marks by Hioki E.E. Corporation is under license. Other trademarks and trade names are those of their respective owners. Notations Safety notations In this document, the severity levels of risk and hazard are classified as follows. - Page 9 Indicates potential risks of damage to the supported Indicates an action that NOTICE product (or to other must not be performed. property). Indicates an action that must be performed. HIOKI CM4141C961-00...
- Page 10 Indicates that the product can be attached or detached while the circuit is live. Indicates alternating current (AC). Indicates direct current (DC). Indicates the grounding terminal. Indicates the instrument is protected throughout by double insulation or reinforced insulation. HIOKI CM4141C961-00...
- Page 11 A B C D E F G H I J K L M N O P Q R S T U V W X Y Z those indicated on the left. : Wire break detected 1 2 3 4 5 6 7 8 9 0 HIOKI CM4141C961-00...
- Page 12 (maximum errors are expressed as a percentage of full scale (“% f.s.”). display value) Other notations Indicates a buzzer sound (either intermittent or continuous). (p. ) Indicates the page number to reference. Indicates additional information is described below. HIOKI CM4141C961-00...
-
Page 13: Checking Package Contents
When you receive the instrument, inspect it to ensure that no damage occurred during shipment. Pay particular attention to included accessories, panel keys, and terminals. If you find any damage or discover that the instrument does not perform as indicated in its specifications, please contact your authorized Hioki distributor or reseller. -
Page 14: Options
The options listed below are available for the instrument. To order an option, please contact your authorized Hioki distributor or reseller. Options are subject to change. Check Hioki’s website for the latest information. Connection cables When attaching the L4933 or L4934 to test leads, set the test leads to the measurement category II configuration (for the L9207-10, remove the sleeves). - Page 15 *4: CAT III 600 V, 5 A *9: CAT II 1000 V, 1 A *5: CAT III 300 V/CAT II 600 V, 3 A *10: CAT III 600 V, 10 A *11: CAT IV 1000 V/CAT III 2000 V HIOKI CM4141C961-00...
- Page 16 The instrument, test leads, and the instruction manuals can be accommodated. C0203 Carrying Case C0207 Carrying Case (bag type) Z3210 Wireless Adapter Connecting the Z3210 to the instrument enables the wireless communication function. See “2.8 Wireless Communications Function (Z3210 required)” (p. 49). HIOKI CM4141C961-00...
-
Page 17: Safety Information
The instrument conforms to the safety requirements for CAT III 1000 V and CAT IV 600 V measuring instruments. Distribution panel Service entrance Internal wiring Service drop CAT II (≤1000 V) CAT IV CAT III (≤1000 V) (≤600 V) Outlet Power meter Fixed installation HIOKI CM4141C961-00... -
Page 18: Operating Precautions
See “Frequency derating” (p. 65). The maximum measurement current varies with the frequency, and the current that can be measured continuously is limited. Operating the instrument at less than this limitation is referred to as derating. HIOKI CM4141C961-00... - Page 19 Confirm that the white portion (insulation layer) inside the „ cable is not exposed. Using the instrument with a color inside its cable exposed could cause the operator to experience an electric shock. HIOKI CM4141C961-00...
- Page 20 Using the instrument to make measurements that exceed either rating could cause the operator to experience an electric shock. HIOKI CM4141C961-00...
- Page 21 Clamp the instrument around only one conductor. Clamping the instrument around two or more of conductors in a bundle prevents the instrument from measuring any current regardless of whether the measurement target is a single-phase or three-phase circuit. HIOKI CM4141C961-00...
- Page 22 People with electronic medical devices such as pacemakers „ should not use the magnetic adapter. Keep the magnetic adapter away from the body. „ Failure to do so may affect proper operation of the electric medical devices, presenting a hazard to human life. HIOKI CM4141C961-00...
- Page 23 Do not bring the magnetic adapter near precision electronic „ equipment, such as computers, TV screens, or electronic wrist watches. Doing so could damage such devices or data stored in them. HIOKI CM4141C961-00...
- Page 24 Operating Precautions HIOKI CM4141C961-00...
-
Page 25: Overview
Continuity check, resistance Installing the Z3210 Wireless Adapter (optional) to the instrument allows your mobile AUTO V, AC voltage, DC voltage, device to display waveforms and measure AC+DC voltage harmonics. AC current HIOKI CM4141C961-00... -
Page 26: Part Names
Serial number (The serial number consists of 9 digits. The first two (from the left) indicate the year of manufacture, and the next two indicate the month of manufacture.) Rotary switch HOLD Battery cover Operation keys Measurement terminals Strap hole HIOKI CM4141C961-00... -
Page 27: Making Measurements
2.1 Inspection Before Measurement Check if there is any damage to the instrument occurred during storage or shipping and verify that instrument operates normally before using it. If you find any damage, contact your authorized Hioki distributor or reseller. Check Inspection details... -
Page 28: Installing Batteries And The Z3210 Wireless Adapter
OFF position. Failure to do so could cause the operator to experience an electric shock. When the instrument is clamped around the object under measurement, the battery contact terminals are regarded as high-voltage parts. HIOKI CM4141C961-00... - Page 29 Securing the battery cover with another screw could damage the instrument, resulting in bodily injury. If you have lost the screw or find that the screw is damaged, please contact your authorized Hioki distributor or reseller. NOTICE Do not mix batteries of different ages or types.
- Page 30 The instrument may be turned off when the display is backlighted or the buzzer sounds. After use, be sure to turn off the instrument. • Dispose of the batteries in accordance with local regulations. HIOKI CM4141C961-00...
-
Page 31: Installation Procedure
After removing the 3, 4 battery cover, you will find LR03 Alkaline three screws, which are used batteries ×2 to adjust measured values. Do not turn them because the instrument will not be able to perform measurement accurately. HIOKI CM4141C961-00... - Page 32 When installing the Z3210 Wireless Adapter, go on to step When not installing the Z3210 Wireless Adapter, go on to step Remove the protective cap from the instrument. Install the Z3210 Wireless Adapter, observing the correct orientation. Reattach the battery cover and tighten the screw. HIOKI CM4141C961-00...
- Page 33 As the battery charge diminishes, black charge bars disappear, one by one, from the left of the battery indicator. The battery voltage is low. Replace the batteries in good time. (Blinks) The batteries are exhausted. Replace the batteries with fresh ones. HIOKI CM4141C961-00...
-
Page 34: Use Of Test Leads
Use of Test Leads 2.3 Use of Test Leads The L9300 Test Lead (accessory) or the L9207-10 Test Lead (optional) is used for measurement. Depending on measurement locations, use Hioki’s optional measurement cables. See “Options” (p. 8). WARNING When using the instrument, use the test leads and options „... - Page 35 The cables can become rigid. Doing so could damage the insulation or cause a wire break, resulting in an electric shock. Do not step on cords or allow them to caught between other objects. „ Do not touch the tips of test leads. „ HIOKI CM4141C961-00...
-
Page 36: L9300 Test Lead (Accessory)
Doing so could cause short circuit accidents. Switching the measurement category Unlock the protective finger guard. Rotate the grip to unlock, moving the mark along the guide line. Protective finger guard mark Guide line HIOKI CM4141C961-00... - Page 37 Rotate the grip to lock, moving the mark along the guide line. Rotate the grip until it clicks, and make sure that the mark indicates [LOCKED]. Perform the above steps to switch over from measurement category II to measurement category III or IV as well. HIOKI CM4141C961-00...
-
Page 38: Current Measurement
Range (p. 36) Jaw center Default setting: Automatic ranging (highest accuracy) Press the RANGE to switch over to the manual ranging. Measurement accuracy will improve when the wire is placed at the center side of the area mark. (p. 71) HIOKI CM4141C961-00... -
Page 39: Manual Hold, Automatic Hold
Press the HOLD key again to disable the hold function. Remove Illuminate The measured value freezes automatically. Holding down the HOLD key for 1 s to disable the automatic hold function. HIOKI CM4141C961-00... - Page 40 (1) Not frozen automatically (Does not fall below threshold.) (2) Not frozen automatically (Does not exceed threshold.) Measured value Threshold value e.g., 12.0 A : Fluctuation range Time ○ : Measured value to be frozen Start Start Start HIOKI CM4141C961-00...
- Page 41 1.800 V range: within 40 counts 1.800 V range: within 1460 counts *1: The automatic hold function does not support measurement functions not listed in this row. *2: Except the 600.0 mV range (Only with the manual ranging). HIOKI CM4141C961-00...
-
Page 42: Switching The Ranges
Current Measurement Switching the ranges Manual Manual Manual Auto-ranging 60.00 A range 600.0 A range 2000 A range (Default setting) HIOKI CM4141C961-00... -
Page 43: Maximum, Minimum, Average, And Peak Values
2000 A range. The measured value Peak Max freezes. Hold down for 1 s. Cancel The instrument measures RMS Waveform values. Measured value AVG indicates Peak Min (RMS value) the average of all measured values. Display refresh interval HIOKI CM4141C961-00... -
Page 44: Filter Function
(100 A input) Disable the filter function when performing measurement of power supply frequencies Filter off Filter on, passband 100 (Hz) in excess of 100 Hz, for example, on an aircraft or ship. Filter disabled Frequency (Hz) HIOKI CM4141C961-00... -
Page 45: Inrush Current (Ac Inrush)
See “Switching the ranges” (p. 36). ±10 A peak (600.0 A range) (Inrush current In automatic ranging mode, the ±100 A peak (2000 A range) occurrence instrument will be automatically set to period) (about 10 ms to 999 ms) the 2000 A range. HIOKI CM4141C961-00... -
Page 46: Various Other Measurement Functions
Do not apply Do not touch. excessive voltage. DC voltage polarity check (p. 58) If the measured value is negative, the buzzer will sound and the display will be backlighted in red. (threshold: −10 V) (Flash in red) HIOKI CM4141C961-00... - Page 47 Zero adjustment Zero adjustment Hold down Hold down for 1 s. for 1 s. Black Black (Illuminate in red) If resistance values of coils, including motors and transformers, measured with the auto- ranging fluctuate, select the range manually. HIOKI CM4141C961-00...
- Page 48 Various Other Measurement Functions Capacitance measurement Diode measurement Black Black Buzzer sound Intermittent sound: during forward connection (0.15 V to 1.8 V), backlight off Continuous sound: during forward connection (less than 0.15 V), red backlight on HIOKI CM4141C961-00...
- Page 49 Type K thermocouples exhibit a physical phenomenon known as short range ordering, which can cause inaccurate measurements in the range of 250°C to 600°C. DT4910 Thermocouples (K) − Black : The DT4910 is broken. To switch the temperature units, see p. 60. HIOKI CM4141C961-00...
-
Page 50: Lcd Backlight, Automatic Power Save (Aps)
Backlight on of inactivity Automatically shut off after 40 s The instrument is of inactivity automatically turned off. (Automatic shutoff is always enabled) Set the rotary switch to the OFF position to restart. How to cancel: p. 59 HIOKI CM4141C961-00... -
Page 51: Dc High V Probe Mode
Use of other probes could cause the operator to experience an electric shock. NOTICE Connect the instrument and the P2000 together with the strap when „ using the L4943. The cables and plugs will be subjected to stress, damaging them. HIOKI CM4141C961-00... - Page 52 When using the L4930 Connection -3 -3 Cable Set or the L4931 Extension Cable Set (optional) -2 -2 Hang the P2000 in some way, such as using a magnetic strap, not to subject the cables and the plugs to stress. HIOKI CM4141C961-00...
- Page 53 Connect the P2000 DC High Voltage Probe to the measurement terminals of the instrument. Set the range. Automatic ranging 600.0 V range 2000 V range Switch the ranges. (Default setting) Bring the probes into contact with an object Black to be measured. HIOKI CM4141C961-00...
- Page 54 Any position • The DC High V Probe mode start-up setting can be toggled between on and off. • When the DC High V Probe mode start-up is enabled, the instrument will start in the mode you last used. HIOKI CM4141C961-00...
-
Page 55: Wireless Communications Function (Z3210 Required)
• The Z3210 uses the 2.4 GHz band wireless technology. When there is a device that uses the same frequency band such as a wireless LAN (IEEE 802.11.b/g/n) near your mobile device, the communication may not be established. HIOKI CM4141C961-00... - Page 56 Install GENNECT Cross on your mobile device. Turn on the instrument. Enable the wireless communications function. (p. 52) When the instrument is turned on for the first time after the Z3210 has been installed, the wireless communications function will be enabled. HIOKI CM4141C961-00...
- Page 57 • Wait for 5 to 30 s until the connection of the instrument is registered after turning on the instrument. If the connection of the instrument is not registered after 1 minute has elapsed, restart GENNECT Cross and the instrument. Select a measurement function to perform measurement. HIOKI CM4141C961-00...
- Page 58 1 s. appears: Wireless communications function enabled blinks: During wireless communications Off: Wireless communications function disabled When the instrument is turned on for the first time after the Z3210 has been installed, the wireless communications function will be enabled. HIOKI CM4141C961-00...
- Page 59 400 ms may not be accurately measured, for 1 s as described failing to detect them.* above. Event count display *: Current frequency, voltage frequency, capacitance (400 ms to 4000 ms, depending on measured value), temperature (type K thermocouple) 2000 ms HIOKI CM4141C961-00...
-
Page 60: Z3210-To-Excel ® Direct Data Entry Function
HID OFF When you wish to use GENNECT Cross, disable the HID function. The setting whether the HID function has been enabled or disabled will not be saved in the instrument but in the Z3210. Measured value is entered. HIOKI CM4141C961-00... - Page 61 Update the Z3210 firmware to the latest version using GENNECT Cross (version 1.8 or later). To change the HID settings, use the procedure on the following page. To change the HID setting, use the procedure on the following page. HIOKI CM4141C961-00...
- Page 62 Turn on the instrument while holding down the two keys as described below. Any position After exhibiting the following displays, the instrument is automatically turned off. The instrument is automatically turned off. Turn on the instrument again. The HID setting will be toggled. HIOKI CM4141C961-00...
- Page 63 1. Use the Bluetooth setting of your mobile device to delete the instrument. 2. Disable the Z3210’s HID function. (p. 56) 3. Use the Instrument Setting of GENNECT Cross to reconnect the instrument. Check Hioki’s website for the latest information. https://z3210.gennect.net HIOKI CM4141C961-00...
-
Page 64: Rotary Switch Combinations
40 Saved (on/off) LCD all segments display (Firmware version number, model number, serial number p. 21 Any position − − (only four digits), p. 55 Confirming the HID setting (Z3210 required)* Buzzer (on/off) − Any position Saved HIOKI CM4141C961-00... - Page 65 Automatic backlight shutoff p. 44 Any position Saved (on/ off) Saving the DC High V Probe mode settings p. 45 Saved Any position (on/off) Toggling the HID setting (on/off) p. 56 − −* (Z3210 required) Any position HIOKI CM4141C961-00...
- Page 66 To save the setting Hold down for 1 s. *1: The screen display depends on the rotary switch position. *2: The setting whether the HID function has been enabled or disabled will be saved in the Z3210. HIOKI CM4141C961-00...
-
Page 67: Specifications
Operating −25°C to 65°C (−13°F to 149°F), 90% RH or less (no condensation) temperature and humidity range Storage temperature −30°C to 70°C (−22°F to 158°F), 90% RH or less and humidity range (no condensation, with batteries removed) HIOKI CM4141C961-00... - Page 68 12.5 mm in diameter. 0: The equipment inside the enclosure is not protected against the harmful effects of water. Standards Safety EN 61010 EN 61326 Power supply LR03 Alkaline batteries ×2 Rated supply voltage: 1.5 V DC ×2 HIOKI CM4141C961-00...
- Page 69 Maximum φ55 mm measurable conductor diameter Weight Approx. 300 g (10.6 oz., including batteries) Product warranty 3 years or until the jaw open/close cycles reaches 30,000, whichever comes first duration Accessories p. 7 Options p. 8 HIOKI CM4141C961-00...
-
Page 70: Input Specifications, Measurement Specifications
1000 V AC (measurement category III) Anticipated transient overvoltage: 8000 V Measurement method True RMS measurement Measurement terminals COM terminal, V terminal Coupling type AC current Current frequency AC Inrush AC coupling AC voltage* Voltage frequency Other measurement DC coupling parameters HIOKI CM4141C961-00... - Page 71 *1: Does not apply to AC detection in Auto V mode and to the AC component of AC+DC voltage mode. *2: Does not include range switching time. Current measurement specifications Frequency derating 3000 A AC or 6 × 10 A·Hz, whichever is lower (continuous, designed value) Zero-display range AC current 5 counts or less HIOKI CM4141C961-00...
- Page 72 AC current 1 ms or more (with filter disabled) width AC Inrush Voltage measurement specifications Overload protection 1100 V DC 1100 V AC or 2 × 10 V·Hz, whichever is lower (Up to 1 minute of continuous application) HIOKI CM4141C961-00...
- Page 73 1 ms or more (with filter disabled) width Ω *1: Defined for 1 k unbalance assuming that the input frequency is 0 Hz, 50 Hz, or 60 Hz *2: Defined assuming that the input frequency is 50 Hz or 60 Hz. HIOKI CM4141C961-00...
- Page 74 Stabilization time for Temperature (Type K Up to 120 minutes reference junction thermocouple) (Reference: when the instrument having a compensation of temperature of 23°C is left to stand in instrument ambient environments of 65°C for 60 minutes) HIOKI CM4141C961-00...
- Page 75 See “(8) DC high voltage (DC High V Probe mode)” (p. 84) in “3.3 Accuracy measurement Table.” accuracy *1: The specifications above apply when both of the following two conditions are satisfied only: (1) the P2000 is connected, and (2) the instrument is in DC High V Prove mode. HIOKI CM4141C961-00...
- Page 76 3 year (duration for which 1.5 times accuracy shown in the accuracy table is guaranteed), value for reference purposes Accuracy guarantee 1 year duration after adjustment made by Hioki Accuracy guarantee 23°C ±5°C (73°F ±9°F), 90% RH or less temperature and humidity (non-condensing) range Accuracy guarantee of continuity check and resistance measurement assumes that zero adjustment has been performed.
- Page 77 Within ±5.0% rdg (Finished outer diameter: 13 Effects of radiated Add ±2% rdg at 10 V/m. radio-frequency electromagnetic field *1: Defined assuming that 100 A current having a frequency of 55 Hz is measured, with respect to the jaw’s center-point. HIOKI CM4141C961-00...
-
Page 78: Accuracy Table
30 Hz ≤ f< 45 Hz, ±2.0% rdg ±5 A ±2.5% rdg ±5 A counts) 66 Hz < f < 1 kHz* *1: Accuracy not defined beyond 66 Hz. *2: Designed values apply beyond 6 × 10 A·Hz. HIOKI CM4141C961-00... - Page 79 30.00 Hz to 99.99 Hz (0.01 Hz) ±0.1% rdg ±0.01 Hz (more than 9999 counts) 999.9 Hz 30.0 Hz to 999.9 Hz (0.1 Hz) ±0.1% rdg ±0.1 Hz* (less than 900 counts) *1: Add ±0.2 Hz if the frequency is less than 100.0 Hz. HIOKI CM4141C961-00...
- Page 80 40 Hz ≤ f ≤ 500 Hz ±5.0% rdg ±1.3 A (0.1 A) 2000 A 100 A to 2000 A 40 Hz ≤ f ≤ 500 Hz* ±5.0% rdg ±13 A (1 A) *1: Designed values apply beyond 6 × 10 A·Hz. HIOKI CM4141C961-00...
- Page 81 Auto V (AC/DC voltage automatic detection) When AC is detected: Conforms to the accuracy specifications described in “(7) AC+DC voltage” (p. 81). When DC is detected: Conforms to the accuracy specifications described in “(6) DC voltage” (p. 79). HIOKI CM4141C961-00...
- Page 82 ±0.05 V ±0.05 V 6000 counts, (0.01 V) 45 Hz ≤ f ≤ 66 Hz ±0.9% rdg ±1.4% rdg less than 540 ±0.03 V ±0.03 V counts) 66 Hz < f < 1 kHz ±1.5% rdg − ±0.05 V HIOKI CM4141C961-00...
- Page 83 *1: Accuracy within the frequency range of 15 Hz (inclusive) to 20 Hz (exclusive) is designed values. *2: Within the frequency range of less than 45 Hz, the accuracy guarantee assumes a superposed DC voltage of less than 500 V. *3: Defined assuming that the 50 Hz AC is input. HIOKI CM4141C961-00...
- Page 84 *3: Values of up to ±1200 V are displayed, but accuracy is not defined for display values in excess of 1000 V (values for reference purposes). *4: Values of up to ±1500 V are displayed, but accuracy is not defined for display values in excess of 1000 V (values for reference purposes). HIOKI CM4141C961-00...
- Page 85 ±5% (more than 6000 counts, less (0.1 V) ±0.3 V than 540 counts) Ω 1000 V ±0 V to ±1000 V ±0.5% rdg 6.0 M ±5% (less than 540 counts) (1 V) ±3 V *1: Assumes DC input. HIOKI CM4141C961-00...
- Page 86 60.00 V 0.0 V to ±120.0 V ±1.0% rdg ±0.7 V (0.1 V) 600.0 V 0 V to ±1000 V ±1.0% rdg ±7 V (1 V) 1000 V 0 V to ±1000 V ±1.0% rdg ±7 V (1 V) HIOKI CM4141C961-00...
- Page 87 AC: 3.1 M ±5% 6000 counts, (0.01 V) ±1.0% rdg ±1.5% rdg less than 540 45 Hz ≤ f ≤ 66 Hz ±0.13 V ±0.13 V counts) 66 Hz < f < 1 kHz ±1.5% rdg − ±0.13 V HIOKI CM4141C961-00...
- Page 88 66 Hz < f < 1 kHz ±1.5% rdg − ±7 V *1: Accuracy within the frequency range of 10 Hz (inclusive) to 20 Hz (exclusive) is designed values. *2: Defined assuming that the DC or 50 Hz AC is input. HIOKI CM4141C961-00...
- Page 89 *2: Values of up to ±1200 V are displayed, but accuracy is not defined for display values in excess of 1000 V (values for reference purposes). *3: Values of up to ±1500 V are displayed, but accuracy is not defined for display values in excess of 1000 V (values for reference purposes). HIOKI CM4141C961-00...
- Page 90 ±0.1% rdg ±0.01 Hz counts, less than 900 counts) (0.01 Hz) 999.9 Hz 1.0 Hz to 999.9 Hz ±0.1% rdg ±0.1 Hz* (less than 900 counts) (0.1 Hz) *1: Add ±0.2 Hz if the frequency is less than 100.0 Hz. HIOKI CM4141C961-00...
- Page 91 Ω (more than 6000 counts, less than 540 counts) (0.1 k ±0.5 k Ω Ω Ω 6.000 M 0.000 M to 6.000 M 100 nA ±20% ±1.0% rdg Ω Ω (less than 540 counts) (0.001 M 0.005 M HIOKI CM4141C961-00...
- Page 92 10 µA ±20% ±0.5 µF less than 100 counts) 100 µA ±20% 1000 µF 0 µF to 1100 µF 10 µA ±20% ±1.9% rdg (less than 100 counts) (1 µF) 100 µA ±20% ±5 µF 200 µA ±20% HIOKI CM4141C961-00...
- Page 93 *1: Prescribed conditions (assuming that an ambient temperature where the instrument is left to stand stabilizes in the range of ±1°C) *2: The temperature unit can be switched over to Fahrenheit by a special operation on the instrument. HIOKI CM4141C961-00...
- Page 94 Accuracy table HIOKI CM4141C961-00...
-
Page 95: Maintenance And Service
Close the jaw tips. The jaw is damaged. The instrument with its jaw damaged cannot measure current accurately. Have the instrument repaired. Displayed values can frequently fluctuate due to induction potential even with no input. This, however, is not a malfunction. HIOKI CM4141C961-00... - Page 96 (vibration); however, there is no effect on the measurement. The measured value does not The test leads have a break. Check the continuity of the test appear. leads. (p. 41) If a break is found, replace the test leads. HIOKI CM4141C961-00...
- Page 97 If you wish to measure current, leaving the instrument clamped remove the instrument from a around a measurement target. measurement target to perform zero adjustment. If problems cannot be resolved even after you have implemented such remedies, have the instrument repaired. HIOKI CM4141C961-00...
-
Page 98: Error And Operation Display
Err 001 Program When the error appears on the display, it is ROM error Err 002 necessary to repair the instrument. Please Adjustment data contact your authorized Hioki distributor or Err 004 Memory error reseller. ADC error Err 005 Hardware malfunction Perform the following steps. -
Page 99: Cleaning
Keep the the facing core surfaces of the jaws clean by gently wiping them with a soft dry cloth. Dirt on the facing core surfaces of the jaws can adversely affect the measurement accuracy. Wipe the LCD gently with a soft, dry cloth. HIOKI CM4141C961-00... - Page 100 Cleaning HIOKI CM4141C961-00...
-
Page 101: Index
Backlight ......... 24, 44, 59 Buzzer ..........24, 40, 58 Filter ............38 Flashing red backlight......... 40 Fluctuation ..........89 Continuity check ....... 35, 41, 85, 90 Frequency........32, 40, 73 Current..........32, 65 GENNECT Cross ........49 HIOKI CM4141C961-00... - Page 102 Serial number ..........20 Manual hold ..........33 Temperature ......... 43, 87 Maximum value .......... 37 Test leads ........7, 8, 28, 91 Measurement function ....19, 35, 40 Minimum value ........... 37 Voltage..........40, 66 Noise ............38 HIOKI CM4141C961-00...
- Page 103 Index Wire break ..........21, 43 Wireless Adapter ........22, 49 Wireless communications ......49 Z3210 ........... 22, 49 Zero adjustment........41, 91 HIOKI CM4141C961-00...
- Page 104 Index HIOKI CM4141C961-00...
- Page 105 HIOKI CM4141C961-00...
- Page 106 HIOKI CM4141C961-00...
- Page 107 HIOKI CM4141C961-00...
- Page 108 HIOKI CM4141C961-00...
Need help?
Do you have a question about the CM4141-90 and is the answer not in the manual?
Questions and answers