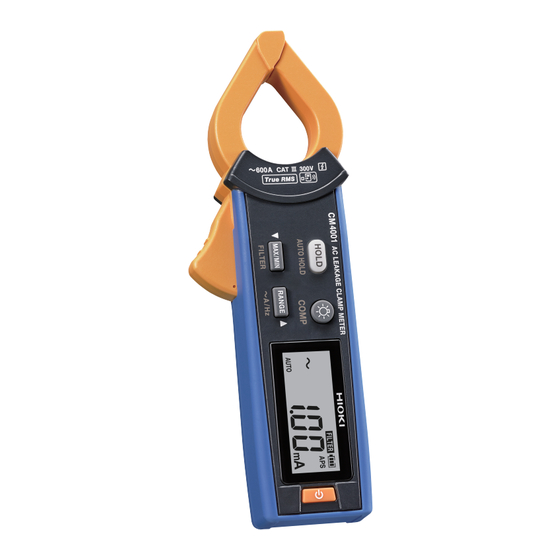
Summary of Contents for Hioki CM4001
- Page 1 CM4001 Instruction Manual Downloadable Version AC LEAKAGE CLAMP METER Nov. 2022 Edition 1 CM4001A963-00 22-11H HIOKI CM4001A963-00...
- Page 2 HIOKI CM4001A963-00...
- Page 3 • The Bluetooth word mark and logos are registered trademarks owned by Bluetooth SIG, Inc. and any use of such marks by Hioki E.E. Corporation is under license. Other trademarks and trade names are those of their respective owners. HIOKI CM4001A963-00...
-
Page 4: Making Measurements
Wear appropriate protective gear such as gloves. Clamp the instrument so that the object under measurement is located at the center of the jaws. Read the measured value. Press RANGE key for 1 s or more to switch between frequency measurement and current measurement. HIOKI CM4001A963-00... -
Page 5: Leakage Current Measurement
If the jaws are even slightly open, measured values will include errors and the accuracy cannot be ensured. HIOKI CM4001A963-00... - Page 6 • If the insulation on the load device has deteriorated at location B in the figure, you can detect the leakage current through the measurement by clamping around the bundled wires, not at location but location Load Load Leakage equipment equipment current HIOKI CM4001A963-00...
-
Page 7: Measuring Load Current
• Depending on the magnitude of the input current, the jaws may generate a sound due to resonance; however, this does not affect any measurement. • When you cannot find the magnitude of an input current, disable the filter function and start measurement using the auto range or 600.0 A range. HIOKI CM4001A963-00... - Page 8 If measured values greatly vary depending on the range selected manually, trust the one measured using the upper range. For detail information, please visit our website. GENNECT Cross > FAQ > Measured values differ greatly depending on the leakage current meter’s measurement range. HIOKI CM4001A963-00...
-
Page 9: Manual Hold
When the measured value become stable, the display refresh stops automatically. When performing the next measurement, remove the instrument from the wire and clamp the instrument around the object under measurement again. (To cancel, hold down the HOLD key for 1 s or more.) HIOKI CM4001A963-00... - Page 10 The variation range and threshold value may vary depending on the range. Range Variation width Threshold value 60.00 mA 600.0 mA 400 counts or less 6.000 A 150 counts 60.00 A 500 counts or less 600.0 A HIOKI CM4001A963-00...
- Page 11 • To freeze the readouts, press the HOLD key. • The instrument measures the RMS value. AVG means the average value of all measured values. Peak max. Waveform Max. Measured value Min. Peak min. (RMS value) Display refresh interval HIOKI CM4001A963-00...
- Page 12 Auto 600.0 A range 60.00 mA 600.0 mA range 600.0 mA, 6.000 A, 60.00 A, 600.0 A Range when the current is measured To cancel, hold down the MAX/MIN and RANGE keys simultaneously for 1 s or more. HIOKI CM4001A963-00...
-
Page 13: Comparator Function (Comp)
Press the MAX/MIN key or RANGE key to set the threshold value. Holding down the key increases or decreases the value continuously. Press the HOLD key. The threshold value is confirmed, and the instrument displays the measurement screen. Video Find issues faster with a comparator function on YouTube HIOKI CM4001A963-00... - Page 14 The filter setting is confirmed, and the [HOLD] symbol and the [rUn] segments blink on the display. To change the threshold value Press the MAX/MIN key or RANGE key to return to the threshold value selection screen (step Press the HOLD key. The instrument starts event logging. HIOKI CM4001A963-00...
- Page 15 The instrument display the maximum value from the recording start. The blinking red backlight warns you that the maximum value exceeds the set threshold value. Press HOLD to freeze the readout. Finishing the simple event logging Cycle the instrument. HIOKI CM4001A963-00...
-
Page 16: Display Backlight
• If the measured value exceeds the threshold value with the comparator function or event recording function The warning backlight works only for the present measured value. The warning backlight does not work for the freezing value and recorded values of the MAX, MIN, AVG, PEAK MAX, and PEAK MIN display functions. HIOKI CM4001A963-00... - Page 17 When the instrument is placed on the floor or ground, the communication distance becomes shorter. It is recommended that you move the instrument from the floor or ground and place it on a desk or table or hold it by hand. HIOKI CM4001A963-00...
- Page 18 • Wait for 5 to 30 s until the connection of the instrument is registered after turning on the instrument. If the connection of the instrument is not registered after 1 minute has elapsed, restart GENNECT Cross and the instrument. HIOKI CM4001A963-00...
- Page 19 • The instrument can record up to 99 events. The event recording terminates when the recorded events reach 99 in number. • When you start another event logging session, the instrument deletes previously logged data. HIOKI CM4001A963-00...
- Page 20 If you do not wish to change the HID setting, press the power key to turn off the instrument. Press the MAX/MIN or RANGE key to enable or disable the HID function. The HOLD key blinks. Every time you press the key, the HID function switches on and off. HIOKI CM4001A963-00...
- Page 21 1. Use the Bluetooth ® setting of your mobile device to delete the instrument. 2. Disable the Z3210’s HID function. 3. Use the Instrument Setting of GENNECT Cross to reconnect the instrument. For detail information, please visit the Z3210’s website. HIOKI CM4001A963-00...
- Page 22 HIOKI CM4001A963-00...


Need help?
Do you have a question about the CM4001 and is the answer not in the manual?
Questions and answers