
Related Manuals for Whirlpool AKZM 8900


Summary of Contents for Whirlpool AKZM 8900
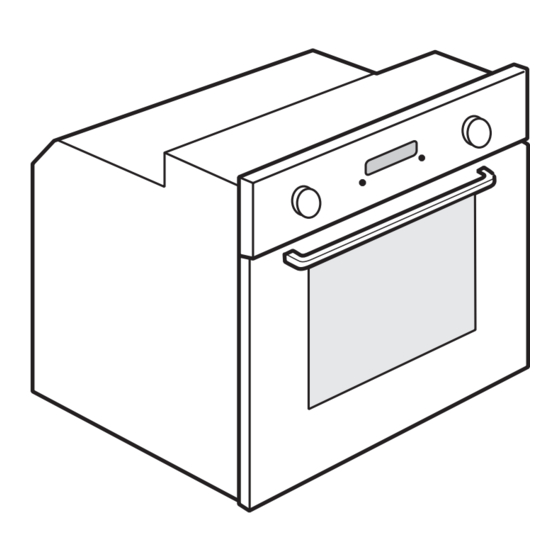
- Page 1 AKZM 8900 User and maintenance manual Manuel d’utilisation et d’entretien Manuale d’uso e manutenzione Gebruiksaanwijzing en Onderhoudshandleiding...
-
Page 2: Important Safety Instructions
IMPORTANT SAFETY INSTRUCTIONS YOUR SAFETY AND THAT OF OTHERS IS PARAMOUNT This manual and the appliance itself provide important safety warnings, to be read and observed at all times. This is the danger symbol, pertaining to safety, which alerts users to potential risks to themselves and others. - Page 3 - Do not touch the appliance with any wet part of the body and do not operate it when barefoot. - This appliance is designed solely for use as a domestic appliance for cooking food. No other type of use is permitted (e.g.: heating rooms).
- Page 4 - Overheated oils and fats catch fire easily. Always remain vigilant when cooking foods rich in fat and oil. - Never leave the appliance unattended during food drying. - If alcoholic beverages are used when cooking foods (e.g. rum, cognac, wine), remember that alcohol evaporates at high temperatures.
-
Page 5: Installation
INSTALLATION After unpacking the oven, make sure that it has not been damaged during transport and that the oven door closes properly. In the event of problems, contact the dealer or your nearest After-sales Service. To prevent any damage, only remove the oven from its polystyrene foam base at the time of installation. To safely move the oven, use the handle provided in the accessories pack. -
Page 6: General Recommendations
GENERAL RECOMMENDATIONS Before use: Remove protective cardboard pieces, protective film and adhesive labels from accessories, induction plate and cooking vessel. Remove the accessories from the oven. Position the induction plate at the third level and plug it in. Place the cooking vessel on the induction plate and fill it in with 200g of water. Select the Top Finishing function and run the oven for approximately one hour to eliminate the smell and fumes from the insulating materials and protective grease. -
Page 7: Declaration Of Conformity
Energy saving Only pre-heat the oven if specified in the cooking table or your recipe. Induction functions do not require pre-heating. When cooking using induction mode, use the supplied cooking vessel which is designed to maximize energy saving. Use dark lacquered or enamelled baking moulds as they absorb heat far better. In standard (non-induction) mode, switch the oven off 10/15 minutes before the set cooking time. -
Page 8: Maintenance
CLEANING Never use steam cleaning equipment. WARNING Only clean the oven when it is cool to the touch. Disconnect the appliance from the power supply. Oven exterior IMPORTANT: do not use corrosive or abrasive detergents. If any of these products accidentally comes into contact with the appliance, clean immediately with a damp Microfibre cloth. -
Page 9: Moving The Top Heating Element (Some Models Only)
To refit the door: Insert the hinges in their seats. Open the door fully. Lower the two catches. Close the door. Fig. 1 Fig. 2 REMOVING THE SIDE GRILLES The accessory-holder grilles are equipped with two fixing screws (fig. 1) for optimum stability. Remove the screws and fixing plates on the right and left with the aid of a coin or tool. -
Page 10: Replacing The Oven Lamp
REPLACING THE OVEN LAMP To replace the rear lamp (if present): Disconnect the oven from the power supply. Unscrew the lamp cover (Fig. 7), replace the lamp (see note for lamp type) and screw the lamp cover back on. Reconnect the oven to the power supply. To replace the side lamp (if present): Disconnect the oven from the power supply. -
Page 11: Instructions For Oven Use
INSTRUCTIONS FOR OVEN USE FOR ELECTRICAL CONNECTION, SEE THE PARAGRAPH ON INSTALLATION The induction oven is equipped with an electrical socket on the rear wall of the oven to supply power to the heating element inside the induction plate when plugged in. The induction plate is designed to work together with the induction cooking vessel supplied with the oven. -
Page 12: Accessories Not Supplied
ACCESSORIES NOT SUPPLIED Other accessories can be purchased separately from the After-sales Service. INSERTING WIRE SHELVES AND OTHER ACCESSORIES IN THE OVEN WIRE SHELVES AND OTHER ACCESSORIES: The wire shelf and other accessories are provided with a locking mechanism to prevent their accidental removal. -
Page 13: Control Panel Description
REMOVAL OF THE COOKING VESSEL AND INDUCTION PLATE REMOVING THE COOKING VESSEL: IMPORTANT: The induction cooking vessel can become extremely hot. Always use oven gloves to touch and move it. Fig. 1 Fig. 2 Using both hands, grasp the front handle and partially remove the cooking vessel (Fig. 1). Then use the lateral handles to better grasp and fully remove the cooking vessel (Fig. -
Page 14: List Of Functions
LIST OF FUNCTIONS After switching on the oven, press the symbol and the display will show the following indication. Press any key to skip the message. NOTE: The induction first alert can be disabled/enabled through the Settings Menu. If the induction plate is already properly engaged, when oven is switched on, the induction first alert will not be shown. - Page 15 To browse the various possibilities, press buttons : the selectable function is highlighted in white in the centre of the screen. N.B.: for the list and description of functions, see the specific table at page 47 and at page 52. If the induction plate is already properly engaged or whenever the induction plate is inserted, only Induction Functions and Settings will be accessible through the main menu.
-
Page 16: Setting Cooking Time
Confirm by pressing : the settings are displayed on the screen. If the proposed temperature is that desired, press , otherwise proceed as described in previous paragraphs to change it. An acoustic signal will sound when the oven has reached the set temperature. At the end of preheating, the oven automatically selects the conventional function At this point food can be placed in the oven for cooking. - Page 17 TIMER 00 : 00 : 00 01 : 10 : 00 01 : 09 : 00 (HH) (MM) (SS) (HH) (MM) (SS) Press to set Timer, ✓ to Start Press to set Timer, ✓ to Start Timer This function can be used only with the oven switched off and is useful, for example, for monitoring the cooking time of pasta.
- Page 18 Select Induction Functions using buttons and confirm with , or press Select the food category to be cooked from the proposed list and confirm using According to food category, further subcategory and/or food weight may be selected by scrolling the sub menu with and confirmed with Press button...
-
Page 19: Function Description Table
FUNCTION DESCRIPTION TABLE MAIN MENU Setting the display (language, time, brightness, volume of acoustic signal, SETTINGS energy saving function). Selecting 30 different pre-set recipes (see enclosed recipe booklet). The oven automatically sets the optimum cooking temperature, function RECIPES and time. It is important to follow the instructions given in the recipe book regarding preparation, accessories and which oven shelf to use. - Page 20 SPECIALS To speed up defrosting of food. Place food on the middle shelf. Leave food DEFROST in its packaging in order to prevent it from drying out on the outside. For keeping just-cooked food hot and crisp (e.g: meat, fried food or flans). KEEP WARM Place food on the middle shelf.
- Page 21 INDUCTION FUNCTIONS The function automatically selects the ideal Roast beef cooking temperature and mode for different 4 steps: from 0.6 to 2 kg weight categories (see oven display). It is Roast meat Roasted possible to roast any type of meat (e.g. beef, 3 steps: from 1 to 4 kg Meat veal, pork, ribs, lamb, etc.).
- Page 22 These functions are ideal for finishing any dish Low grill that requires a grill or gratin cooking mode. Using three different level of grill, it is possible Medium grill Finishing to control the power or speed of this cooking mode. During top finishing the tray is not High grill functional.
- Page 23 Range time Range time Recipe with cooking Pre- Level Tempera- Function (min.-max) (min.-max) vessel (provided) heat tray ture LOW* HIGH* Cod fish Fish fillet / piece Automatic Roasted potatoes Automatic Vegetables – roasted Mixed vegetables Automatic Stuffed zucchini Automatic Vegetables – stuffed Stuffed tomatoes Automatic...
-
Page 24: Cooking Table
COOKING TABLE Recipe Function Pre- Shelf (from Temp. Time Accessories and notes heating bottom) (°C) (min) 160-180 30-90 Cake tin on rack Leavened cakes Level 4: cake tin on rack 160-180 30-90 Level 1: cake tin on rack Drip-tray / baking tray or 160-200 35-90 Filled pies... - Page 25 Recipe Function Pre- Shelf (from Temp. Time Accessories and notes heating bottom) (°C) (min) 180-190 40-55 Cake tin on rack Level 4: cake tin on rack 180-190 45-70 Savoury pies Level 1: cake tin on rack (vegetable pie, Level 5: cake tin on rack quiche lorraine) Level 3: cake tin on rack 1-3-5...
- Page 26 Recipe Function Pre- Shelf (from Temp. Time Accessories and notes heating bottom) (°C) (min) Drip-tray or baking tray (turn food two thirds of the way Baked potatoes Medium 45-55 through cooking if necessary) Vegetables au gratin High 10-15 Pan on rack Level 4: pan on rack Lasagna &...
- Page 27 TESTED RECIPES in compliance with IEC 50304/60350:2009-03 and DIN 3360-12:07:07 Recipe Function Pre- Shelf (from Temp. Time Accessories and notes heating bottom) (°C) (min) IEC 60350:2009-03 § 8.4.1 15-30 Drip-tray / baking tray Shortbread Level 4: baking tray 20-35 Level 1: drip-tray IEC 60350:2009-03 §...
-
Page 28: Recommended Use And Tips
RECOMMENDED USE AND TIPS How to read the cooking table The table indicates the best function to use for any given food, to be cooked on one or more shelves at the same time. Cooking times start from the moment food is placed in the oven, excluding pre-heating (where required). - Page 29 When using the roast Meat and whole roast Chicken functions, the meat does not need to be turned over. For the “Roast beef” function: after cooking for 15 minutes it is recommended that the meat is turned to achieve even surface browning. When the beef is cooked to your liking take it out of the oven and leave to rest.
- Page 30 Printed in Italy 09/2012 5019 300 00560A...
Need help?
Do you have a question about the AKZM 8900 and is the answer not in the manual?
Questions and answers