
Related Manuals for Whirlpool AKZM 8350


Summary of Contents for Whirlpool AKZM 8350
- Page 1 AKZM 8350 Інструкція з користування та технічного обслуговування Руководство по эксплуатации и техническому обслуживанию...
-
Page 3: Important Safety Instructions
IMPORTANT SAFETY INSTRUCTIONS These instructions shall also be available on website: www.whirlpool.eu YOUR SAFETY AND THAT OF OTHERS IS VERY IMPORTANT This manual and the appliance itself provide important safety warnings, to be read and observed at all times. This is the danger symbol, pertaining to safety, which alerts users to potential risks to themselves and others. - Page 4 - Do not touch the appliance with any wet part of the body and do not operate it when barefoot. - This appliance is designed solely for use as a domestic appliance for cooking food. No other type of use is permitted (e.g.: heating rooms).
-
Page 5: Installation
- Never leave the appliance unattended during food drying. - If alcoholic beverages are used when cooking foods (e.g. rum, cognac, wine), remember that alcohol evaporates at high temperatures. As a result, there is a risk that vapours released by the alcohol may catch fire upon coming into contact with the electrical heating element. -
Page 6: General Recommendations
GENERAL RECOMMENDATIONS Before use: Remove cardboard protection pieces, protective film and adhesive labels from accessories. Remove the accessories from the oven and heat it at 200° for about an hour to eliminate the smell and fumes from the insulating materials and protective grease. During use: Do not place heavy objects on the door as they could damage it. -
Page 7: After Sales Service
AFTER-SALES SERVICE Before calling the After-Sales Service: See if you can solve the problem yourself with the help of the suggestions given in the “Troubleshooting guide“. Switch the appliance off and back on again it to see if the fault persists. If after the above checks the fault still occurs, get in touch with the nearest After-sales Service. -
Page 8: Maintenance
10. Then start cleaning using the sponge provided, moistened with hot water (cleaning could be compromised if delayed by more than 15 minutes). Particularly stubborn grime To eliminate particularly stubborn grime, repeat the STARCLEAN™ cycle and add a few drops of neutral detergent while removing the grime. -
Page 9: Moving The Top Heating Element (Some Models Only)
MOVING THE TOP HEATING ELEMENT (SOME MODELS ONLY) Remove the side accessory holder grilles (Fig. 3). Pull the heating element out a little (Fig. 4) and lower it (Fig. 5). To reposition the heating element, lift it up, pulling it slightly towards you, making sure it comes to rest on the lateral supports. -
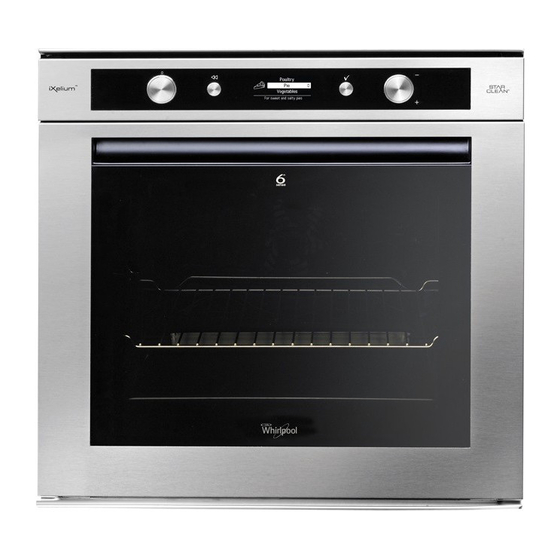
Page 10: Instructions For Oven Use
INSTRUCTIONS FOR OVEN USE FOR ELECTRICAL CONNECTION, SEE THE PARAGRAPH ON INSTALLATION Control panel Upper heating element/grill Cooling fan (not visible) Dataplate (not to be removed) Light Circular heating element (not visible) Turnspit (if present) Lower heating element (not visible) 10. -
Page 11: Control Panel Description
INSERTING WIRE SHELVES AND OTHER ACCESSORIES IN THE OVEN Insert the wire shelf horizontally, with the raised part “A” upwards (Fig. 1). The other accessories, like the drip tray and baking tray, are inserted with the raised part on the flat section “B”... - Page 12 USING THE APPLIANCE FOR THE FIRST TIME - LANGUAGE SELECTION AND SETTING THE TIME For correct use of the oven, when it is switched on for the first time you will have to select the desired language and set the correct time. Proceed as follows: Turn the “Functions”...
-
Page 13: Preheating The Oven
PREHEATING THE OVEN 200°C --:-- 200°C --:-- TEMPERATURE COOK TIME TEMPERATURE COOK TIME Conventional Conventional --:-- --:-- PREHEAT Start END TIME PREHEAT Start END TIME 200°C --:-- 200°C --:-- TEMPERATURE COOK TIME TEMPERATURE COOK TIME Conventional Conventional --:-- --:-- PREHEAT Start END TIME PREHEAT... - Page 14 SETTING END OF COOKING TIME / DELAYED START The end of cooking time can be set, delaying the start of cooking by up to a maximum of 23 hours and 59 minutes. This can only be done once cooking time has been set. This setting is only possible when pre-heating is not required for the selected function.
- Page 15 RECIPES Thanks to “Sixth sense” technology, the oven offers 30 pre-set recipes with ideal cooking temperatures. Simply follow the recipe as regards ingredients and the method of preparation. Then, proceed as follows: Dessert Dessert Meat Meat Fish Fish 6th Sense: Press ✓ to view recipes 6th Sense: Press ✓...
- Page 16 STARCLEAN™ CLEANING CYCLE To keep the oven in best condition, carry out the STARCLEAN™ cleaning cycle after each use. The cycle takes 35 minutes, including a cooling stage, and must be carried out as follows: For the description of this function, see the section CLEANING and the functions table on page 15. Proceed with oven cold.
-
Page 17: Functions Description Table
FUNCTIONS DESCRIPTION TABLE FUNCTIONS KNOB To stop cooking and switch off the oven. FAST PREHEATING To preheat the oven rapidly. To cook any kind of dish on one shelf only. Use the 3rd shelf. To cook CONVENTIONAL pizza, savoury pies and sweets with liquid fillings, use the 1st or 2nd shelf. -
Page 18: Frozen Food
SPECIAL FUNCTIONS To speed up defrosting of food. Place food on the middle shelf. DEFROST Leave food in its packaging in order to prevent it from drying out on the outside. For keeping just-cooked food hot and crisp (e.g: meat, fried food or KEEP WARM flans). -
Page 19: Cooking Table
COOKING TABLE Recipe Function Pre- Shelf (from Temp. Time Accessories and notes heating bottom) (°C) (min) 160-180 30-90 Cake tin on wire shelf Leavened cakes Level 4: cake tin on wire shelf 160-180 30-90 Level 1: cake tin on wire shelf Drip-tray / baking tray or cake 160-200 35-90... - Page 20 Recipe Function Pre- Shelf (from Temp. Time Accessories and notes heating bottom) (°C) (min) 190-200 20-30 Drip-tray or baking tray Level 4: pan on wire shelf Vols-au-vent / 180-190 20-40 Level 1: drip-tray or baking tray Puff pastry Level 5: pan on wire shelf savouries 1-3-5 180-190 20-40*...
- Page 21 Recipe Function Pre- Shelf (from Temp. Time Accessories and notes heating bottom) (°C) (min) Level 4: pan on wire shelf Lasagna & Meat 50-100* Level 1: drip-tray or pan on wire shelf Level 4: pan on wire shelf Meat & Potatoes 45-100* Level 1: drip-tray or pan on wire shelf...
- Page 22 TESTED RECIPES in compliance with IEC 60350-1:2011-12 and DIN 3360-12:07:07 Recipe Function Pre- Shelf (from Temp. Time Accessories and notes heating bottom) (°C) (min) IEC 60350-1:2011-12 § 7.5.2 15-30 Drip-tray / baking tray Shortbread Level 4: baking tray 25-40 Level 1: drip tray/baking tray IEC 60350-1:2011-12 §...
-
Page 23: Recommended Use And Tips
RECOMMENDED USE AND TIPS How to read the cooking table The table indicates the best function to use for any given food, to be cooked on one or more shelves at the same time. Cooking times start from the moment food is placed in the oven, excluding preheating (where required). - Page 25 117105, г. Москва, Варшавское шоссе, дом 9, стр.1Б, 3 эт. Адрес: Виа АюМоро 5 Телефон горячей линии в РФ: 8-800-100-57-31 21024 Кассинетта ди Биандронно Whirlpool Europe s.r.l. Варезе - Италия Viale Guido Borghi, 27 - 21025 Comerio (Varese) ITALY Виерлпул Европа с.р.л.
Need help?
Do you have a question about the AKZM 8350 and is the answer not in the manual?
Questions and answers