Table of Contents
Advertisement
Service and Maintenance Instructions
CONTENTS
SAFETY CONSIDERATIONS . . . . . . . . . . . . . . . . . . . 2
UNIT ARRANGEMENT AND ACCESS . . . . . . . . . . . . 3
General . . . . . . . . . . . . . . . . . . . . . . . . . . . . . . . . . . . . . 3
Routine Maintenance . . . . . . . . . . . . . . . . . . . . . . . . . 3
Filters . . . . . . . . . . . . . . . . . . . . . . . . . . . . . . . . . . . . . . 3
SUPPLY FAN (BLOWER) SECTION . . . . . . . . . . . . . . 4
Supply Fan (Direct-Drive) . . . . . . . . . . . . . . . . . . . . . . 4
Staged Air Volume . . . . . . . . . . . . . . . . . . . . . . . . . . 10
COOLING . . . . . . . . . . . . . . . . . . . . . . . . . . . . . . . . . . 10
Condenser Coil (Outdoor) . . . . . . . . . . . . . . . . . . . . 10
Evaporator Coil (Indoor) . . . . . . . . . . . . . . . . . . . . . . 10
Recommendation . . . . . . . . . . . . . . . . . . . . . . . . . 10
Evaporator Coil . . . . . . . . . . . . . . . . . . . . . . . . . . . . . 12
Refrigeration System Components . . . . . . . . . . . . . 12
Evaporator Coil Metering Devices . . . . . . . . . . . . . . 12
THERMOSTATIC EXPANSION VALVE (TXV) . . . . . 13
TXV Operation . . . . . . . . . . . . . . . . . . . . . . . . . . . . . . 13
Replacing TXV . . . . . . . . . . . . . . . . . . . . . . . . . . . . . . 13
Refrigerant System Pressure Access Ports . . . . . . 14
PURON (R-410A) REFRIGERANT . . . . . . . . . . . . . . . 15
Refrigerant Charge . . . . . . . . . . . . . . . . . . . . . . . . . . 15
COOLING CHARGING CHARTS . . . . . . . . . . . . . . . . 15
COMPRESSOR . . . . . . . . . . . . . . . . . . . . . . . . . . . . . 16
Lubrication . . . . . . . . . . . . . . . . . . . . . . . . . . . . . . . . . 16
Replacing Compressor . . . . . . . . . . . . . . . . . . . . . . . 16
Compressor Rotation . . . . . . . . . . . . . . . . . . . . . . . . 16
Filter Drier . . . . . . . . . . . . . . . . . . . . . . . . . . . . . . . . . 17
Condenser-Fan Adjustment . . . . . . . . . . . . . . . . . . . 17
Troubleshooting Cooling System . . . . . . . . . . . . . . 18
CONVENIENCE OUTLETS . . . . . . . . . . . . . . . . . . . . 19
Convenience Outlets . . . . . . . . . . . . . . . . . . . . . . . . 19
Installing Weatherproof Cover . . . . . . . . . . . . . . . . . 19
Non-Powered Type . . . . . . . . . . . . . . . . . . . . . . . . . . 19
Unit-Powered Type . . . . . . . . . . . . . . . . . . . . . . . . . . 19
Duty Cycle . . . . . . . . . . . . . . . . . . . . . . . . . . . . . . . . . 20
Maintenance . . . . . . . . . . . . . . . . . . . . . . . . . . . . . . . 20
Fuse on Powered Type . . . . . . . . . . . . . . . . . . . . . . . 20
COMMERICAL DEFROST CONTROL . . . . . . . . . . . . 20
Reversing Valve Control . . . . . . . . . . . . . . . . . . . . . 21
Compressor Control . . . . . . . . . . . . . . . . . . . . . . . . . 21
Auxiliary (Electric) Heat Control . . . . . . . . . . . . . . . 21
Defrost . . . . . . . . . . . . . . . . . . . . . . . . . . . . . . . . . . . . 22
ELECTRIC HEATERS . . . . . . . . . . . . . . . . . . . . . . . . 22
Safety Devices . . . . . . . . . . . . . . . . . . . . . . . . . . . . . . 23
Manufacturer reserves the right to discontinue, or change at any time, specifications or designs without notice and without incurring obligations.
Catalog No. 04-53500340-01
Page
Printed in U.S.A.
Form 50GCQ-4-6-02SM
Single Package Rooftop Heat Pump
with Puron
®
Completing Heater Installation . . . . . . . . . . . . . . . . .23
SMOKE DETECTORS . . . . . . . . . . . . . . . . . . . . . . . . .24
System . . . . . . . . . . . . . . . . . . . . . . . . . . . . . . . . . . . .24
Controller . . . . . . . . . . . . . . . . . . . . . . . . . . . . . . . . . .24
Smoke Detector Sensor . . . . . . . . . . . . . . . . . . . . . .24
Smoke Detector Locations . . . . . . . . . . . . . . . . . . . .24
Detector . . . . . . . . . . . . . . . . . . . . . . . . . . . . . . . . .25
FIOP Smoke Detector Wiring and Response . . . . .26
SENSOR AND CONTROLLER TESTS . . . . . . . . . . .27
Sensor Alarm Test . . . . . . . . . . . . . . . . . . . . . . . . . . .27
Controller Alarm Test . . . . . . . . . . . . . . . . . . . . . . . .27
Dirty Controller Test . . . . . . . . . . . . . . . . . . . . . . . . .27
Dirty Sensor Test . . . . . . . . . . . . . . . . . . . . . . . . . . . .27
Changing the Dirty Sensor Test . . . . . . . . . . . . . . . .27
Remote Station Test . . . . . . . . . . . . . . . . . . . . . . . . .27
SD-TRM4 Remote Alarm Test Procedure . . . . . . . .28
Dirty Sensor Test Using an SD-TRM4 . . . . . . . . . . .28
Detector Cleaning . . . . . . . . . . . . . . . . . . . . . . . . . . .28
Indicators . . . . . . . . . . . . . . . . . . . . . . . . . . . . . . . . . .28
Troubleshooting . . . . . . . . . . . . . . . . . . . . . . . . . . . .29
PROTECTIVE DEVICES . . . . . . . . . . . . . . . . . . . . . . .30
Compressor Protection . . . . . . . . . . . . . . . . . . . . . . .30
Relief Device . . . . . . . . . . . . . . . . . . . . . . . . . . . . . . .30
Control Circuit, 24-v . . . . . . . . . . . . . . . . . . . . . . . . . .30
SYSTEMVU CONTROL SYSTEM . . . . . . . . . . . . . . . .30
SystemVu Interface . . . . . . . . . . . . . . . . . . . . . . . . . .30
Troubleshooting . . . . . . . . . . . . . . . . . . . . . . . . . .30
RTU OPEN CONTROL SYSTEM . . . . . . . . . . . . . . . .32
Sensory/Accessory Installation . . . . . . . . . . . . . . . .32
Troubleshooting . . . . . . . . . . . . . . . . . . . . . . . . . .33
ECONOMIZER SYSTEMS . . . . . . . . . . . . . . . . . . . . .33
EconoMi$er 2 . . . . . . . . . . . . . . . . . . . . . . . . . . . . . . .34
EconoMi$er IV (Field-Installed Accessory) . . . . . . .35
EconoMi$er X (Factory Option) . . . . . . . . . . . . . . . .42
PRE-START-UP/START-UP . . . . . . . . . . . . . . . . . . . .53
START-UP, GENERAL . . . . . . . . . . . . . . . . . . . . . . . .54
Unit Preparation . . . . . . . . . . . . . . . . . . . . . . . . . . . . .54
Additional Installation/Inspection . . . . . . . . . . . . . .54
Return-Air Filters . . . . . . . . . . . . . . . . . . . . . . . . . . . .54
Outdoor-Air Inlet Screens . . . . . . . . . . . . . . . . . . . . .54
Compressor Mounting . . . . . . . . . . . . . . . . . . . . . . .54
Internal Wiring . . . . . . . . . . . . . . . . . . . . . . . . . . . . . .54
Refrigerant Service Ports . . . . . . . . . . . . . . . . . . . . .54
Compressor Rotation . . . . . . . . . . . . . . . . . . . . . . . .54
Refrigerant Service Ports . . . . . . . . . . . . . . . . . . . . .54
Pg 1
50GCQ*04-06
(R-410A) Refrigerant
3 to 5 Nominal Tons
8-23
Replaces: 50GCQ-4-6-01SM
Advertisement
Table of Contents
Troubleshooting

Related Manuals for Carrier 50GCQ Series


Summary of Contents for Carrier 50GCQ Series
-
Page 1: Table Of Contents
50GCQ*04-06 Single Package Rooftop Heat Pump with Puron ® (R-410A) Refrigerant 3 to 5 Nominal Tons Service and Maintenance Instructions CONTENTS Completing Heater Installation ....23 SMOKE DETECTORS . -
Page 2: Safety Considerations
Cooling ........55 Heating ........55 WARNING Ventilation (Continuous Fan) . -
Page 3: Unit Arrangement And Access
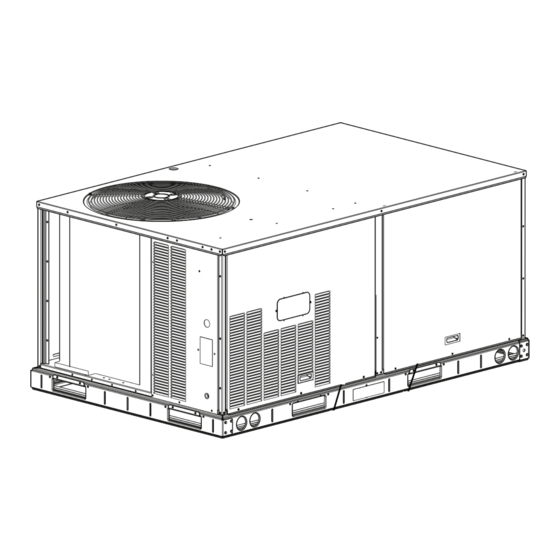
• Ensure indoor coils are clean UNIT ARRANGEMENT AND ACCESS • Check supply blower motor amperage General Electric Heating Figures 1 and 2 show general unit arrangement and access • Inspect power wire connections locations. • Ensure fuses are operational Filter Access Panel •... -
Page 4: Supply Fan (Blower) Section
SUPPLY FAN (BLOWER) SECTION 17-1/4" WARNING ELECTRICAL OPERATION HAZARD Failure to follow this warning could result in personal injury or death. Before performing service or maintenance operations on unit, LOCKOUT/TAGOUT the main power switch to unit. Divider Electrical shock and rotating equipment could cause severe injury. - Page 5 EVALUATING MOTOR SPEED When replacing UCB, the board will be shipped as default without a low speed selected. To select correct GCQ low fan speed, set The direct drive ECM blower motor uses a constant speed design. DIP switch 1 to the “ON” position (see Table 1). The DIP switch Motor speed is controlled by a 0-10 vdc signal, where 10 vdc is positions can also be found on the unit's control label diagram.
- Page 6 ESP in. wg Factory Setting: Calculator 9.0 V 1500 Field Setting: 1625 Record field setting here 1750 1875 2000 Switch Range: 2125 10.0 2250 4.1 - 7.5 2375 6.9 - 8.7 2500 7.7 - 10.0 Field Accessories: Economizer * Overlap in A, B, C switch range 1 Stage E Heat designed for maximum field adjustment potential.
- Page 7 Units with SystemVu™ controls Using the DOWN arrow key, highlight the UNIT CON- FIGURATIONS menu, then press ENTER. On units equipped with the factory-installed SystemVu con- Highlight UNIT CONFIGURATIONS then press ENTER. troller the Fan Speed settings are accessed through the SystemVu interface.
- Page 8 TROUBLESHOOTING THE ECM MOTOR EcoBlue™ motors are designed with several built-in protections included in the motor software. If the motor detects a fault it will safely shut down. For temperature related faults the motor re- quires a line voltage reset to continue operation. For all others, the motor will resume operation automatically as soon as the fault condition is cleared.
- Page 9 Disassembling Motor and Fan Assembly See Fig. 12. Remove 6 screws from retaining rings in the top of the fan rotor. Remove rotor from motor. Remove 4 screws connecting motor to stator flange. Remove stator from motor. If required, remove stator limit switch on aluminum stator. Remove 3 screws from the heat shield.
-
Page 10: Staged Air Volume
9. Set retaining rings (x3) into composite rotor and install COOLING 6 no. 10-32 x 1/2 in. hex head machine screws (P/N: AD07AB126) through the holes in retaining WARNING rings. Tighten to 23 in.-lb (2.6 Nm). It is recommended this screw installation be done in a star pattern. UNIT OPERATION AND SAFETY HAZARD 10. - Page 11 the coil. Failure to clean the coils may result in reduced durability Remove the compressor access panel to access the lower in the environment. coil clip. The condenser coil corner post may also be removed. Avoid use of: Remove the screws from both sides of the upper and lower •...
-
Page 12: Evaporator Coil
debris. If a coil cleaner is used be sure to rinse the coils Evaporator Coil completely before reassembly. Cleaning the Evaporator Coil: 11. Move the inner coil back into position. Reinstall the lower Turn unit power off. Install lockout tag. Remove evapora- and upper coil clips. -
Page 13: Thermostatic Expansion Valve (Txv)
Filter LPS/LOC Drier Cooling Liquid Line DFT 1 Acutrol Indoor Coil Outdoor Coil Strainer Heating Mode Liquid Line Accurater Fig. 19 — Typical Piping Schematic closes the pin. The refrigerant flow is effectively stabilized THERMOSTATIC EXPANSION VALVE (TXV) to the load demand with negligible change in superheat. All 50GCQ units have a factory-installed nonadjustable thermo- static expansion valve (TXV). -
Page 14: Refrigerant System Pressure Access Ports
Refrigerant System Pressure Access Ports There are 2 access ports in the system: on the suction tube near the compressor and on the discharge tube near the compressor. These are brass fittings with black plastic caps. The hose connection fit- tings are standard 1/4 in. -
Page 15: Puron (R-410A) Refrigerant
Remove Charge if Below the Curve Amount of refrigerant charge is listed on the unit’s nameplate. Re- fer to Carrier GTAC2-5 Charging, Recovery, Recycling and Rec- lamation training manual and the following procedures. Unit panels must be in place when unit is operating during the charging procedure. -
Page 16: Compressor
5 Ton 50GCQ / 549K / RHW WARNING R-410A Refrigerant Charging Chart (Unit must run in cooling mode, on high stage FIRE, EXPLOSION HAZARD compressors and outdoor fan on high speed.) 59.9 Failure to follow this warning could result in death, serious personal injury and/or property damage. -
Page 17: Filter Drier
Loosen fan hub setscrews. Filter Drier Adjust fan height by pushing fan until it stops on the fan Replace whenever refrigerant system is exposed to atmosphere. shaft. Only use factory specified liquid-line filter driers with working Tighten set screw to 60 in.-lb (6.78 Nm). pressures no less than 650 psig (4482 kPa). -
Page 18: Troubleshooting Cooling System
Troubleshooting Cooling System Refer to Table 6 for additional troubleshooting topics. Table 6 — Troubleshooting SYMPTOM CAUSE SOLUTION Power failure. Call power company. Fuse blown or circuit breaker tripped. Replace fuse or reset circuit breaker. Determine root cause. Defective thermostat, contactor, transformer, Replacement component. -
Page 19: Convenience Outlets
Press the gasket over the screw heads. Slip the backing CONVENIENCE OUTLETS plate over the screw heads at the keyhole slots and align with the gasket; tighten the 2 screws until snug (do not over-tighten). WARNING Mount the weatherproof cover to the backing plate as ELECTRICAL OPERATION HAZARD shown in Fig. -
Page 20: Duty Cycle
USING UNIT-MOUNTED CONVENIENCE OUTLETS Units with unit-mounted convenience outlet circuits will often re- quire that 2 disconnects be opened to de-energize all power to the unit. Treat all units as electrically energized until the convenience outlet power is also checked and de-energization is confirmed. Observe National Electrical Code Article 210, Branch Circuits, for use of convenience outlets. -
Page 21: Reversing Valve Control
Fig. 31 — Defrost Control Board Location — 50GCQ*04-06 Electro-Mechanical Units Table 7 — 50GCQ Defrost Board I/O and Jumper Configurations POINT NAME TYPE OF I/O CONNECTION PIN NUMBER UNIT CONNECTION NOTE INPUTS G Fan DI, 24 vac P2-3 CTB-G Y1 Cool 1 DI, 24 vac P2-5... -
Page 22: Defrost
Defrost The defrost control mode is a time/temperature sequence. There are 2 time components: The continuous run period and the test/defrost cycle period. The temperature component is provided by Defrost Thermostat 1 and 2 (DFT1 and DFT2) mounted on the outdoor coil. -
Page 23: Single Point Boxes And Supplementary Fuses
Single Point Boxes and Supplementary Fuses When the unit MOCP device value exceeds 60A, unit-mounted supplementary fuses are required for each heater circuit. These fuses are included in accessory single point boxes, with power dis- Stator Manual Reset Limit tribution and fuse blocks. The single point box will be installed di- Switch rectly under the unit control box, just to the left of the partition separating the indoor section (with electric heaters) from the out-... -
Page 24: Smoke Detectors
SMOKE DETECTORS Duct Smoke Sensor Smoke detectors are available as factory-installed options on 50GCQ models. Smoke detectors may be specified for supply air only, for return air with or without economizer, or in combination of supply air and return air. Return air smoke detectors are ar- ranged for vertical return configurations only. -
Page 25: Completing Installation Of Return Air Smoke
RETURN AIR SMOKE DETECTOR SENSOR WITH ECONOMIZER The sampling tube is inserted through the side plates of the econo- Supply Air Smoke Detector mizer housing, placing it across the return air opening on the unit basepan. See Fig. 43. The holes in the sampling tube face down- ward, into the return air stream. -
Page 26: Fiop Smoke Detector Wiring And Response
Rotate the detector plate so the sensor is facing outwards FIOP Smoke Detector Wiring and Response and the sampling tube connection is on the bottom. See ALL UNITS Fig. 45. The FIOP smoke detector is configured to automatically shut Screw the sensor and detector plate into its operating position down all unit operations when a smoke condition is detected. -
Page 27: Sensor And Controller Tests
SENSOR AND CONTROLLER TESTS IMPORTANT: Failure to follow this ALERT can result in an Sensor Alarm Test unnecessary evacuation of the facility. Holding the test magnet against the sensor housing for more The sensor alarm test checks a sensor’s ability to signal an alarm than 7 seconds will put the duct detector into the alarm state state. -
Page 28: Sd-Trm4 Remote Alarm Test Procedure
SD-TRM4 Remote Alarm Test Procedure Detector Cleaning Hold the test magnet to the target area for 7 seconds. CLEANING THE SMOKE DETECTOR Verify that the test/reset station’s Alarm LED turns on. Clean the duct smoke sensor when the Dirty LED is flashing con- Reset the sensor by holding the test magnet to the target tinuously or sooner, if conditions warrant. -
Page 29: Troubleshooting
ALARM STATE NOTE: All troubles are latched by the duct smoke detector. The trouble condition must be cleared and then the duct smoke detec- The smoke detector enters the alarm state when the amount of tor must be reset in order to restore it to the normal state. smoke particulate in the sensor’s sensing chamber exceeds the alarm threshold value. -
Page 30: Protective Devices
The switch is stem-mounted and brazed into the The SystemVu control system is fully communicating and cable- discharge tube. Trip setting is 630 psig ± 10 psig (4344 ± 69 kPa) ready for connection to the Carrier Comfort Network ® (CCN), when hot. - Page 31 Fig. 50 — SystemVu Control...
-
Page 32: Rtu Open Control System
The RTU Open controller is an integrated component of the Open must be routed through the raceway built into the corner Carrier rooftop unit. Its internal application programming post of the unit or secured to the unit control box with electrical provides optimum performance and energy efficiency. -
Page 33: Additional Rtu Open Installation And Troubleshooting
Additional RTU Open Installation and Trouble- Outside Air shooting Temperature Sensor Additional installation, wiring and troubleshooting information Low Ambient for the RTU Open Controller can be found in the following EconoMi$er IV Sensor manual: “RTU Open Multi-Protocol Controller Factory- Controller (W7212) Installed Option —... -
Page 34: Economi$Er 2
EconoMi$er 2 IMPORTANT: The optional EconoMi$er 2 does not ® include a controller. The EconoMi$er 2 is operated by a 4 to 20 mA signal from an existing field-supplied control- ler. See Fig. 55 for wiring information. BLACK Transformer Ground BLUE 500 OHM Resistor... -
Page 35: Economi$Er Iv (Field-Installed Accessory)
EconoMi$er IV (Field-Installed Accessory) IMPORTANT: For 50GCQ rooftop units EconoMi$er IV is only available as a field-installed accessory. ECONOMI$ER IV STANDARD SENSORS Troubleshooting instructions are enclosed. A functional view of the EconoMi$er ® IV accessory is shown in Fig. 56. Typical set- tings, sensor ranges, and jumper positions are also shown. - Page 36 Table 11 — EconoMi$er IV Input/Output Logic INPUTS OUTPUTS Demand Enthalpy Compressor N Terminal Controlled Ventilation Outdoor Return Stage 1 Stage 2 Occupied Unoccupied (DCV) High (Free Cooling Minimum position Closed LED Off) Below Set (DCV LED Modulating (between minimum Modulating (between Off)
- Page 37 Outdoor Air Lockout Sensor DIP Switch Changeover The EconoMi$er IV is equipped with an ambient temperature Position Temperature lockout switch located in the outdoor airstream which is used to lock out the compressors below a 42°F (6°C) ambient tempera- 48°F ture.
- Page 38 Horizontal Economizer Barometric Relief Flow Vertical Economizer Barometric Relief Flow 2500 2500 Horizontal Economizers Vertical Economizers 2000 2000 1500 1500 3-5 Ton 3-5 Ton 6 Ton 6 Ton 1000 1000 0.05 0.15 0.25 0.05 0.15 0.25 Return Duct Static Pressure (in. wg) Return Duct Static Pressure (in.
- Page 39 Exhaust Set Point Adjustment The exhaust set point will determine when the exhaust fan runs (29) (32) (35) (38) (41) (43) based on damper position (if accessory power exhaust is in- CONTROL POINT CONTROL stalled). The set point is modified with the Exhaust Fan set point APPROX.
- Page 40 EconoMi$er IV control will be in occupied mode. Use setting 1 or 2 for Carrier equipment. When the timeclock contacts are open (removing the 24-v signal Press Clear and Mode buttons. Hold at least 5 seconds from terminal N), the EconoMi$er IV will be in unoccupied until the sensor enters the Edit mode.
- Page 41 Disconnect wires at T and T1. Place 5.6 kilo-ohm resistor Turn the DCV and Exhaust potentiometers CCW until the across T and T1. Exhaust LED turns on. The exhaust contacts will close 30 Jumper TR to 1. to 120 seconds after the Exhaust LED turns on. Jumper TR to N.
-
Page 42: Economi$Er X (Factory Option)
Economizer Module EconoMi$er X (Factory Option) The module is the core of the EconoMi$er X system. The module The EconoMi$er X system is an expandable economizer control ® is mounted in the unit’s control box, and includes the user inter- system, which includes a W7220 economizer module (controller) face for the system. - Page 43 INPUTS Sensors NOTE: A Mixed Air (MA) analog sensor is required on all W7220 units; either an Outdoor Air (OA) sensor for dry bulb change over or an OA bus sensor for outdoor enthalpy change over is required in addition to the MA sensor. An additional Return Air (RA) bus sensor can be added to the system for dif- ferential enthalpy or dry bulb changeover.
- Page 44 Table 14 — Economizer Module — Right Hand Table 15 — HH57AC081 Sensor Wiring Terminations Terminal Blocks TERMINAL TYPE DESCRIPTION LABEL TYPE DESCRIPTION NUMBER LABEL Top Right Terminal Blocks S-BUS Communications AUX2 I 24 vac IN The first terminal is not used S-BUS S-BUS (Enthalpy Control...
- Page 45 INTERFACE OVERVIEW Press the (Enter) button to display the value of the This section describes how to use the EconoMi$er X user ® currently displayed item. interface for: Press the ▲ button to increase (change) the displayed • Keypad and menu navigation parameter value.
- Page 46 Table 17 — W7220 Menu Structure PARAMETER PARAMETER MENU PARAMETER DEFAULT RANGE AND NOTES VALUE INCREMENT ECONO AVAIL YES/NO FIRST STAGE COOLING DEMAND (Y1–IN) YES = economizing available; the system can use outside air for free cooling when required. ECONOMIZING YES/NO FIRST STAGE COOLING RELAY OUTPUT YES = outside air being used for 1 stage cooling.
- Page 47 Table 17 — W7220 Menu Structure (cont) PARAMETER PARAMETER MENU PARAMETER DEFAULT RANGE AND NOTES VALUE INCREMENT MECH COOL ON 0, 1, or 2 Displays stage of mechanical cooling that is active. HEAT STAGES ON Displays the stage of heat pump heating that is active. STATUS FAN SPEED LOW or HIGH...
- Page 48 Table 17 — W7220 Menu Structure (cont) PARAMETER PARAMETER MENU PARAMETER DEFAULT RANGE AND NOTES VALUE INCREMENT ERV OAT SP 32°F 0 to 50°F ENERGY RECOVERY VENTILATOR UNIT OUTDOOR AIR increment by 1 TEMPERATURE SETPOINT Only displayed when AUX1 O = ERV. EXH1 SET 0 to 100% Exhaust fan set point for single speed units.
- Page 49 Table 17 — W7220 Menu Structure (cont) PARAMETER PARAMETER MENU PARAMETER DEFAULT RANGE AND NOTES VALUE INCREMENT STG3 DLY 2.0h 0 min, 5 min, COOLING STAGE 3 DELAY 15 min, then 15 min Delay after stage 2 cool has been active. Turns on second stage of intervals.
- Page 50 Table 17 — W7220 Menu Structure (cont) PARAMETER PARAMETER MENU PARAMETER DEFAULT RANGE AND NOTES VALUE INCREMENT DA SYLK T ERR DISCHARGE AIR S-BUS SENSOR ERROR Discharge air sensor has failed or become disconnected — check wiring then replace sensor if the alarm continues. OA SENS T ERR OUTSIDE AIR TEMPERATURE SENSOR ERROR Outdoor air temperature sensor has failed or become disconnected —...
- Page 51 Enthalpy Settings sensor. When the OA temperature, OA humidity and OA dew point are all below the selected boundary, the economizer sets When the OA temperature, enthalpy and dew point are below the economizing mode to YES, economizing is available. the respective setpoints, the Outdoor Air can be used for econ- omizing.
- Page 52 Standard or Single Speed Fan Operation The W (heating mode) is not controlled by the W7220 but it re- quires the status to know where to position the OA damper for FAN TYPE = 1SPEED is not used on 50GCQ units. minimum position for the fan speed.
-
Page 53: Pre-Start-Up/Start-Up
2SP H/C and 3-Speed Fan Operation TROUBLESHOOTING Alarms FAN TYPE = 2SP H/C and FAN TYPE = 3SPEED are not used on 50GCQ units. The economizer module provides alarm messages that display on the 2-line LCD. CHECKOUT NOTE: Upon power up, the module waits 60 minutes before Inspect all wiring connections at the economizer module’s ter- checking for alarms. -
Page 54: Start-Up, General
Return-Air Filters Ensure correct filters are installed in unit (see Appendix B — WARNING Physical Data on page 57). Do not operate unit without return- air filters. ELECTRICAL OPERATION HAZARD Failure to follow this warning could result in personal injury or Outdoor-Air Inlet Screens death. - Page 55 Cooling FASTENER TORQUE VALUES Set space thermostat to OFF position. To start unit, turn on main power supply. Set system selector switch at COOL posi- Heat shield screws 30 in.-lb (3.4 Nm) ±2 in.-lb (0.2 Nm) tion and fan switch at AUTO position. Adjust thermostat to a Stator motor mounting 23 in.-lb (2.6 Nm) ±2 in.-lb (0.2 Nm) setting below room temperature.
- Page 56 APPENDIX A — MODEL NUMBER NOMENCLATURE Position: 9 10 11 12 13 14 15 16 17 18 Example: Unit/Series/Model Packaging and Seismic Compliance 50GCQ = Packaged Rooftop Heat Pump 0 = Standard 17 SEER and 16 SEER2 High Efficiency 1 = LTL Refrig.
- Page 57 APPENDIX B — PHYSICAL DATA 50GCQJ 3 to 5 Ton Physical Data, Three Phase Units 50GCQ UNIT 50GCQJ04 50GCQJ05 50GCQJ06 NOMINAL TONS BASE UNIT OPERATING WT (lb) REFRIGERATION SYSTEM No. Circuits / No. Compressors / Type 1 / 1 / 2-Stage Scroll 1 / 1 / 2-Stage Scroll 1 / 1 / 2-Stage Scroll Puron...
- Page 58 APPENDIX B — PHYSICAL DATA (cont) 50GCQT 3 to 5 Ton Physical Data, Single Phase Units 50GCQ UNIT 50GCQT04 50GCQT05 50GCQT06 NOMINAL TONS BASE UNIT OPERATING WT (lb) REFRIGERATION SYSTEM No. Circuits / No. Compressors / Type 1 / 1 / 2-Stage Scroll 1 / 1 / 2-Stage Scroll 1 / 1 / 2-Stage Scroll Puron...
- Page 59 APPENDIX C — FAN PERFORMANCE For more information on the performance limits of Carrier General Fan Performance Notes motors, see the application data section of the product data Interpolation is permissible. Do not extrapolate. book for this model and size.
- Page 60 APPENDIX C — FAN PERFORMANCE (cont) 50GCQT04 Single Phase — 3 Ton Vertical Supply (rpm - bhp) AVAILABLE EXTERNAL STATIC PRESSURE (in. wg) 1059 0.08 1325 0.16 1541 0.25 1718 0.35 1870 0.46 1102 0.09 1356 0.17 1572 0.27 1751 0.37 1906 0.48...
- Page 61 APPENDIX C — FAN PERFORMANCE (cont) 50GCQT04 Single Phase — Medium Static — 3 Ton Vertical Supply (rpm - vdc) AVAILABLE EXTERNAL STATIC PRESSURE (in. wg) 1060 1325 1541 1718 1871 1103 1355 1572 1752 1906 1050 1150 1387 1602 1784 1941 1125...
- Page 62 APPENDIX C — FAN PERFORMANCE (cont) 50GCQJ04 Three Phase — 3 Ton Vertical Supply (rpm - bhp) AVAILABLE EXTERNAL STATIC PRESSURE (in. wg) 1058 0.08 1325 0.16 1541 0.25 1718 0.35 1870 0.46 1102 0.09 1356 0.17 1572 0.27 1751 0.37 1906 0.48...
- Page 63 APPENDIX C — FAN PERFORMANCE (cont) 50GCQJ04 Three Phase — Medium Static — 3 Ton Vertical Supply (rpm - vdc) AVAILABLE EXTERNAL STATIC PRESSURE (in. wg) 1060 1325 1541 1718 1871 1103 1355 1572 1752 1906 1050 1150 1387 1602 1784 1941 1125...
- Page 64 APPENDIX C — FAN PERFORMANCE (cont) 50GCQT05 Single Phase — 4 Ton Vertical Supply (rpm - bhp) AVAILABLE EXTERNAL STATIC PRESSURE (in. wg) 1200 1048 0.12 1251 0.21 1431 0.32 1590 0.43 1735 0.56 1300 1102 0.14 1293 0.23 1467 0.34 1622 0.46...
- Page 65 APPENDIX C — FAN PERFORMANCE (cont) 50GCQT05 Single Phase — Medium Static — 4 Ton Vertical Supply (rpm - vdc) AVAILABLE EXTERNAL STATIC PRESSURE (in. wg) 1200 1047 1251 1431 1590 1735 1300 1101 1293 1467 1622 1765 1400 1158 1337 1505 1657...
- Page 66 APPENDIX C — FAN PERFORMANCE (cont) 50GCQJ05 Three Phase — 4 Ton Vertical Supply (rpm - bhp) AVAILABLE EXTERNAL STATIC PRESSURE (in. wg) 1200 1047 0.12 1252 0.21 1431 0.32 1590 0.43 1735 0.56 1300 1102 0.14 1293 0.23 1467 0.34 1622 0.46...
- Page 67 APPENDIX C — FAN PERFORMANCE (cont) 50GCQJ05 Three Phase — Medium Static — 4 Ton Vertical Supply (rpm - vdc) AVAILABLE EXTERNAL STATIC PRESSURE (in. wg) 1200 1047 1251 1431 1590 1735 1300 1101 1293 1467 1622 1765 1400 1158 1337 1505 1657...
- Page 68 APPENDIX C — FAN PERFORMANCE (cont) 50GCQT06 Single Phase — 5 Ton Vertical Supply (rpm - bhp) AVAILABLE EXTERNAL STATIC PRESSURE (in. wg) 1500 1228 0.20 1394 0.29 1554 0.40 1701 0.53 1836 0.66 1625 1305 0.24 1457 0.33 1609 0.44 1750 0.57...
- Page 69 APPENDIX C — FAN PERFORMANCE (cont) 50GCQT06 Single Phase — Medium Static — 5 Ton Vertical Supply (rpm - vdc) AVAILABLE EXTERNAL STATIC PRESSURE (in. wg) 1500 1228 1394 1554 1701 1835 1625 1305 1456 1609 1750 1881 1750 1385 1523 1666 1802...
- Page 70 APPENDIX C — FAN PERFORMANCE (cont) 50GCQJ06 Three Phase — 5 Ton Vertical Supply (rpm - bhp) AVAILABLE EXTERNAL STATIC PRESSURE (in. wg) 1500 1228 0.20 1394 0.29 1554 0.40 1701 0.53 1836 0.66 1625 1305 0.24 1457 0.33 1609 0.44 1750 0.57...
- Page 71 APPENDIX C — FAN PERFORMANCE (cont) 50GCQJ06 Three Phase — Medium Static — 5 Ton Vertical Supply (rpm - vdc) AVAILABLE EXTERNAL STATIC PRESSURE (in. wg) 1500 1227 1394 1554 1701 1835 1625 1305 1456 1609 1750 1881 1750 1385 1523 1666 1802...
- Page 72 APPENDIX C — FAN PERFORMANCE (cont) 50GCQT04 Single Phase — 3 Ton Horizontal Supply (rpm - bhp) AVAILABLE EXTERNAL STATIC PRESSURE (in. wg) 1036 0.08 1301 0.15 1517 0.24 1698 0.34 1855 0.44 1077 0.09 1331 0.16 1546 0.26 1727 0.36 1885 0.47...
- Page 73 APPENDIX C — FAN PERFORMANCE (cont) 50GCQT04 Single Phase — Medium Static — 3 Ton Horizontal Supply (rpm - vdc) AVAILABLE EXTERNAL STATIC PRESSURE (in. wg) 1036 1301 1517 1698 1855 1077 1331 1546 1727 1885 1050 1119 1362 1574 1755 1915 1125...
- Page 74 APPENDIX C — FAN PERFORMANCE (cont) 50GCQJ04 Three Phase — 3 Ton Horizontal Supply (rpm - bhp) AVAILABLE EXTERNAL STATIC PRESSURE (in. wg) 1037 0.08 1301 0.15 1517 0.24 1698 0.34 1855 0.44 1076 0.09 1330 0.16 1545 0.26 1727 0.36 1886 0.47...
- Page 75 APPENDIX C — FAN PERFORMANCE (cont) 50GCQJ04 Three Phase — Medium Static — 3 Ton Horizontal Supply (rpm - vdc) AVAILABLE EXTERNAL STATIC PRESSURE (in. wg) 1037 1301 1517 1698 1855 1076 1330 1545 1727 1886 1050 1119 1361 1574 1755 1915 1125...
- Page 76 APPENDIX C — FAN PERFORMANCE (cont) 50GCQT05 Single Phase — 4 Ton Horizontal Supply (rpm - bhp) AVAILABLE EXTERNAL STATIC PRESSURE (in. wg) 1200 1021 0.11 1227 0.19 1417 0.30 1586 0.42 1738 0.55 1300 1073 0.13 1265 0.21 1447 0.31 1612 0.43...
- Page 77 APPENDIX C — FAN PERFORMANCE (cont) 50GCQT05 Single Phase — Medium Static — 4 Ton Horizontal Supply (rpm - vdc) AVAILABLE EXTERNAL STATIC PRESSURE (in. wg) 1200 1021 1227 1417 1586 1738 1300 1073 1265 1447 1612 1762 1400 1128 1305 1479 1640...
- Page 78 APPENDIX C — FAN PERFORMANCE (cont) 50GCQJ05 Three Phase — 4 Ton Horizontal Supply (rpm - bhp) AVAILABLE EXTERNAL STATIC PRESSURE (in. wg) 1200 1022 0.11 1228 0.19 1417 0.30 1586 0.42 1737 0.55 1300 1074 0.13 1265 0.21 1447 0.31 1613 0.44...
- Page 79 APPENDIX C — FAN PERFORMANCE (cont) 50GCQJ05 Three Phase — Medium Static — 4 Ton Horizontal Supply (rpm - vdc) AVAILABLE EXTERNAL STATIC PRESSURE (in. wg) 1200 1022 1228 1417 1586 1737 1300 1074 1265 1447 1613 1762 1400 1129 1306 1479 1641...
- Page 80 APPENDIX C — FAN PERFORMANCE (cont) 50GCQT06 Single Phase — 5 Ton Horizontal Supply (rpm - bhp) AVAILABLE EXTERNAL STATIC PRESSURE (in. wg) 1500 1197 0.18 1361 0.26 1524 0.36 1679 0.49 1822 0.62 1625 1271 0.21 1421 0.29 1574 0.40 1721 0.52...
- Page 81 APPENDIX C — FAN PERFORMANCE (cont) 50GCQT06 Single Phase — Medium Static — 5 Ton Horizontal Supply (rpm - vdc) AVAILABLE EXTERNAL STATIC PRESSURE (in. wg) 1500 1197 1361 1524 1679 1822 1625 1271 1421 1574 1721 1860 1750 1347 1485 1627 1767...
- Page 82 APPENDIX C — FAN PERFORMANCE (cont) 50GCQJ06 Three Phase — 5 Ton Horizontal Supply (rpm - bhp) AVAILABLE EXTERNAL STATIC PRESSURE (in. wg) 1500 1197 0.18 1361 0.26 1524 0.36 1679 0.49 1822 0.62 1625 1271 0.21 1421 0.29 1574 0.40 1721 0.52...
- Page 83 APPENDIX C — FAN PERFORMANCE (cont) 50GCQJ06 Three Phase — Medium Static — 5 Ton Horizontal Supply (rpm - vdc) AVAILABLE EXTERNAL STATIC PRESSURE (in. wg) 1500 1197 1361 1524 1679 1822 1625 1271 1421 1574 1721 1860 1750 1347 1485 1627 1767...
- Page 84 APPENDIX D — WIRING DIAGRAMS Wiring Diagrams 50GCQ*04-06 UNITS SIZE VOLTAGE CONTROL (OVERLAY) PAGE POWER PAGE 208/230-1-60 48TC003157 04-06 48TC003160 Electro-Mechanical 208/230-3-60 48TC003156 W7220 Controller 460/575-3-60 48TC003161 48TC003158 208/230-1-60 48TC003157 04-06 48TC003160 (48TC003214) RTU Open Controller 208/230-3-60 48TC003156 (Factory Option) 460/575-3-60 48TC003161 (48TC003214) 48TC003158...
- Page 85 APPENDIX D — WIRING DIAGRAMS (cont) Fig. B — 50GCQ 04-06 Electro-Mechanical Control Wiring Diagram — 208/230-1-60, 208/230-3-60 Units (with W7220 Control)
- Page 86 APPENDIX D — WIRING DIAGRAMS (cont) Fig. C — 50GCQ 04-06 Electro-Mechanical Control Wiring Diagram — 460/575-3-60 Units (with W7220 Control)
- Page 87 APPENDIX D — WIRING DIAGRAMS (cont) Fig. D — 50GCQ 04-06 208/230-1-60, 208/230-3-60 Units — with Optional Factory-Installed RTU Open Controller...
- Page 88 APPENDIX D — WIRING DIAGRAMS (cont) Fig. E — 50GCQ 04-06 460/575-3-60 Units — with Optional Factory-Installed RTU Open Controller...
- Page 89 APPENDIX D — WIRING DIAGRAMS (cont) Fig. F — 50GCQ 04-06, All Voltages — Optional Factory-Installed SystemVu™ Controller...
- Page 90 APPENDIX D — WIRING DIAGRAMS (cont) Fig. G — 50GCQ 04-06 Power Wiring Diagram — 208/230-1-60 Units...
- Page 91 APPENDIX D — WIRING DIAGRAMS (cont) Fig. H — 50GCQ 04-06 Power Wiring Diagram — 208/230-3-60 Units...
- Page 92 APPENDIX D — WIRING DIAGRAMS (cont) Fig. I — 50GCQ 04-06 Power Wiring Diagram — 460/575-3-60 Units...
- Page 93 APPENDIX D — WIRING DIAGRAMS (cont) Fig. J — 50GCQ 04-06 SystemVu™ Power Wiring Diagram — 208/230-1-60 Units...
- Page 94 APPENDIX D — WIRING DIAGRAMS (cont) Fig. K — 50GCQ 04-06 SystemVu™ Power Wiring Diagram — 208/230-3-60 Units...
- Page 95 APPENDIX D — WIRING DIAGRAMS (cont) Fig. L — 50GCQ 04-06 SystemVu™ Power Wiring Diagram — 460/575-3-60 Units...
- Page 96 APPENDIX E — LOW AMBIENT CONTROL SENSOR LOCATION Sensor Location Sensor Location Fig. M — 50GCQ 04 Outdoor Circuiting Fig. N — 50GCQ 05 Outdoor Circuiting...
- Page 97 APPENDIX E — LOW AMBIENT CONTROL SENSOR LOCATION (cont) Sensor Location Fig. O — 50GCQ 06 Outdoor Circuiting...
- Page 98 © 2023 Carrier Manufacturer reserves the right to discontinue, or change at any time, specifications or designs without notice and without incurring obligations. Catalog No. 04-53500340-01 Printed in U.S.A. Form 50GCQ-4-6-02SM Pg 98 8-23 Replaces: 50GCQ-4-6-01SM...
- Page 99 START-UP CHECKLIST 50GCQ*04-06 SINGLE PACKAGE ROOFTOP HEAT PUMP UNITS (Remove and use for job file) NOTE: To avoid injury to personnel and damage to equipment or property when completing the procedures listed in this start-up checklist, use good judgment, follow safe practices, and adhere to the safety considerations/information as outlined in preceding sections of this Service and Maintenance document.
- Page 100 (Y/N) _____ Verify smoke detector unit shutdown by utilizing magnet test (Y/N) _____ © 2023 Carrier Manufacturer reserves the right to discontinue, or change at any time, specifications or designs without notice and without incurring obligations. Catalog No. 04-53500340-01 Printed in U.S.A.
Need help?
Do you have a question about the 50GCQ Series and is the answer not in the manual?
Questions and answers