Advertisement
Table of Contents
D70ES Quick Start Guide
Full manual can be found at www.b-tek.com
1. Unpacking and install
Take the D70ES terminal, quick start guide, sealing screws, and
sense shorting plug out of the packaging.
2. Wiring of analog load cells and serial ports
COM 1
COM 2
Diagram shows terminal strip wiring to connect the scale, 4 wire
(local sense) install the jumper plug wires oriented over the Ex &
SEN (the plug will have the two open positions on the left) 6 wire
(Remote Sense) remove the jumper, as well as com ports wiring.
Com1 Default - TM-295 Printer, you must use TX, RX, and GND.
Message "Prn.Off" will display if dip switch 3 on printer is off
Com 2 Default - Continuous B-TEK String - RS-232
3. Turn the indicator on using the power button
If D70ES ask for time and date (Appears "SEt.tiN" on 7 segment
display) you can key in HH:MM:SS and press enter to except.
B-TEK Scales, LLC
800.266.8900 • Fax: 330.471.8909
Monday - Friday 7:00 AM - 5:00 PM
www.B-TEK.com • sales@b-tek.com
D70ES Quick Start Guide
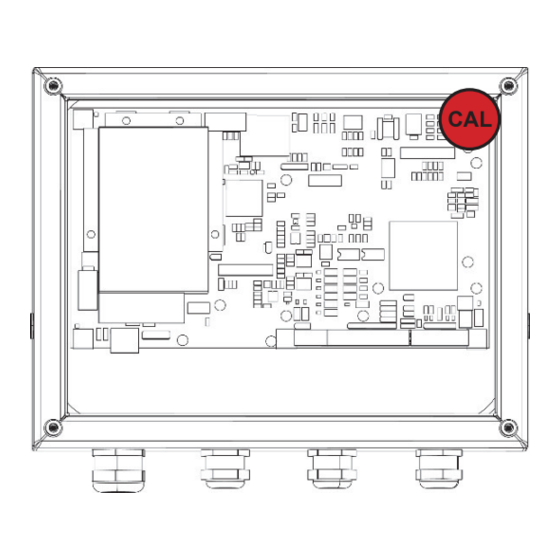
4. To enter parameters - Click for Setup Video
Press the calibration button in the upper right corner of the main board
SCALE
or hold Enter Key
appears. (This will not let you modify scale configuration)
Key functions while in parameters
Function
2 FN / ESC
Keyed Tare
Auto Tare
while turning on the indicator until "SETUP"
Key
Parameter down for header and sub
parameter selections
Print
Up for header and sub parameter selections
Enter
Enter and advance to the next sub parameter
Display values while in sub parameters
Exit or back out of sub parameters
CAL
Operation
Advertisement
Table of Contents

Related Manuals for BTEK D70ES


Summary of Contents for BTEK D70ES
- Page 1 3. Turn the indicator on using the power button Enter Enter and advance to the next sub parameter If D70ES ask for time and date (Appears "SEt.tiN" on 7 segment display) you can key in HH:MM:SS and press enter to except. Keyed Tare...
- Page 2 D70ES Quick Start Guide D70ES Quick Start Guide 6. Span Calibration - Click Calibration Video Link 5. Menu Structure - Click for Menu Tree Link Press Step Display Description Press “Cal” Button to enter setup mode Start calibration procedure ...
Need help?
Do you have a question about the D70ES and is the answer not in the manual?
Questions and answers