Table of Contents
Advertisement
Advertisement
Table of Contents

Related Manuals for Westinghouse WBGLGBGO12AR


Summary of Contents for Westinghouse WBGLGBGO12AR
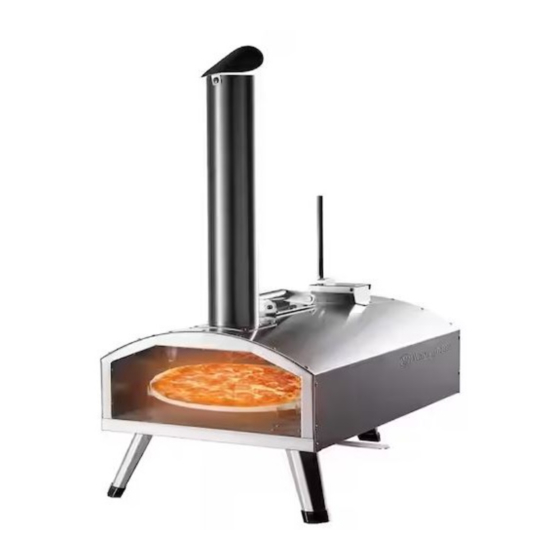
- Page 1 User Manual Dual Fuel Pizza Oven with Rotating Stone WBGLGBGO12AR Assembly, Care And Use Instructions Read Carefully Important:Retain These Instructions For Future Reference. This appliance is for Household use only. This is not a commercial appliance. Rev. 05/23...
-
Page 2: Table Of Contents
CONTENT INTENDED USE ..................3 SAFETY INFORMATION ................3 PACKAGE CONTENTS ................7 PREPARATION ..................8 ASSEMBLY INSTRUCTIONS ..............9 8.1 USE WOOD PELLET ................13 8.2 USE GAS ..................14 OPERATION INSTRUCTIONS ..............16 CONNECTING THE LP TANK ..............17 CHECKING FOR LEAKS ................ -
Page 3: Intended Use
INTENDED USE Use the device only for the purpose intended. Any other use may result in damage to the device or injuries. SAFETY INFORMATION Assembler/Installer This instruction manual contains important information necessary for the proper assembly and safe use of this appliance. Read and follow all warnings and instructions before assembling and using this appliance. - Page 4 IMPORTANT SAFETY Please read this manual carefully and before installing or using your gas grill to ensure This manual should be retained for your information. LOCATION OF GRILL Remember that your grill is an outdoor appliance. Ensure your grill is positioned safely away garages or any other enclosed area.
- Page 5 Keep an ABC fire extinguisher accessible at all times, and never attempt to extinguish a grease fire with water or other liquids. Do not attempt to heat unopened containers on the grill. Pressure may build up and cause the container to explode. Never use charcoal or any other solid fuel in the grill.
- Page 6 BEWARE OF SPIDERS BURNER TUBE MUST BE INSPECTED AND CLEANED BEFORE EACH USE. Spiders and small insects occasionally spin webs or make nests in the burner tube of gas grill. These webs can lead to a gas flow obstruction, which could result in a fire in and around the burner tube.
-
Page 7: Package Contents
PACKAGE CONTENTS 1. Body X 1 9. Door handle X 2 2. Chimney X 1 10. Pellet box X 1 3. Chimney cap X 1 11. Pellet box grate X 1 4. Door X 1 12. Pellet shovel X 1 5. -
Page 8: Preparation
Spare part A. M5*12MM X 12 B. M5 Nut X 4 C. M5 Nut X 3 D. Movable Screws for gas turner X 2 E. M4*6MM X 3 PREPARATION Before beginning assembly of product, make sure all parts are present. Compare parts with package contents list on previous page and hardware contents below. -
Page 9: Assembly Instructions
ASSEMBLY INSTRUCTIONS 1. Install the rotating handle The screw has been pre-installed in the rotating handle. Unscrew & reinstall to attached - rotating piece. M5*12MM 2 PCS 2. Unfold legs... - Page 10 3. Install the chimney The screw has been pre-installed on the chimney. Unscrew & reinstall to attached chimney piece. M5*12MM 1 PCS 4. Install the pizza oven handle The screws and nuts have been pre-installed on the oven handle. Unscrew & reinstall to the oven.
- Page 11 5. Install the chimney 6. Install the pellet inlet parts The screws and nuts have been pre-installed on the body. Unscrew & reinstall to the pizza oven. M5*12MM 2 PCS...
- Page 12 There is a handle to open and close the cover when you add pellet. 7. Install the door The screws and nuts have been pre-installed on the handles. Unscrew & reinstall to the door. M5*12MM 2 PCS M5 Nut 2 PC...
-
Page 13: 8.1 Use Wood Pellet
8.1 USE WOOD PELLET 8.1.1 Install the pellet box The screws and nuts have been pre-installed on the handles. Unscrew & reinstall to the pellet basket. M5*12MM 2 PCS M5 Nut 2 PCS 8.1.2 Put the pellet box into the pizza oven. -
Page 14: 8.2 Use Gas
8.2 USE GAS 8.2.1 Install the burner The screws and nuts have been pre-installed on the burner. Unscrew & reinstall to the pizza oven. Movable Screws for gas turner 2 PCS 9. Install the pizza stone. - Page 15 10. Attach the door. 11. Install the pizza shovel. M4*6MM 3 PCS M5 Nut 3 PC...
-
Page 16: Operation Instructions
OPERATION INSTRUCTIONS CONNECTING GAS CYLINDER The propane gas supply cylinder to be used must be constructed and marked in accordance with the Standard of Canada, CAN/CSA-B339, Cylinders, Spheres and Tubes for Transportation of Dangerous Goods; and Commission, as applicable; and provided with a listed overfilling prevention device. -
Page 17: Connecting The Lp Tank
compatible with the appliance nesting hole and retention means. Refer to Page 10-11 of the Assembly Instructions for correct cylinder to cylinder holder connection. Warnings ALL INSTRUCTIONS AND SAFEGUARDS ON THIS PAGE MUST BE FOLLOWED TO PREVENT FIRE, DAMAGE AND/OR INJURY. CONNECTING THE LP TANK 1. -
Page 18: Checking For Leaks
CHECKING FOR LEAKS After all connection are made, check all connections and fittings on the LP gas tank valve, gas hose and regulator for leaks with a water and soap solution. To prevent fire or explosion while testing for a leak: •... -
Page 19: Troubleshooting
TROUBLESHOOTING Problem Possible Cause Prevention/Solution Burner will not light 1. No gas flow 1. Check to see if propane 2. Coupling nut and tank is empty. regulator not fully 2. Turn the coupling nut connected about one-half to three 3. Obstruction of gas flow quarters additional turn 4. -
Page 20: First-Time Operation
Flashback(fire in burner 1. Burner and/or burner 1. Turn gas control knob tube, roaringsound from tubes are blocked off.Clean burner and/or burner) 2. Pressure drop during burner tubes. ingition 2. Turn off oven,ensure the tank valve is fully open (if applicable) and relight. -
Page 21: To Light With A Match
TO LIGHT WITH A MATCH 1. If burner will not light after several attempts using the control knob, the burner may be lit with a match. 2. If you have already attempted to light the burner using the control knob,wait 5 minutes for any gas to dissipate. -
Page 22: Care And Maintenance
• When you need to refill the pellets, open the hopper and fill small amounts of pellets into the pellet box then close the hood of hopper. You may like to refill the pellets gradually to keep the certain temperature. NOTE: •... -
Page 23: Other Care And Maintenance
and that you keep your stone baking board in a warm, dry environment when your pizza oven is not in use. Ensure that your pizza oven is cool and dry and use pizza oven cover not included) for storage. Warnings Do not apply water directly to your pizza oven to extinguish or cool it down as this may cause damage and personal injury! Cleaning... -
Page 24: Disposal
DISPOSAL Proper disposal of this product. This label indicates that, electronic devices cannot be disposed of with regular household waste. Please use the return or collections systems of your municipality or contact the seller where you purchased this product. INFORMATION AND SERVICE If you have question or concerns about your product, please visit our website: In line with our policy of continuous product development, we reserve the right to change product, packaging and documentation specifications without notice. - Page 28 Westinghouse are trademarks of Westinghouse Electric Corporation. Used under license by Westinghouse Homeware (HK) Co. All Rights Reserved.
Need help?
Do you have a question about the WBGLGBGO12AR and is the answer not in the manual?
Questions and answers