
Related Manuals for HomeMatic HmIP-ASIR-2


Summary of Contents for HomeMatic HmIP-ASIR-2
- Page 1 Montage- und Bedienungsanleitung Mounting instruction and operating manual Alarmsirene S. 2 Alarm Siren p. 25 HmIP-ASIR-2...
- Page 2 Lieferumfang Anzahl Bezeichnung Homematic IP Alarmsirene Montageplatte 1,5 V LR6/Mignon/AA Batterien Schrauben 3,0 x 30 mm Dübel 5 mm Bedienungsanleitung Dokumentation © 2018 eQ-3 AG, Germany Alle Rechte vorbehalten. Ohne schriftliche Zustimmung des Herausgebers darf diese Anleitung auch nicht auszugsweise in...
-
Page 7: Table Of Contents
Inhaltsverzeichnis Hinweise zur Anleitung ...........8 Gefahrenhinweise ............8 Funktion und Geräteübersicht ........10 Allgemeine Systeminformationen ......11 Montage ................12 Wand- bzw. Deckenmontage ...........12 Montage auf einer Unterputzdose ........13 Inbetriebnahme .............. 14 Anlernen ................14 Batterien wechseln ............16 Fehlerbehebung .............18 Schwache Batterien ............18 Befehl nicht bestätigt ............18 Duty Cycle ................19 Fehlercodes und Blinkfolgen ........... -
Page 8: Hinweise Zur Anleitung
Hinweise zur Anleitung Hinweise zur Anleitung Lesen Sie diese Anleitung sorgfältig, bevor Sie Ihr Homematic IP Gerät in Betrieb nehmen. Bewahren Sie die Anleitung zum späteren Nachschlagen auf! Wenn Sie das Gerät anderen Personen zur Nutzung überlassen, übergeben Sie auch diese Anleitung. - Page 9 Gefahrenhinweise Betreiben Sie das Gerät nur in trockener sowie staubfreier Umgebung, setzen Sie es keinem Ein- fluss von Feuchtigkeit, Vibrationen, ständiger Sonnen- oder anderer Wärmeeinstrahlung, Kälte und keinen mechanischen Belastungen aus. Das Gerät ist kein Spielzeug! Erlauben Sie Kindern nicht damit zu spielen. Lassen Sie das Verpa- ckungsmaterial nicht achtlos...
-
Page 10: Funktion Und Geräteübersicht
Funktion und Geräteübersicht Funktion und Geräteübersicht Die Homematic IP Alarmsirene ist für den Einsatz in In- nenräumen konzipiert und sorgt im Alarmfall, z. B. aus- gelöst durch einen Homematic IP Bewegungsmelder, für eine zuverlässige akustische und optische Signalisierung. Die Deaktivierung des Alarms erfolgt über angelernte Homematic IP Geräte oder die Homematic IP App. -
Page 11: Allgemeine Systeminformationen
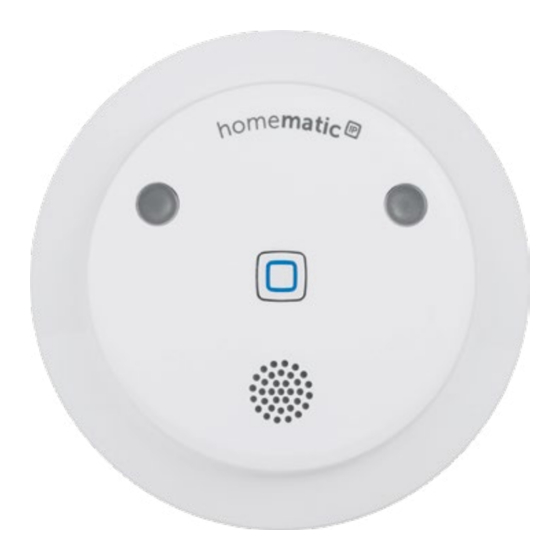
Lautsprecher Batteriefach Sabotagekontakt Allgemeine Systeminformationen Dieses Gerät ist Teil des Homematic IP Smart-Home-Sys- tems und kommuniziert über das Homematic IP Funk- protokoll. Alle Geräte des Systems können komfortabel und individuell per Smartphone über die Homematic IP App konfiguriert werden. Alternativ haben Sie die Mög- lichkeit, Homematic ... -
Page 12: Montage
Montage Montage Sie können die Alarmsirene an der Wand bzw. Decke oder auf einer Unterputzdose montieren. Wand- bzw. Deckenmontage Um die Alarmsirene an einer Wand oder Decke zu mon- tieren, gehen Sie wie folgt vor: • Wählen Sie einen geeigneten Montageort an der Decke oder an einer Wand aus. -
Page 13: Montage Auf Einer Unterputzdose
Montage Montage auf einer Unterputzdose Sie können die Alarmsirene mithilfe der Löcher (H) auf einer Unterputz-/Installationsdose montieren (s. Abbil- dung 4). In der Unterputzdose dürfen sich keine offenen Leiterenden befinden. Sollten für die Montage bzw. Installation des Gerä- tes Änderungen oder Arbeiten an der Hausinstalla- tion (z. B. -
Page 14: Inbetriebnahme
Bitte lesen Sie diesen Abschnitt erst vollständig, bevor Sie mit dem Anlernen beginnen. Richten Sie zunächst Ihren Homematic IP Access Point über die Homematic IP App ein, um weitere Homematic IP Geräte im System nutzen zu kön- nen. Ausführliche Informationen dazu finden Sie... - Page 15 Geräten kommunizieren kann, muss sie zu- nächst angelernt werden. Zum Anlernen der Alarmsirene an den Access Point ge- hen Sie wie folgt vor: • Öffnen Sie die Homematic IP App auf Ihrem Smartphone. • Wählen Sie den Menüpunkt „Gerät anlernen“ aus. •...
-
Page 16: Batterien Wechseln
Batterien wechseln finden Sie auf dem Aufkleber im Lieferumfang oder direkt am Gerät. • Warten Sie, bis der Anlernvorgang abgeschlossen ist. • Zur Bestätigung eines erfolgreichen Anlernvor- gangs leuchtet die LED grün. Das Gerät ist nun einsatzbereit. • Leuchtet die LED rot, versuchen Sie es erneut. •... - Page 17 Batterien wechseln non/AA entsprechend der Polaritätsmarkierungen in das Batteriefach ein (s. Abbildung 7). • Drehen Sie das Gerät wieder in die Montageplatte ein. Achten Sie nach dem Einlegen der Batterien auf die Blink- folgen der Geräte-LED (B) (s. „8.4 Fehlercodes und Blink- folgen“...
-
Page 18: Fehlerbehebung
Fehlerbehebung Fehlerbehebung Schwache Batterien Wenn es der Spannungswert zulässt, ist die Alarmsirene auch bei niedriger Batteriespannung betriebsbereit. Je nach Beanspruchung kann evtl. nach kurzer Erholungs- zeit der Batterien wieder mehrfach gesendet werden. Bricht beim Senden die Spannung wieder zusammen, wird das Symbol für leere Batterien ( ) in der App und der Fehlercode am Gerät angezeigt (s. -
Page 19: Duty Cycle
Stunde (also 36 Sekunden in einer Stunde). Die Geräte dürfen bei Erreichen des 1-%-Limits nicht mehr senden, bis diese zeitliche Begrenzung vorüber ist. Gemäß dieser Richtlinie, werden Homematic IP Geräte zu 100 % nor- menkonform entwickelt und produziert. Im normalen Betrieb wird der Duty Cycle in der Regel nicht erreicht. -
Page 20: Fehlercodes Und Blinkfolgen
„8.3 Duty Cycle“ auf Seite 19). Kurzes Anlernmodus aktiv Geben Sie die oranges (Anlernen an den letzten vier Ziffern Blinken Access Point oder der Geräte- (alle 10 s) an die Homematic Seriennummer zur Zentrale) Bestätigung ein (s. „6.1 Anlernen“ auf Seite 14). -
Page 21: Wiederherstellung Der Werkseinstellungen
Wiederherstellung der Werkseinstellungen 6x langes Gerät defekt Achten Sie auf die rotes Anzeige in Ihrer Blinken App oder wenden Sie sich an Ihren Fachhändler. 1x oranges Testanzeige Nachdem die und 1x Testanzeige grünes erloschen ist, Leuchten können Sie fortfahren. Wiederherstellung der Werksein- stellungen Die Werkseinstellungen des Gerätes können wie- derhergestellt werden. -
Page 22: Wartung Und Reinigung
Lassen Sie die Systemtaste wieder los, um das Wiederherstellen der Werkseinstellungen abzu- schließen. Das Gerät führt einen Neustart durch. Nach dem Neustart können Sie das Gerät wieder in Ihr Homematic IP System integrieren. Wartung und Reinigung Das Gerät ist wartungsfrei. Überlassen Sie Reparatur einer Fachkraft. -
Page 23: Allgemeine Hinweise Zum Funkbetrieb
Gegebenheiten vor Ort eine wich- tige Rolle. Hiermit erklärt die eQ-3 AG, Maiburger Str. 29, 26789 Leer, Deutschland, dass der Funkanlagentyp Home- matic IP HmIP-ASIR-2 der Richtlinie 2014/53/EU ent- spricht. Der vollständige Text der EU-Konformitätserklä- rung ist unter der folgenden Internetadresse verfügbar: www.homematic-ip.com Technische Daten Geräte-Kurzbezeichnung:... - Page 24 Technische Daten Schutzart: IP20 Umgebungstemperatur: 5 - 35 °C Ø Abmessungen ( x H): 124 x 45 mm Gewicht: 190 g (inkl. Batterien) Funkfrequenz: 868,3 MHz/869,525 MHz Empfängerkategorie: SRD category 2 Typ. Funk-Freifeldreichweite: 250 m Duty Cycle: < 1% pro h / < 10% pro h Technische Änderungen vorbehalten.
- Page 25 Package contents Quantity Description Homematic IP Alarm Siren Mounting plate 1.5 V LR6/mignon/AA batteries Screws 3.0 x 30 mm Plugs 5 mm Operating manual Documentation © 2018 eQ-3 AG, Germany All rights reserved. Translation of the original version in German.
- Page 26 Table of contents Information about this manual........27 Hazard information ............27 Function and device overview ........29 General system information ........30 Mounting ................. 30 Mounting on walls or ceilings .......... 30 Mounting on flush-mounted boxes ........31 Start-up ................33 Teaching-in ................33 Replacing batteries ............34 Troubleshooting .............36 Weak batteries ..............
-
Page 27: Information About This Manual
Information about this manual Please read this manual carefully before beginning operation with your Homematic IP component. Keep the manual so you can refer to it at a later date if you need to. If you hand over the device to other persons for use, please hand over this manual as well. - Page 28 Hazard information The device may only be operated in dry and dust- free environment and must be protected from the effects of moisture, vibrations, solar or other methods of heat radiation, cold and mechanical loads. The device is not a toy; do not allow children to play with it.
-
Page 29: Function And Device Overview
Function and device overview Function and device overview The Homematic IP Alarm Siren is designed for indoor applications and enables reliable acoustic and visual signalling in alarm cases, e.g. triggered by a Homematic IP Motion Detector. Alarms can be deactivated by connected Homematic ... -
Page 30: General System Information
General system information General system information This device is part of the Homematic IP smart home system and works with the Homematic IP radio protocol. All devices of the system can be configured comfortably and individually with the Homematic IP smartphone app. -
Page 31: Mounting On Flush-Mounted Boxes
Mounting Remove the mounting plate (F) by rotating the • device and the mounting plate into opposite directions (see figure 2+3). • Position the mounting plate on the desired site and mark two bore holes (G) with a pen to the wall or ceiling (see figure 4). - Page 32 Mounting Incorrect installation can put • your own life at risk; • and the lives of other users of the electrical system. Incorrect installation also means that you are running the risk of serious damage to property, e.g. because of a fire. You may be personally liable in the event of injuries or damage to property.
-
Page 33: Start-Up
Teaching-in Please read this entire section before starting the teach-in procedure. First set up your Homematic IP Access Point via the Homematic IP app to enable operation of other Homematic IP devices within your system. For further information, please refer to the oper- ating manual of the Access Point. -
Page 34: Replacing Batteries
3 minutes by pressing the system button (B) shortly (see figure 5). • Your device will automatically appear in the Homematic IP app. • To confirm, please enter the last four digits of the device number (SGTIN) in your app or scan the QR code. - Page 35 Replacing batteries move it from the mounting plate (see figure 6). • Remove the empty batteries from the battery compartment (D). • Insert three new LR6/mignon/AA batteries in the battery compartment, observing the polarity shown (see figure 7). • Turn the device back into the mounting plate. Please pay attention to the flashing signals of the device LED (B) while inserting the batteries (see „8.4 Error codes and flashing sequences“...
-
Page 36: Troubleshooting
Troubleshooting Troubleshooting Weak batteries Provided that the voltage value permits it, the alarm siren will remain ready for operation also if the battery voltage is low. Depending on the particular load, it may be possi- ble to send transmissions again repeatedly, once the bat- teries have been allowed a brief recovery period. -
Page 37: Duty Cycle
Devices must cease transmission when they reach the 1% limit until this time restriction comes to an end. Homematic IP devices are designed and produced with 100% conformity to this regulation. During normal operation, the duty cycle is not usually reached. -
Page 38: Error Codes And Flashing Sequences
(teaching- four numbers of the ry 10 s) in to the Access device serial num- Point or the ber to confirm (see Homematic „6.1 Teaching-in“ on Central Control page 33). Unit) 6x long red Device defective Please see your app... -
Page 39: Restore Factory Settings
Press and hold down the system button again for 4 seconds, until the status LED lights up green. • Release the system button to finish the proce- dure. The device will perform a restart. After the restart, you can again integrate your device into your Homematic IP system. -
Page 40: Maintenance And Cleaning
Maintenance and cleaning Maintenance and cleaning The product does not require any maintenance. Enlist the help of an expert to carry out any repairs. Clean the device using a soft, lint-free cloth that is clean and dry. You may dampen the cloth a little with lukewarm water in order to remove more stubborn marks. -
Page 41: Technical Specifications
Technical specifications Hereby, eQ-3 AG, Maiburger Str. 29, 26789 Leer/Germany declares that the radio equipment type Homematic IP HmIP-ASIR-2 is in compliance with Directive 2014/53/ EU. The full text of the EU declaration of conformity available following internet address: www.homemaic-ip.com... - Page 42 Technical specifications Instructions for disposal Do not dispose of the device with regular domestic waste! Electronic equipment must be disposed of at local collection points for waste electronic equipment in compliance with the Waste Electrical and Electronic Equipment Directive. Information about conformity The CE sign is a free trading sign addressed exclusively to the authorities and does not include any warranty of any properties.
- Page 43 Kostenloser Download der Homematic IP App! Free download of the Homematic IP app! Bevollmächtigter des Herstellers: Manufacturer’s authorised representative: eQ-3 AG Maiburger Straße 29 26789 Leer / GERMANY www.eQ-3.de...
Need help?
Do you have a question about the HmIP-ASIR-2 and is the answer not in the manual?
Questions and answers