
Subscribe to Our Youtube Channel
Related Manuals for Morphy Richards EG820C2LP-PM


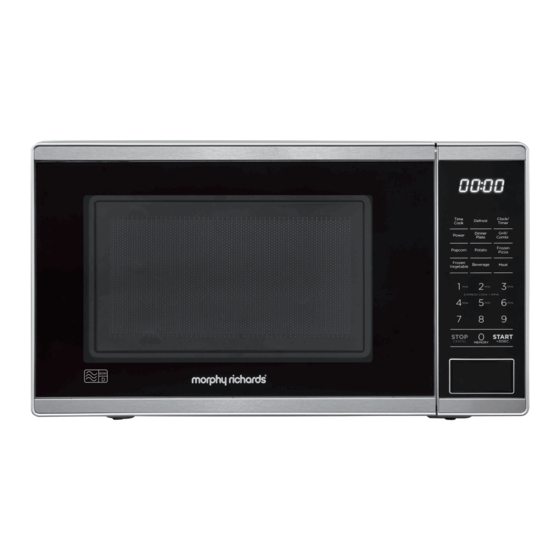
Summary of Contents for Morphy Richards EG820C2LP-PM
- Page 1 MICROWAVE OVEN Installation & User Instructions – EG820C2LP(F)-PM Please keep for future reference Version 2 31/03/2021...
-
Page 2: Table Of Contents
Contents Safety information…………………………………………………… Installation…………………………………………………....… Parts and assembly…………………………………………………… Control panel………………………………………………....…… Setting the clock…………………………………………………... Stop cooking / Cancel………………………………………… Control panel lock……………………………………………… Kitchen Timer………………………………………………..Selecting microwave oven power…………………………… Express microwave mode ……………………………………………… Microwave cooking………………………………………………..…… Defrosting………………………………………………………………… Grill cooking…………………………………………………………………… Combination cooking ………………………………………………… Multistage cooking…………………………………...…………… Memory cooking…………………………………………………… Auto cook function……………………………………………………... -
Page 3: Safety Information
Safety information Important – Please read these instructions fully before installation • WARNING: It is hazardous for anyone other than a competent person to carry out any service or repair operation that involves the removal of a cover that gives protection against exposure to microwave energy. - Page 4 • This oven must be positioned so that the plug is accessible and the plug socket is within easy reach of the power cord. • Do not operate the microwave if damaged or after it malfunctions. In the event the supply cord is damaged, it must only be replaced by a qualified service engineer, with a suitably approved part.
- Page 5 WARNING! (continued) • Never cook or heat eggs in their shell or whole hard boiled eggs, as they may explode even after cooking in the microwave has been completed. • The oven should be cleaned regularly and any food deposits removed –...
- Page 6 FOOD SAFETY • Do not cook raw meat or raw shellfish in a microwave, due to the possibility for uneven heating. • Do not use microwave for home canning or bottling. Improperly canned or bottled foods may spoil and be dangerous to eat.
-
Page 7: Installation
Installation • This microwave is designed to be free standing and is not intended to be used ‘built in’ or in a cabinet. • Select a level surface away from televisions, cookers and other heat producing appliances. • Ensure adequate ventilation and allow a clearance of 20cm at each side of the oven ➢... -
Page 8: Parts And Assembly
Parts and assembly 1. Interlocking catches 5. Door with viewing panel 2. Turntable roller 6. Glass turntable 3. Turntable shaft 7. Grill Rack 4. Control panel 8. Grill element 9. Door release button • Ensure all packaging materials, protective film and adhesive tape are removed and check the oven and door for any damage. -
Page 9: Control Panel
Control panel • Version 2 31/03/2021... -
Page 10: Setting The Clock
Setting the clock 1. Fully unwind the cable, plug in and switch on. The microwave will emit a single bleep and the display will show 0:00. 2. Press CLOCK/TIMER pad once, 00:00 will display. 3. Press the number pads to enter the correct time. For example, the time is 8:15 now, please press 0-8-1-5 in turn. -
Page 11: Control Panel Lock
Control panel lock This function helps prevent accidental operation during cleaning or unsupervised operation of the oven by children. • To activate the lock, press and hold the STOP/CANCEL pad (approx. 3 seconds), until the locked icon is displayed and a single long bleep is heard. -
Page 12: Selecting Microwave Oven Power
Selecting microwave oven power The default on the microwave oven is set to cook at full power unless otherwise changed. To select a lower power setting, press the POWER pad and enter desired power level before setting the cooking time. The power selected will be shown in the display. -
Page 13: Microwave Cooking
Microwave cooking 1. Place the food to be cooked in a suitable microwave safe container and cover. 2. Press the door button to open the door, place the container in the centre of the glass turntable and securely close the oven door. 3. -
Page 14: Defrosting
The oven will work with this selected power level for the rest of the cooking time. • Cooking time can be extended during microwaving cooking by pressing the START/+30SEC pad. Each successive press will increase the cooking time by 30 seconds. •... -
Page 15: Grill Cooking
Note: Defrosting time can be extended during time defrosting by pressing the START/+30SEC pad. Each successive press will increase the cooking time by 30 seconds. Grill cooking grill safe 1. Place the food to be cooked in a suitable container. Press the door button to open the door and place the container in the centre of the glass turntable or alternatively place the food directly on the grill grill safe... -
Page 16: Combination Cooking
Combination cooking This function combines both cooking methods and two-preset programmes are available and these are accessed by pressing the GRILL/COMBI pad repeatedly to scroll though the options available below. • Combi. 1 (C-1) – 55% of cooking time is by microwave and 45% by grill •... -
Page 17: Multistage Cooking
Multistage cooking The oven can be programmed to carry out up to two consecutive functions. For example, if you wish to first microwave at half power then cook by grill. 1. Place the food to be cooked in a suitable container for all the cooking methods to be used and position in the centre of the glass turntable. -
Page 18: Memory Cooking
Memory cooking This function allows three bespoke cooking programs to be stored into the memory of the microwave for use at future times. To store a cooking program 1. To store a program into the first memory position, press the 0/MEMORY pad ONCE and ‘1’... -
Page 19: Auto Cook Function
Auto cook function 1. The oven has a pre-programmed cooking menu that can be used immediately from start up just by pressing the relevant pad. 2. After checking the cooking method used in the table following, place the food to be cooked in a suitable container and cover when necessary. - Page 20 9. The oven can be stopped at any time by pressing the STOP/CANCEL pad or by opening the door. Pressing the STOP/CANCEL pad once (with the door closed) will stop the cooking, pressing the pad twice will clear the settings. Notes: •...
- Page 21 Instructions Food Weight / quantity Cooks by microwave Potato 1 (230 g) For best result, once the potatoes 2 (460 g) are cooked, wrap them in tin foil for 3 (690 g) at least 5 minutes to cook through. Larger or cold potatoes may need additional cooking.
- Page 22 Meat - 400 g Cooks by a combination of Chicken 600 g microwave and grill 800 g Turn chicken over three-fourths way 1000 g through the cooking cycle. 1200 g The cooking times are guidelines only – check that chicken is cooked through before consuming.
-
Page 23: Cleaning Your Oven
Cleaning your oven Clean the oven and seals to remove food debris on a weekly basis and more often if required. Failure to maintain the oven and seals in a clean condition could lead to deterioration of the surface or seals, adversely affect the life of the oven and possibly result in a hazardous situation (possible release of microwave energy). - Page 24 Materials suitable for use in the oven Material Suitability for use in Microwave Grill Combination Glassware Heat resistant Heat resistant Heat resistant only only only Ceramic ware Heat resistant Heat resistant Heat resistant only only only Plastic Microwave safe containers only Not melamine Avoid using...
-
Page 25: General Microwave Cooking Advice
General microwave cooking advice • Food cooking times will vary with microwave wattage (MAFF rating). When following recipes and on pack cooking instructions always check the MAFF rating / wattage of the appliance being used (marked on the front of the microwave) and follow the corresponding cooking advice. -
Page 26: Troubleshooting
Troubleshooting Observation Potential cause / solution Oven will not Plug not fully inserted into the mains socket or start not switched on Door is open Incorrect operation Do you have a power cut? Arcing or Unsuitable materials used when using sparking microwave function. - Page 27 Technical specification MORPHY RICHARDS 20 LITRES 800W MICROWAVE WITH GRILL Model EG820C2LP(F)-PM Rated Voltage & Frequency 230 – 240V AC 50Hz Rated Power Input (Microwave) 1200-1270W Rated Power Input (Grill) 9 50-1000W Rated Microwave Output 750-800W MAFF rating Rated Microwave Frequency...
-
Page 28: Recycling Electrical Products
Recycling electrical products You should now recycle your waste electrical goods and in doing so help the environment. This symbol means an electrical product should not be disposed of with normal household waste. Please ensure it is taken to a suitable facility for disposal when finished with. - Page 29 The GREEN & YELLOW wire must be connecting to the terminal marked with the letter E or the earth symbol Produced in China under licence for Morphy Richards. Argos Limited, 489-499 Avebury Boulevard, Milton Keynes, MK9 2NW. Argos (N.I.) Ltd, Forestside Shopping Centre, Upper Galwally, Belfast, United Kingdom, BT8 6FX.
- Page 30 Version 2 31/03/2021...
- Page 31 Version 2 31/03/2021...
- Page 32 PN:16170000A80841 Version 2 31/03/2021...
Need help?
Do you have a question about the EG820C2LP-PM and is the answer not in the manual?
Questions and answers