
Related Manuals for Morphy Richards P90D23EL-B8/H


Summary of Contents for Morphy Richards P90D23EL-B8/H
- Page 1 MICROWAVE OVEN Installation & User Instructions – 90D23EL-B8/H Please keep for future reference Issue 1 16/8/2023...
-
Page 2: Table Of Contents
Contents Safety Information……………………………………………….. Installation………………………………………………………… Parts and assembly……………………………………………… Control panel…………………………………………………….. Setting the clock…………………………………………………. Stop cooking / cancel…………………………………………… Control panel lock…..…………………………………………… Selecting microwave power level……………………………… Microwave express mode………………………………………. Microwave cooking……………………………………………… Defrosting………………………………………………………… Multistage cooking………………………………………………. Auto cook…………………………………………………………. Cleaning your oven……………………………………………… Materials suitable for use in the oven…………………………. General microwave cooking advice……………………………... -
Page 3: Safety Information
Safety information Important – Please read these instructions fully before installation You should only plug the appliance into a 230V‐240V AC, 50Hz • supply. Connecting it to other power sources may damage the appliance and will invalidate the guarantee. WARNING: It is hazardous for anyone other than a competent person •... - Page 4 SAFETY (continued) All microwaves are tested and approved in accordance with current • electromagnetic safety and compatibility regulations and standards. As a precautionary measure, pacemaker manufacturers recommend wearers to keep a minimum distance of 20-30 cm between an operating microwave oven and the pacemaker in order to avoid possible interference with the pacemaker.
- Page 5 WARNING! (continued) If smoke is emitted, switch off or unplug the appliance and keep the • door closed in order to stifle any flames. Do not use oven on, near or under flammable or heat sensitive items. • Do not place foil wrapped food, metal containers or containers with •...
-
Page 6: Installation
Installation This microwave is designed to be free standing and is not intended to • be used ‘built in’ or in a cabinet. Select a level surface away from televisions, cookers and other heat • producing appliances. Ensure adequate ventilation and allow a clearance of •... -
Page 7: Parts And Assembly
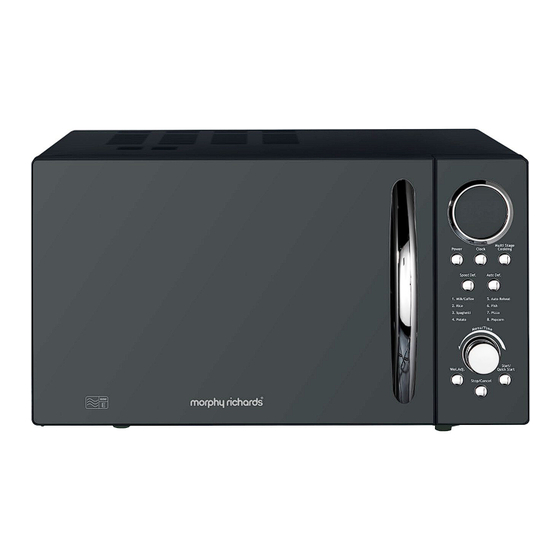
Parts and assembly Interlocking catches Control panel Door with viewing panel Waveguide cover Turntable roller Glass turntable Turntable shaft Ensure all packaging materials, protective film and adhesive tape are • removed and check the oven and door for any damage. Do not remove the waveguide cover. -
Page 8: Control Panel
Control panel • Display Description Symbol Cooking (High power modes) Cooking (Low power modes) Display Control panel locked Defrost Clock Microwave First cooking stage Second cooking stage Data entry required Weight gram Function Percentage power knob Fan only operation TIME INCREMENTS Cooking time Increments 0 –... -
Page 9: Setting The Clock
Setting the clock Fully unwind the cable, plug in and switch on. The microwave will emit a single bleep and the display will show 1:01. Press the CLOCK button to select 12 hour time format. Press the button again to select the 24 hour format. When the time format of choice is displayed, turn the FUNCTION knob until the correct hour is displayed. -
Page 10: Control Panel Lock
Control panel lock This function helps prevent accidental or unsupervised operation of the oven by young children. The lock function is activated automatically 1 minute after last user operation; the padlock symbol will be shown in the display and the control panel will now be inactive. -
Page 11: Microwave Cooking
Microwave cooking Place the food to be cooked in a suitable microwave safe container and cover. Pull open the door, place the container in the centre of the glass turntable and securely close the oven door. Press the POWER button and turn the FUNCTION knob until the required cooking time is displayed (10 seconds to 60 minutes). -
Page 12: Defrosting
Defrosting Weight defrost Weigh the item to be defrosted, place in a suitable microwave safe container and position in the centre of the glass turntable. Securely close the microwave door. Press the AUTO DEF. button and then turn the FUNCTION until the corresponding food weight (100 - 1800g) is displayed. -
Page 13: Multistage Cooking
Multistage cooking The oven can be programmed to carry out up to three consecutive functions. For example, if you wish to Speed defrost for 10 minutes Cook at full microwave for 2 minutes iii. Cook at P-60 for 5 minutes Place the food to be cooked in a suitable microwave safe container and position in the centre of the glass turntable. -
Page 14: Auto Cook
Auto cook function The oven has a pre-programmed cooking menu that can be used immediately from start up just by pressing the relevant button. Place the food to be cooked in a suitable microwave safe container. Open the door and place the container in the centre of the glass turntable and securely close the oven door. - Page 15 Weight / Display Food Instructions quantity Milk / Heating liquid from 5-10°C. Use wide (200ml) coffee neck cup / mug and do not cover. (400ml) (600ml) 150g Rice Place rice in a bowl with five times the 300g quantity (unless another quantity 450g specified by food packaging) of boiling 600g...
- Page 16 Cleaning Clean the oven and seals to remove food debris on a weekly basis and more often if required. Failure to maintain the oven and seals in a clean condition could lead to deterioration of the surface or seals, adversely affect the life of the oven and possibly result in a hazardous situation (possible release of microwave energy).
-
Page 17: Materials Suitable For Use In The Oven
Materials suitable for use in the oven Material Suitability Microwave safe plastic only. Plastics Cooking vessel Do not use melamine dishes and containers avoid using with food with high fat or Not melamine sugar contents Plastic wrap Covering food Microwave safe plastic only. Glass Cooking vessel Heat resistant glass only... -
Page 18: General Microwave Cooking Advice
General microwave cooking advice Food cooking times will vary with microwave wattage (MAFF rating). • When following recipes and on pack cooking instructions always check the MAFF rating / wattage of the appliance being used (marked on the front of the microwave) and follow the corresponding cooking advice. -
Page 19: Troubleshooting
Troubleshooting Observation Potential cause / solution Plug not fully inserted into the mains socket or not Oven will not start switched on Door is open Incorrect operation Do you have a power cut? Unsuitable materials used when using microwave Arcing or function. -
Page 20: Technical Specification
Technical specification Morphy Richards 23 Litre 900W Microwave oven Model P90D23EL-B8/H SKU No. 143073371, 143075413 Rated Voltage & Frequency 230 - 240V AC 50Hz Rated Power Input 1400W Rated Microwave Output 900W MAFF rating Rated Microwave Frequency 2450MHz Overall 23 litres... -
Page 21: Plug Rewiring
Plug rewiring advice The wires in this mains lead are coloured in accordance with the following UK electrical code: BLUE = NEUTRAL BROWN = LIVE GREEN + YELLOW = EARTH Non-rewireable plug This appliance may be fitted with a “non‐rewireable” plug. If you need to change the fuse in a “non‐rewireable”... - Page 22 Issue 1 16/8/2023...
Need help?
Do you have a question about the P90D23EL-B8/H and is the answer not in the manual?
Questions and answers