
Related Manuals for Plum Axe Plus Z403


Summary of Contents for Plum Axe Plus Z403
- Page 1 User Manual Axe PLUS User Manual Brand Name: plum Model Name: Z403 FCC ID: Y7WPLUMZ403...
-
Page 2: Table Of Contents
User Manual Contents 1.APPEARANCE AND KEYPAD OPERATIONS ......3 2.USING MEMORY CARD AS U DISK ......4/5/6 3.WIFI ............ 7 4.BLUETOOTH ..........8 5.MAIL ............ 9 5.1 G MAIL ........................9 5.2 E MAIL .......................... 10 6.DIALLING ........11/12/13/14 7.MESSAGING .......... -
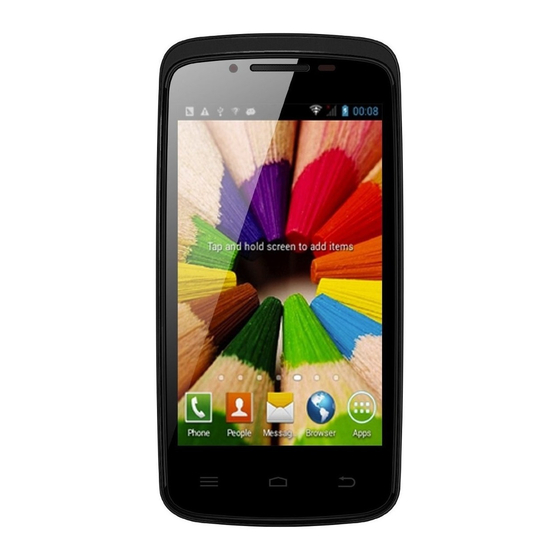
Page 3: 1.Appearance And Keypad Operations
User Manual 1 . Appearance and Keypad Operations Keys Functions Home Long press it to open recently opened application window. Press it to start the menu, which allows you to perform actions in the current menu interface or options’ menu. ... - Page 4 User Manual The Methods as the same as connection, see the following picture: 1) cell phone connections media equipment (MTP) 2) In the Settings, developers in closed USB debugging options. 3) Use USB mobile transmission line will connected to the computer 4)...
- Page 5 User Manual camera. The phone connection camera (PTP) 1) Using the USB mobile transmission line will connected to the computer. You don't have to shut down USB debugging, see below. Only under the camera view images 2) After the connection can be directly in the PC check images captured on camera 。 ...
-
Page 6: 3.Wifi
User Manual 2) XP update windows media player to 11 3) Install wpdmtp.inf driver 4) Vista Unconfirmed Notice :On the PC operation assistant tool such as mobile phone, Must be open the USB debugging. WIFI Wi-Fi provides as far as 300feet (100M) range of wireless network access. If you use cell phone to connect wifi, you should connect to the wireless access point or 「hot spots」. - Page 7 User Manual users can select manually ,the specific location is “settings>wireless and internet>data connection” ,touch “SIM1、SIM2、no data connection” ,when the dot turns green, it’s already opened.。...
-
Page 8: 4.Bluetooth
User Manual 4. Bluetooth Turn on Bluetooth or set the phone can be detected 1) Press home>menu, the touch settings. 2) Touch wireless and internet, then choose Bluetooth box to open the Bluetooth function. After started, the status box will ). -
Page 9: 5.Mail
User Manual 5.Mail 5.1 Gmail Create an electronic mail account Select mail> settings. You can activate or edit existing e-mail accounts as well as create a new e-mail account. a. Select mail, Google account setting interface appears. Then touch ‘next step’ > create account>enter name, last name and e-mail account. -
Page 10: Email
User Manual 5.2 Email Load Email. c. Open network connection, d. In setting the account interface, input the correct email address and password and click next mobile phone automatically complete the sending and receiving server Settings. Pop-up mail find frequency, and user Settings interface, complete Settings, click next. -
Page 11: 6.Dialling
User Manual 6.Dialling When the icon of internet server appears in the screen, you could dial or receive callings. The signal bar on the top right corner show the strength of network signal (the maximum with 4 signal bars) . ... - Page 12 User Manual Receive callings When calling comes (top left will show from which SIM card) press “Answer” and slide towards right until the middle button, then you can receive callings. Proximity sensor According to the distance between phone and human body,it will adjust automatically the switch of the backlight. During the call, close the phone to the ear, the backlight will turn off automatically,...
- Page 13 User Manual 1)settings>set other functions of the call in the dialing settings,for example:Call Transfer– after all the settings finished and turned on,you could transfer the call to a certain number. 2)In settings>dialing settings >other dialing settings,open “call waiting”.After turned on,you can receive another call when already exist one,The answering and rejecting functions are just like the ordinary phone.
- Page 14 User Manual Call settings Voice Call 1)V oice Mail :The voice mailbox in setting in the input voicemail number. 2) IP prefix number: Setting the different of SIM cards IP prefix numbers 3) Call forwarding :Can set respectively 2 a SIM card, the line is busy, and no one has to receive, not be connect four connecting way 3) Call barring :...
-
Page 15: 7.Messaging
User Manual 7. Messaging Important:the message title of this phone is the phone number,will be reserved in s similar for of dialog, instead of the usual folder structure. Messages with blue background are those received, and messages with white background are those sent. ... - Page 16 User Manual Notices: a, If you want send MMS with many pages, you should select “append PPT” in the “append” interface. b, You can append 10 pictures, with the form of GIF, JPEG. c, Click “adding themes”, the box of “theme” will appear under the box of “recipient”, meanwhile it is turned to MMS automatically.
- Page 17 User Manual Notices:For now this phone can mass messages to almost 20 numbers,the correct number depends on the characters,you can only enter 312 characters in the box of“recipient”. When a message is sent or sent again,a little yellow letter will appear. The number 1 or 2 on the letter refers to SIM1 or SIM2.
-
Page 18: Contacts
User Manual Contacts Open the menu of applications>contacts Default display phone contacts and SIM card contacts, sort contacts by first letter of alphabet. 2)Click Search Icons,You c an enter the contact search interface. a.To enter the Numbers or letters and the list of names of the agreement, which will be shown in the search results. - Page 19 User Manual Select save contacts to phone or a a SIM card, into contact editing interface. You can edit contact head, name, telephone number, group, save to and more, and then click "finish". 4) In contact interface, click on the Menu button a.
- Page 20 User Manual Open the application interface >Contact,change to the group. 1)Click“Add group”Icons can create new group,Just to be saved in a cell phone group 2) In "the group name" column input group name, in "type in the contact's name" column input contact key word, can be in all of contact search, and added to the group.
-
Page 21: Intenet Explor
User Manual 9. Internet Explorer Internet explorer 1)In the interface of internet explorer,touch address filed and enter the URL. 2)Use keypad to enter URL. The appropriate web sites will appear on the screen. You can touch it directly go to the page or continue to enter URL. -
Page 22: 10.Recorder
User Manual 10. Recorder Recorder can record voice, and send it quickly via Bluetooth or MMS as well as make it as ring tone. Notices:recorder can only save the audio files as AMR format. 1) Click the recorder application. 2) Keep the phone’s microphone near the voice source. -
Page 23: 11.Clock
User Manual 11.Clock Open the menu of application, click 2) Click screen except the alarm at any position, screens, black, time with white shows, this time the standby time to screen will not extinguish screen. Click again on the screen, and restore normal clock interface. 3) Click screen set alarm button and enter the alarm clock set interface ... -
Page 24: Caculator
User Manual 12.Caculator calculator this function can turn your phone into calculator, it can do some simple calculations. ·Touch the number keys to make it appear in the blank box. In the interface of calculator, press MENU button or hold down the screen to the left, then the senior panel appears. -
Page 25: 13.Camera
User Manual 13. Camera 13.1 camera Prior preparation Install memory card before using the camera or video camera. All your photos or videos taken by the phone are stored in memory card. Open camera Press home, touch menu, select camera. Choose the video mode if you want to make videos. The screen will automatically switch to landscape mode. -
Page 26: Video Mode
User Manual 13.2 Video camera Prior preparation Install memory card before using the camera or video camera. All your photos or videos taken by the phone are stored in memory card. Open camera Press home, touch menu, select camera. Choose video camera mode. The screen will automatically switch to landscape mode. - Page 27 User Manual 14. Images Open images Press home,touch label of applications,then touch photos’ galley. In the interface of camera,Press menu to open it,then touch to operate. 2) Files Interface In the library the interface, upper right a slide show the play button, click on the way to the slide circulation play all image files.
- Page 28 User Manual Use images After taking pictures, you can view them and share them with your friends. a. Use E-mail to send pictures : choose Gmail or E-mail, pictures will be automatically added to an E-mail. Write your information, click send. b.Use Messaging to send pictures:...
- Page 29 User Manual View images 1) In the picture interface, touch photo album to view images. 2) Touch the thumbnail to view pictures on full screen. You can choose to display small or large thumbnails. Hold down the screen towards the left side to view the next photo or towards right to view the previous one.
-
Page 30: 15.Music
User Manual 15. Music The phone can play digital audio files in memory card.The following formats are available :AMR 、 M4A 、 MIDI 、 MP3 、 WAV 、 OGG. Open Music Press home, touch the label of applications, touch music. Then the interface of Music Media appears. ... - Page 31 User Manual press Menu, then touch to turn off the Party Shuffle. View lyrics When the corresponding tracks have lyrics file, the player displays the lyrics sources. Click the up arrow, you can play music, view lyrics at the same time.
-
Page 32: Calender
User Manual 16. Calender Enter the calender application Load Goggles accounts, enter the application, In the interface of month or week will use gray to highlight the day. Display default the date on the current month. In the interface,press menu,4 display modes will appear: 1) Schedule Intrface shows a certain schedule(click on the initial time and view forward,click the final time to view backwards ) 2) day... -
Page 33: Fm Radio
User Manual 17.FM Radio FM Radio Through this program, you may listen to FM radio on the device, FM radio use the wired headset as an antenna receive signals, before opening this program ,you install original equipment-headphones, when listening, you can switch it manually to speakers or the mode with wired headphones. -
Page 34: Settings
User Manual 18.Settings Your service provider may default some device settings, so you may not be able to change these settings. SIM management 1) Touch it to choose or to disable the SIM card, the card is grey when disabled, the flight mode displays on status bar. - Page 35 User Manual Percentage and top-Bar) Apps Can be view all the application, as Download 、 Running and so on. Location Services 1) Access to my location Allow or disallow the apps have asked your permission use your location information 2) GPS satellites active or deactivate the GPS satellites 3) Wi-Fi &...
- Page 36 User Manual Add account Add the different the account, as Google account. Date and Time 1) Automation data&time Use date and time provided by Network. 2) Setting Date Set the data via touch the number 3) Selecting Time Zone Select Time Zone according to where you are.
- Page 37 User Manual 19. Notices for the use of phone Your phone is a product of superior design and craftsmanship and should be treated with care. The following suggestions can help you comply with the terms of repair kits, to extend the life of mobile phone. Place the mobile phone and their parts and components out of reach of small children.
-
Page 38: Notices For The Use Of Phone
User Manual To avoid the phone in a lit cigarette, near open flame or any heat source. Do not open the device, non-professional approach will do damage to the phone. Do not throwit from height, knock or shake the phone, rough handling can damage internal circuit boards. Do not paint the phone, because the paint will block headphones, microphones or other removable parts, and lead it not work. - Page 39 User Manual radio frequency (RF) signals. In August, 1996, the Federal Communications Commissions (FCC) adopted RF exposure guidelines with safety levels for hand-held wireless phones. Those guidelines are consistent with the safety standards previously set by both U.S. and international standards bodies: <ANSIC95.1>...
- Page 40 User Manual harmful interference to radio communications. However, there is no guarantee that interference will not occur in a particular installation. If this equipment does cause harmful interference to radio or television reception, which can be determined by turning the equipment off and on, the user is encouraged to try to correct the interference by one or more of the following measures: - Reorient or relocate the receiving antenna.
Need help?
Do you have a question about the Axe Plus Z403 and is the answer not in the manual?
Questions and answers