Table of Contents
Advertisement
Quick Links
Advertisement
Table of Contents

Related Manuals for Plum Ram E200


Summary of Contents for Plum Ram E200
- Page 1 Ram Mobile Phone User manual Trand name:plum Model name:E200 FCC ID:Y7WPLUME200...
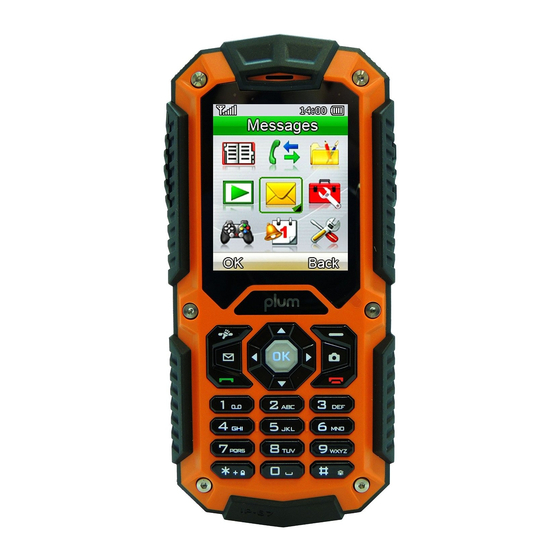
- Page 2 WELCOME Thank you to choose plum series mobile phone, the phone is a pressure-proof, waterproof, dustproof three anti-mobile phone. You can read this manual to fully understand use of plum series phones, the taste of its simple operation. The mobile phone in addition to the basic call functions, also supports text messaging, MP3 player, video player, flashlight, e-books and other functions, will bring your work and life more convenient and fun.
-
Page 3: Table Of Contents
WELCOME ......................II IMPORTANT SAFETY PRECAUTIONS ............5 GETTING STARTED .................... 3 ......................3 ATTERY USE Installing the battery ..................3 Charge the battery .................... 4 ..................4 CARD INFORMATION Installing the SIM card ..................5 Access codes ..................... 5 .................. - Page 4 ....................11 ECEIVED CALLS ..................... 11 ELETE CALL LOGS ....................11 ALL SETTINGS SIM 1/2 call setting..................11 ..................12 DVANCED SETTINGS Auto redial ...................... 12 Call time reminder..................12 connect notice ....................12 Answer mode ....................12 PHONEBOOK ...................... 12 ...................
- Page 5 Sent messages ....................16 ..................16 ROADCAST ESSAGE Template ......................16 Message settings ..................... 16 MULTIMEDIA ....................... 17 ......................17 AMERA ....................17 MAGA VIEWER ....................18 IDEO RECORDER ....................18 IDEO PLAYER ....................18 UDIO PLAYER ....................19 OUND RECORDER ......................
- Page 6 SIM Security Setup ..................23 Phone security ....................24 Phone lock ...................... 24 Change Password ................... 24 Auto Keypad Lock ..................24 Privacy protectz ....................24 ....................24 ONNECTIVITY Bluetooth ......................24 Data account ....................25 Restore factory settings .................. 25 TROUBLESHOOTING ..................
- Page 7 For example, do not carry a spare battery in a pocket or bag where the battery may contact metal objects. Short-circuiting the terminals may damage the battery or the object causing the short-circuiting. ◆ The battery can be charged and discharged hundreds of times, but it will gradually wear out.
-
Page 8: Getting Started
Getting started You need to insert the SIM card and charge the battery before using the phone. Battery use To extend the battery life of your device: 1. Use the standard wall charger to charge the battery for the first time. 2. -
Page 9: Charge The Battery
3. Replace the battery. Align the contacts of the battery with the corresponding connectors in the battery compartment. Charge the battery To charge the device battery: 1. Take the USB cable from the device packaging, and attach it to power adapter. Now connect the power adapter into a standard AC wall outlet. -
Page 10: Important Safety Precautions
and the contacts inside can easily be damaged by scratching or bending. Installing the SIM card Insert the SIM cards into their respective slots. Make sure that the contact area on the cards is facing the connectors on the device (as shown below). -
Page 11: Insert Memory Card
same code again and press the OK key. If you enter an incorrect PUK ten times in succession, the SIM card becomes invalid. Please contact your service provider for a new card. Insert memory card Insert memory card. Take compatible T-Flash card, and place it into its slot. -
Page 12: Phone Layout
Indicates that the alert type of your phone is set as ring. Indicates that the alert type of your phone is set as mute. Indicates your phone is locked. Indicates that the alert type of your phone is set as headset. - Page 13 (LSK) displayed in the lower left corner of the screen. Long press to activate the flashlight Press to perform the function currently displayed in the lower right corner of the Right soft key screen. (RSK) Quick access to inbox. Message keys Quick access to camera Camera...
-
Page 14: Enter Text
Enter text ABC, Zi, Number, and Symbol modes You can enter text in some features such as Messages, Phonebook, or Calendar, using ABC mode, Zi mode, Number mode, and Symbol mode. You can enter text by pressing the alphanumeric keys on the phone. Text Input Options: While you are in text editing mode, you will be in several modes. -
Page 15: To Make A Call From The Phonebook
To Make a call from the phonebook In the standby mode, press right soft key (RSK) to enter Phonebook. Scroll to the desired contact name or type the name in the input box, and then press send key to make the call. You can also press Menu and choose Phonebook submenu. -
Page 16: Overview Of Menu Functions
Overview of menu functions Basic menu Call center Phonebook File manager Organizer Messages Multimedia Services Voice call Settings Call center To access this menu, press [Menu] in Idle mode and select Call History Missed calls In Call Record menu, choose Missed Calls, and press OK to view the records. -
Page 17: Advanced Settings
• Call divert: You can set to forward the incoming call in different conditions and enable to Activate/Deactivate call diversion and check the Query status. • Call barring: In order to activate this service, it requires the services provided by the network service provider. When you change barring password, you need to input the old password. -
Page 18: Search
Search Search names and numbers saved in the Phonebook. Select the one you wish to call, and press Send Key to make a call. In the search mode, you might press # key to change the input method. You can finish the following operations with the find number: View: view the detailed information of the selected number. -
Page 19: File Manager
Copy contacts: it can allows copying the entries of SIM1/2 card or phone each other. Move contacts: Allows you move all contacts information to different storage location. Delete all contacts:You can delete all phonebook data in SIM1, SIM2 or Phone. File manager In this menu, you can manage images, audio, music, photos, and other contents you have downloaded. -
Page 20: Alarm
Your phone provides the following selections for your option: View: To view the note stored in a specified date. View all: To view all notes stored in a specified date. Add event: To add a new event in a specified date. Delete event: To delete a specific task, multiple tasks or all tasks. -
Page 21: Messages
Messages Use the Messaging menu to send and receive short messages and multimedia messages. You can also use a voice-mail, and cell broadcast message features. To access this menu, press [Menu] in Idle mode and select Messages. Message functions are available depending on network services that your service provider supports. -
Page 22: Multimedia
Multimedia Camera To take a picture, press Options in the preview mode, you can adjust the setting. Switch to video recorder: By camera switching to video Photos: Into photo album Camera settings: Set anti-flicker and delay timer Image settings: Set Image size/Image quality. White balance: Auto/Daylight/Fluorescent/Incandescent Scene mode: Auto/Night Effect settings: Normal/Grayscale/Sepia/Sepia green/Sepia blue/Color... -
Page 23: Video Recorder
Rename: Allows you to rename the file. Delete: Allows you to delete the pictures in the Photo Album. Sort by: Allows you to view the related information about the selected image. Video recorder In Multimedia menu, select Video Recorder and press OK. You can press ok key to start recording and press RSK to stop recording. -
Page 24: Sound Recorder
Settings: Allows you to turn on auto refresh play list. In the Music Player menu, choose Settings. The setting options include: Player Settings: List auto gen.: You can choose to refresh play list automatically or not. Repeat: You can choose to repeat all songs, one songs or turn off this function. -
Page 25: Services
Auto Search: If you want to search radio channel, press Yes when Preset list confirm message show up. The search stops when channels has been found and show channel in Channel list. Settings: FM radio setting options: Background play: Turn on/off Background play function. On: allow radio continuing playing when exit FM radio Off: when user exits FM radio, radio will stop. -
Page 26: Input Address
site. Input address You can edit URL addresses to access a web site. Recent pages You can view the recent pages you have visited. Setting In the Settings menu, you can set the WAP default page, data account, the browser option and Internet parameters Settings Data account Default data accounts based on major operators at the time this phone is manufactured are provided. -
Page 27: Settings
side, press confirm again to stop speaking, and back to the receiving status, 60 seconds for each speaking time. Text message: you can enter message into the input box in the interface of voice call and send the message to the opposite side.(Text input box at left of the "Mic icon")... -
Page 28: Network Setup
Display :Under Display you can set a host of different characteristics of the Wallpaper, Set up open shutoff standby interface time date to show. Dedicated Key: This function allows you to re-assign the quick-access- feature default setting in 4-way navigation keys. Flight Mode:Switch into flight mode while being on board, screening off partial function of telecom , normal mode or decide on when boot up . - Page 29 Phone security Phone lock You can switch on or off to activate the phone lock function to protect your phone. If you switch Phone Lock on, you need to enter the password to set the request on. The default password is “1122”. Change Password Allows you to change the phone lock password.
- Page 30 Data account According to need to link the network service choose corresponding data account, and can edit, add, delete, change the default setting the account Restore factory settings This feature would reset the phone to the same settings as those configured at the factory.
- Page 31 When failing to connect to network, the phone will keep searching base station that consumes much battery and Standby time reduces standby time. Move to an area with stronger too short signal strength or switch your phone off temporarily. Replace the battery. Make sure that the chips in SIM card are not damaged;...
- Page 32 FCC RF EXPOSURE INFORMATION: WARNING!! Read this information before using your phone In August 1986 the Federal Communications Commission (FCC) of the United States with its action in Report and Outer FCC 96-326 adopted an updated safety standard for human exposure to radio frequency (RF) electromagnetic energy emitted by FCC regulated transmitters.
- Page 33 <ANSIC95.1> (1992) / <NCRP Report 86> (1986) / <ICIMIRP> (1996) Those standards were based on comprehensive and periodic evaluations of the relevant scientific literature. For example, over 120 scientists, engineers, and physicians from universities, government health agencies, and industry reviewed the available body of research to develop the ANSI Standard (C95.1).
- Page 34 interference that may cause undesired operation. NOTE: The manufacturer is not responsible for any radio or TV interference caused by unauthorized modifications to this equipment. Such modifications could void the user’s authority to operate the equipment. NOTE: This equipment has been tested and found to comply with the limits for a Class B digital device, pursuant to part 15 of the FCC Rules.
Need help?
Do you have a question about the Ram E200 and is the answer not in the manual?
Questions and answers