Table of Contents
Advertisement
Quick Links
Advertisement
Table of Contents

Subscribe to Our Youtube Channel
Related Manuals for Cosmo DIC DROP-IN COOKTOP Series


Summary of Contents for Cosmo DIC DROP-IN COOKTOP Series
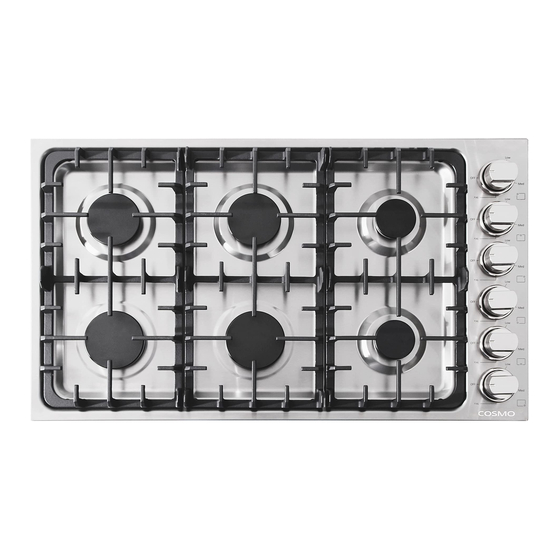
- Page 1 GAS COOKTOP COS-DIC304 COS-DIC366 DIC DROP-IN COOKTOP SERIES INSTALLATION & USER MANUAL IMPORTANT: READ AND SAVE THESE INSTRUCTIONS. FOR RESIDENTIAL USE ONLY. INSTALLER: PLEASE LEAVE THIS GUIDE WITH THE HOMEOWNER. HOMEOWNER: PLEASE KEEP THIS GUIDE FOR FUTURE REFERENCE. Rev.22.10...
- Page 3 COSMO Appliances are designed according to the strictest safety and performance standard for the North American market. We follow the most advanced manufacturing philosophy.
-
Page 4: Table Of Contents
TABLE OF CONTENTS COOKTOP SAFETY ....................3 Important Safety Instructions ................. 6 INSTALLATION REQUIREMENTS ................ 9 Tools and Parts ......................9 Location Requirements .................... 11 Product Dimensions ....................12 Clearances ......................... 13 Cutout Dimensions ....................14 Electrical Requirements ................... 15 Gas Supply Requirements .................. -
Page 5: Cooktop Safety
COOKTOP SAFETY WARNING Fire Hazard If the information in this manual is not followed exactly, a fire or explosion may result causing property damage, personal injury or death. - Do not store or use gasoline or other flammable vapors and liquids in the vicinity of this or any other appliance. - Page 6 WARNING: Gas leaks cannot always be detected by smell. Gas suppliers recommend that you use a gas detector approved by UL or CSA. For more information, contact your gas supplier. WARNING: Do not install a ventilation system that blows air downward toward this cooking appliance.
- Page 7 In the State of Massachusetts, the following installation instructions apply: • Installations and repairs must be performed by a qualified or licensed contractor, plumber, or gasfitter qualified or licensed by the State of Massachusetts. • If using a ball valve, it shall be a T-handle type. •...
-
Page 8: Important Safety Instructions
IMPORTANT SAFETY INSTRUCTIONS WARNING: To reduce the risk of fire, electrical shock, injury to persons, or damage when using the cooktop, follow basic precautions, including the following: • WARNING: NEVER use this • Storage in or on appliance – appliance as a space heater to Flammable materials should not heat or warm the room. - Page 9 IMPORTANT SAFETY INSTRUCTIONS • Utensil Handles Should Be Turned • Proper Installation – The Inward and Not Extend Over appliance, when installed, must Adjacent Surface Units – To be electrically grounded in reduce the risk of burns, ignition accordance with local codes, or of flammable materials, and in the absence of local codes, spillage due to unintentional...
- Page 10 IMPORTANT SAFETY INSTRUCTIONS • Do not let cooking grease or • Proper Disposal of Your other flammable materials Appliance – Dispose of or recycle accumulate on the cooktop. your appliance in accordance Grease on the cooktop may with Federal and Local ignite.
-
Page 11: Installation Requirements
INSTALLATION REQUIREMENTS TOOLS AND PARTS Gather the required tools and parts before starting installation. Read and follow the instructions provided with any tools listed here. Tools Needed • Tape measure • Noncorrosive leak-detection solution • Flat-blade screwdriver • Phillips screwdriver For Propane/Natural Gas •... - Page 12 Parts Needed Gas supply line kit (supply line and 2 adapters) Optional Parts To purchase these or any other accessories, please visit www.cosmoappliances.com or reference the contact information at the end of this manual. • Replacement NG/LP conversion kit Scan to find available NG/LP kits...
-
Page 13: Location Requirements
LOCATION REQUIREMENTS IMPORTANT: Observe all governing codes and ordinances. Do not obstruct flow of combustion and ventilation air. • This cooktop is for indoor household use only. • It is the installer's responsibility to comply with installation clearances specified on the model/serial rating plate. The model/serial rating plate is located on the underside of the cooktop base. -
Page 14: Product Dimensions
PRODUCT DIMENSIONS Note: Cooktop features may differ. COS-DIC304 21" 30" (53.3 cm) (76.2 cm) ¹/ " (1.2 cm) 3 ¹/ " (8.2 cm) 28 ³/ " 19 ¹/ " (72.0 cm) (48.5 cm) 2 ³/ " (7.0 cm) COS-DIC366 21" (53.3 cm) 36"... -
Page 15: Clearances
CLEARANCES IMPORTANT: Some cabinet and building materials are not designed to withstand the heat produced by the cooktop. Check with your builder or cabinet supplier to make sure that the materials used will not discolor, delaminate or sustain other damage. GIVEN DIMENSIONS ARE MINIMUM CLEARANCES. -
Page 16: Cutout Dimensions
CUTOUT DIMENSIONS Back Wall Side Wall Side Wall Countertop Front Edge MODEL Recom- Recom- mended mended 29" " " COS-DIC304 (72.6 cm) (73.6 cm) (74.6 cm) " " " (48.9 cm) (50.1 cm) (51.3 cm) " " " COS-DIC366 (88.9 cm) (87.8 cm) (89.8 cm) Side Walls... -
Page 17: Electrical Requirements
ELECTRICAL REQUIREMENTS WARNING Electrical Shock Hazard Plug into a grounded 3 prong outlet. Do not remove ground prong. Do not use an adapter or extension cord. Failure to do so can result in death, fire or electrical shock. IMPORTANT: The cooktop must be electrically grounded in accordance with local codes and ordinances, or in the absence of local codes, with the National Electrical Code, ANSI/NFPA 70 or Canadian Electrical Code, CSA C22.1. -
Page 18: Gas Supply Requirements
Electronic ignition systems operate within wide voltage limits, but proper grounding and polarity are necessary. Check that the outlet provides 120 V power and is correctly grounded. WARNING: Improper connection of the equipment-grounding conductor can result in a risk of electric shock. Check with a qualified electrician or service technician if you are in doubt as to whether the appliance is properly grounded. - Page 19 • Leak testing of the cooktop must be conducted according to the manufacturer's instructions. TYPE OF GAS Natural Gas: This cooktop is factory-set for use with Natural gas. The model/serial rating plate located on the underside of the cooktop base has information on the types of gas that can be used.
- Page 20 Rigid pipe connection: The rigid pipe connection requires a combination of pipe fittings to obtain an in-line connection to the cooktop. The rigid pipe must be level with the cooktop connection. All strains must be removed from the supply and fuel lines so cooktop will be level and in line.
-
Page 21: Installation Instructions
GAS SUPPLY PRESSURE TESTING Gas supply pressure for testing regulator must be at least 1" (2.5 cm) water column pressure above the manifold pressure shown on the model/serial rating plate. Line pressure testing above 0.5 psi gauge (14" WCP) The cooktop and its individual shutoff valve must be disconnected from the gas supply piping system during any pressure testing of that system at test pressures in excess of 0.5 psi (3.5 kPa). -
Page 22: Install Cooktop
INSTALL COOKTOP 1. Determine whether your cabinet construction provides clearance for installing hold-down brackets at cooktop base ends. 2. Using two or more people, place cooktop right side up into the cutout. Note: Make sure that the front edge of the cooktop is parallel to the front edge of the counter top. -
Page 23: Gas Connection
GAS CONNECTION WARNING Explosion Hazard Use a new CSA International approved gas supply line and install a shut- off valve for new installations. Securely tighten all gas connections. If connected to LP, have a qualified person make sure gas pressure does not exceed the maximum pressure listed in the "Gas Supply Requirement"... - Page 24 3. Attach one adapter to the gas pressure regulator and the other adapter to the gas shutoff valve. Tighten both adapters, being certain not to move or turn the gas pressure regulator. Note: Install the gas pressure regulator with the arrow pointing in the direction toward the bottom of the cooktop base and in a position where you can reach the regulator access cap.
-
Page 25: Complete Connection
CONVERT TO LP GAS (OPTIONAL) This cooktop is shipped from the factory set up to use natural gas. It can be converted to use LP gas by a qualified service technician. The LP conversion kit (LP orifices) is included. The conversion to LP requires all surface burner orifices to be changed. - Page 26 COS-DIC304 A. Super Rapid (X-Large) B. Semi Rapid (Medium) C. Rapid (Large) COS-DIC366 A. Super Rapid (X-Large) B. Auxiliary (Small) C. Rapid (Large) Note: Align notches in burner caps with pins in burner base. Burner caps should be level when properly positioned. If burner caps are not properly positioned, surface burners will not light.
-
Page 27: Adjust Flame Height
ADJUST FLAME HEIGHT Check and adjust the height of top burner flames. The cooktop "low" burner flame should be a steady blue flame approximately 1/4" (6 mm) high. Propane gas flames have a slightly yellow tip. Low lame lame If burners do not light properly: 1. - Page 28 NOTE: For burners (on some models) with safety valve, make sure that the regulation obtained is sufficient to maintain heating of the thermocouple. If it is not, increase the minimum flame. ABNORMAL OPERATION ANY OF THE FOLLOWING ARE CONSIDERED TO BE ANBORMAL OPERATION AND MAY REQUIRE SERVICING: •...
-
Page 29: Gas Conversion
GAS CONVERSION WARNING Explosion Hazard Use a new CSA International approved gas supply line. Install a shut-off valve. Securely tighten all gas connections. If connected to LP, have a qualified person make sure gas pressure does not exceed the maximum pressure listed in the "Gas Supply Requirement" section. - Page 30 4. Unscrew the regulator cap with the wrench. Regulator cap 5. Remove the retainer pin that is currently positioned for use with natural gas. Natural gas position Retainer pin 6. Turn the retainer pin upside down and place it back into the regular cap. The regular cap is now positioned for use with LP gas.
-
Page 31: Convert Surface Burners
Convert Surface Burners 1. If installed, remove the burner grates. 2. Remove the burner grates, burner caps, and the burner base. 3. Remove the natural gas orifices with a 9/32" (7 mm) nut driver. Orifice 4. Replace the natural gas orifices with the correct LP gas orifices from the LP conversion kits. - Page 32 Orifice Chart for Surface Burners: COS-DIC304 LP Orifice NG Orifice Burner Burner Placement Size (mm) Size (mm) Rating Super Rapid Front Left 1.24 1.88 18,000 BTU Semi Rapid Front Right 0.90 1.30 9,000 BTU Rapid Rear Left 1.00 1.50 12,000 BTU Semi Rapid Rear Right 0.90...
-
Page 33: Complete Gas Conversion
5. Keep and store natural gas orifices in case of re-installation with natural gas. 6. Replace the burner base, the burner caps, and the burner grates. Burner cap Burner base Igniter Flame failure safety device (for older versions) Complete Gas Conversion 1. -
Page 34: Overview
OVERVIEW COOKTOP LAYOUT This illustration covers several different models. The cooktop you have purchased may have some or all of the items listed. The locations and appearances of the features shown here may not match those of your model. Surface burner Grate Burner control knob... - Page 35 WHAT'S INCLUDED Surface burner grates (2) Surface burner grates (3) Model: COS-DIC304 Model: COS-DIC366 Surface burners and caps (4) Surface burners and caps (6) Model: COS-DIC304 Model: COS-DIC366 BURNER LAYOUT Electrode Burner cap Flame failure safety device Burner head (on some models)
-
Page 36: Cooktop Use
COOKTOP USE Read the instructions before installing or using this appliance. • This appliance shall be installed in accordance with the regulations in force and only used in a well-ventilated space. • The use of a gas-cooking appliance results in the production of heat and moisture in the room in which it is installed. -
Page 37: Power Failure
USING THE COOKTOP BURNERS IMPORTANT: Make sure all cooktop burners are properly installed. 1. To ignite a burner, push down on the burner control knob and turn it counter-clockwise towards the "Hi" position. The clicking sounds indicate the system is igniting. 2. -
Page 38: Cookware
COOKWARE MATCH PAN DIAMETER TO FLAME SIZE The flame should be the same size as the bottom of the pan or smaller. Do not use small pans with high flame settings as the flames can lick up the sides of the pan. -
Page 39: Cooktop Care
COOKTOP CARE CLEANING IMPORTANT: Before cleaning, make sure all controls are off and the cooktop is cool. Always follow label instructions on cleaning products. Soap, water, and a soft cloth or sponge are suggested first, unless otherwise noted. Do not use abrasive cleaning products. - Page 40 BURNER BASE • The holes in the burner bases must be kept clean for proper ignition and a complete, even flame. Spillovers should be cleaned immediately since they can clog the openings in the burners. IMPORTANT: Before cleaning, make sure all controls are OFF and the cooktop is cool.
-
Page 41: Troubleshooting
TROUBLESHOOTING First try the solutions suggested here to possibly avoid the cost of a service call. COOKTOP PROBLEMS PROBLEM POSSIBLE CAUSE SOLUTION Burner There is no power to Make sure electrical plug is plugged will not the cooktop. into a live, properly grounded outlet. ignite Replace the fuse or reset the circuit breaker. - Page 42 PROBLEM POSSIBLE CAUSE SOLUTION Burner Cooktop gas supply Ensure the cooktop is set for the correct flame is is not correct. gas type. It is factory set for natural too high gas. If connecting to LP gas, the burners or too low should be converted to LP gas with the orifice kit supplied and the pressure regulator converted to the LP gas...
-
Page 43: Limited Warranty
LIMITED WARRANTY WARRANTY AND SERVICE TO RECEIVE WARRANTY SERVICE, YOUR PRODUCT MUST BE REGISTERED. TO REGISTER AND REVIEW FULL WARRANTY DETAILS, VISIT: WWW.COSMOAPPLIANCES.COM/WARRANTY SCAN TO REGISTER CUSTOMER SUPPORT TO CHAT WITH US LIVE FOR ASSISTANCE, VISIT: WWW.COSMOAPPLIANCES.COM/CHAT SCAN TO CHAT... - Page 44 IMPORTANT Do Not Return This Product To The Store If you have a problem with this product, please contact COSMO Customer Support at +1 (888) 784-3108 DATED PROOF OF PURCHASE, MODEL #, AND SERIAL # REQUIRED FOR WARRANTY SERVICE. IMPORTANT Ne pas Réexpédier ce Produit au Magasin...
- Page 45 MEMO...
- Page 46 MEMO...
- Page 48 APPLIANCES Cosmo is constantly making efforts to improve the quality and performance of our products, so we may make changes to our appliances without updating this manual. Electronic version of this manual is available at: www.cosmoappliances.com...
Need help?
Do you have a question about the DIC DROP-IN COOKTOP Series and is the answer not in the manual?
Questions and answers