Table of Contents
Advertisement
Quick Links
Advertisement
Table of Contents

Related Manuals for Axis Q1615 Mk III


Summary of Contents for Axis Q1615 Mk III
- Page 1 AXIS Q1615 Mk III Network Camera User manual...
-
Page 2: Table Of Contents
AXIS Q1615 Mk III Network Camera Table of Contents Get started .......... -
Page 3: Get Started
Get started Find the device on the network To find Axis devices on the network and assign them IP addresses in Windows®, use AXIS IP Utility or AXIS Device Manager. Both applications are free and can be downloaded from axis.com/support. -
Page 4: Verify That No One Has Tampered With The Firmware
Verify that no one has tampered with the firmware To make sure that the device has its original Axis firmware, or to take full control of the device after a security attack: 1. Reset to factory default settings. See Reset to factory default settings on page 52. -
Page 5: Installation
AXIS Q1615 Mk III Network Camera Installation Installation Preview mode Preview mode is ideal for installers when fine tuning the camera view during the installation. No login is required to access the camera view in preview mode. It is available only in factory defaulted state for a limited time from powering up the device. -
Page 6: Configure Your Device
AXIS Q1615 Mk III Network Camera Configure your device Configure your device Basic settings Set the capture mode 1. Go to Video > Installation > Capture mode. 2. Click Change. 3. Select a capture mode and click Save and restart. - Page 7 AXIS Q1615 Mk III Network Camera Configure your device 2. Click to show the level grid. 3. Adjust the camera mechanically until the position of the reference area or the object is aligned with the level grid. Reduce image processing time with low latency mode You can optimize the image processing time of your live stream by turning on low latency mode.
- Page 8 2. If you still have problems, go to Exposure and adjust the Exposure zone to cover the area of interest. Find out more about WDR and how to use it at axis.com/web-articles/wdr. Stabilize a shaky image with electronic image stabilization (EIS) Electronic Image Stabilization (EIS) can be used in environments where the product is mounted in an exposed location and subject to vibrations, for example, wind or passing traffic.
- Page 9 Use corridor format to better utilize the full field of view in a long and narrow area, for example a staircase, hallway, road, or tunnel. 1. Depending on your device, turn the camera or the 3-axis lens in the camera 90° or 270°.
-
Page 10: Adjust The Camera View (Ptz)
AXIS Q1615 Mk III Network Camera Configure your device 1. Go to Video > Image and click 2. Click for Pixel counter. 3. In the camera’s live view, adjust the size and position of the rectangle around the area of interest, for example where you expect faces to appear. -
Page 11: View And Record Video
AXIS Q1615 Mk III Network Camera Configure your device Adjust the camera view (PTZ) Limit the pan, tilt, and zoom movements If there are parts of the scene that you don’t want the camera to reach, you can limit the pan, tilt, and zoom movements. For example, you want to protect the privacy of residents in an apartment building, which is located close to a parking lot that you intend to monitor. -
Page 12: Set Up Rules For Events
AXIS Q1615 Mk III Network Camera Configure your device 4. Go to Video > Stream > General and increase Compression. 5. Go to Video > Stream > Zipstream and do one or more of the following: Select the Zipstream Strength that you want to use. - Page 13 Before you start: • Make sure you have an SD card installed. Make sure that AXIS Object Analytics is running: 1. Go to Apps > AXIS Object Analytics. 2. Start the application if it is not already running. 3. Make sure you have set up the application according to your needs.
-
Page 14: Audio
AXIS Q1615 Mk III Network Camera Configure your device 1. Go to Apps > AXIS Object Analytics. 2. Start the application if it is not already running. 3. Make sure you have set up the application according to your needs. -
Page 15: Status
AXIS Q1615 Mk III Network Camera The web interface The web interface To reach the device’s web interface, type the device’s IP address in a web browser. Note Support for the features and settings described in this section varies between devices. This icon indicates that the feature or setting is only available in some devices. -
Page 16: Video
AXIS Q1615 Mk III Network Camera The web interface Device info Shows the device information, including firmware version and serial number. Upgrade firmware: Upgrade the firmware on your device. Takes you to the Maintenance page where you can do a firmware upgrade. - Page 17 AXIS Q1615 Mk III Network Camera The web interface Adds or removes a focus recall area. When you add a focus recall area, the camera saves the focus settings at that specific pan/tilt range. When you have set a focus recall area and the camera enters that area in the live view, the camera recalls the previously saved focus.
- Page 18 AXIS Q1615 Mk III Network Camera The web interface Installation Capture mode : A capture mode is a preset configuration that defines how the camera captures images. When you change the capture mode, it can affect many other settings, such as view areas and privacy masks.
- Page 19 AXIS Q1615 Mk III Network Camera The web interface Straighten image : Turn on and use the slider to straighten the image horizontally by rotating and cropping it digitally. The functionality is useful when it’s not possible to mount the camera exactly level. Ideally, straighten the image during installation.
- Page 20 AXIS Q1615 Mk III Network Camera The web interface Brightness: Use the slider to adjust the light intensity. This can make objects easier to see. Brightness is applied after image capture, and doesn’t affect the information in the image. To get more details from a dark area, it’s usually better to increase gain or exposure time.
- Page 21 • Move the slider towards Dark to increase the threshold for the IR-cut filter. The camera changes to night mode later. IR light If your device doesn’t have built-in illumination, these controls are only available when you connect a supporting Axis accessory. Allow illumination: Turn on to let the camera use the built-in light in night mode.
- Page 22 AXIS Q1615 Mk III Network Camera The web interface Illumination angle : Use the slider to manually set the illumination angle, for example, if the angle needs to be different from the camera’s angle of view. If the camera has a wide angle of view, you can set the illumination angle to a narrower angle, which equals a greater tele position.
- Page 23 AXIS Q1615 Mk III Network Camera The web interface • Center: Uses a fixed area in the center of the image to calculate the exposure. The area has a fixed size and position in the live view. • Full : Uses the entire live view to calculate the exposure.
- Page 24 Zipstream is a bitrate reduction technology, optimized for video surveillance, that reduces the average bitrate in an H.264 or H.265 stream in real time. Axis Zipstream applies a high bitrate in scenes where there are multiple regions of interest, for example, in scenes with moving objects.
- Page 25 AXIS Q1615 Mk III Network Camera The web interface P-frames: A P-frame is a predicted image that shows only the changes in the image from the previous frame. Enter the desired number of P-frames. The higher the number, the less bandwidth is required. However, if there is network congestion, there could be a noticeable deterioration in the video quality.
-
Page 26: Recordings
AXIS Q1615 Mk III Network Camera The web interface Use transparency: Select and enter the RGB hexadecimal value for that color. Use the format RRGGBB. Examples of hexadecimal values: FFFFFF for white, 000000 for black, FF0000 for red, 6633FF for blue, and 669900 for green. -
Page 27: Apps
• Activate license with a key: If the app requires a license, you need to activate it. Use this option if your device doesn’t have internet access. If you don’t have a license key, go to axis.com/products/analytics. You need a license code and the Axis product serial number to generate a license key. -
Page 28: System
AXIS Q1615 Mk III Network Camera The web interface • Activate license automatically: If the app requires a license, you need to activate it. Use this option if your device has internet access. You need a license code to activate the license. - Page 29 AXIS Q1615 Mk III Network Camera The web interface Assign IPv4 automatically: Select to let the network router assign an IP address to the device automatically. We recommend automatic IP (DHCP) for most networks. IP address: Enter a unique IP address for the device. Static IP addresses can be assigned at random within isolated networks, provided that each address is unique.
- Page 30 One-click cloud connection One-click cloud connection (O3C) together with an O3C service provides easy and secure internet access to live and recorded video from any location. For more information, see axis.com/end-to-end-solutions/hosted-services. Allow O3C: • One-click: This is the default setting. Press and hold the control button on the device to connect to an O3C service over the internet.
- Page 31 Authentication failed: Sends a trap message when an authentication attempt fails. Note All Axis Video MIB traps are enabled when you turn on SNMP v1 and v2c traps. For more information, see AXIS OS Portal > SNMP. • v3: SNMP v3 is a more secure version, which provides encryption and secure passwords. To use SNMP v3, we recommend you to activate HTTPS, as the password is then sent through HTTPS.
- Page 32 To install test firmware or other custom firmware from Axis on the device, you need a custom-signed firmware certificate. The certificate verifies that the firmware is approved by both the device owner and Axis. The firmware can only run on a specific device which is identified by its unique serial number and chip ID.
- Page 33 AXIS Q1615 Mk III Network Camera The web interface Add account: Click to add a new account. You can add up to 100 accounts. Account: Enter a unique account name. New password: Enter a password for the account. Passwords must be 1 to 64 characters long. Only ASCII printable characters (code 32 to 126) are allowed in the password, for example, letters, numbers, punctuation, and some symbols.
- Page 34 AXIS Q1615 Mk III Network Camera The web interface A rule defines the conditions that triggers the product to perform an action. The list shows all the currently configured rules in the product. Note You can create up to 256 action rules.
- Page 35 RSA is the preferred method during negotiation, followed by ECDSA, ED25519, and DSA. Make sure to enter the right MD5 host key that is used by your SFTP server. While the Axis device supports both MD5 and SHA-256 hash keys, we recommend using SHA-256 due to stronger security over MD5. For more information on how to configure an SFTP server with an Axis device, go to the AXIS OS Portal.
- Page 36 IoT integration and is used in a wide variety of industries to connect remote devices with a small code footprint and minimal network bandwidth. The MQTT client in Axis device firmware can simplify integration of data and events produced in the device to systems which are not video management software (VMS).
- Page 37 AXIS Q1615 Mk III Network Camera The web interface ALPN is a TLS/SSL extension that allows for the selection of an application protocol during the handshake phase of the connection between the client and server. This is used to enable MQTT traffic over the same port that is used for other protocols, such as HTTP.
- Page 38 AXIS Q1615 Mk III Network Camera The web interface The Last Will Testament (LWT) lets a client provide a testament along with its credentials when connecting to the broker. If the client disconnects ungracefully at some point later (maybe because his power source died), it can let the broker deliver a message to other clients.
- Page 39 DNS. Windows SMB/CIFS names are not supported. • Network share: Enter the name of the shared location on the host server. Several Axis devices can use the same network share since each device gets its own folder.
- Page 40 AXIS Q1615 Mk III Network Camera The web interface Important Risk of data loss and corrupted recordings. Do not remove the SD card while the device is running. Unmount the SD card before you remove it. Unmount: Click to safely remove the SD card.
- Page 41 When you create an ONVIF account, you automatically enable ONVIF communication. Use the username and password for all ONVIF communication with the device. For more information see the Axis Developer Community at axis.com. Add accounts: Click to add a new ONVIF account.
- Page 42 AXIS Q1615 Mk III Network Camera The web interface Update account: Edit the account properties. Delete account: Delete the account. You can’t delete the root account. ONVIF media profiles An ONVIF media profile consists of a set of configurations that you can use to change media stream settings.
- Page 43 AXIS Q1615 Mk III Network Camera The web interface Shock detector: Turn on to generate an alarm if the device is hit by an object or if it is tampered with. Sensitivity level: Move the slider to adjust the sensitivity level at which the device should generate an alarm. A low value means that the device only generates an alarm if the hit is powerful.
-
Page 44: Maintenance
Severity: Select which messages to send when triggered. CA certificate set: See the current settings or add a certificate. Plain config Plain config is for advanced users with experience of Axis device configuration. Most parameters can be set and edited from this page. Maintenance Restart: Restart the device. - Page 45 Note All Axis device firmware is digitally signed to ensure that you only install verified firmware on your device. This further increases the overall minimum cybersecurity level of Axis devices. For more information, see the white paper “Signed firmware, secure boot, and security of private keys” at axis.com.
-
Page 46: Specifications
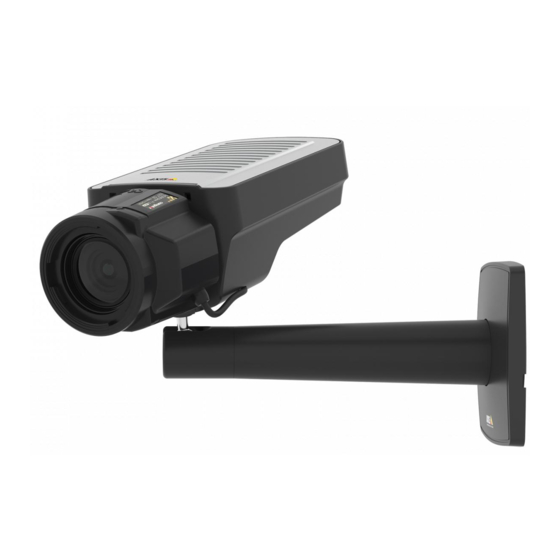
AXIS Q1615 Mk III Network Camera Specifications Specifications Product overview Status LED indicator... -
Page 47: Led Indicators
AXIS Q1615 Mk III Network Camera Specifications Lens Network connector (PoE) Control button (1) Function button (2) microSD Card slot Audio in Audio out I/O connector 10 Iris connector 11 Camera housing communication connector 12 Power connector 13 RS485/RS422 connector... -
Page 48: Sd Card Slot
AXIS Q1615 Mk III Network Camera Specifications Status LED behavior and buzzer signal for leveling assistant For information on the function button used for leveling the camera, see page 48. Press and hold the function button (2) for more than two seconds to level the camera. - Page 49 AXIS Q1615 Mk III Network Camera Specifications Audio connector • Audio in – 3.5 mm input for a mono microphone, or a line-in mono signal (left channel is used from a stereo signal). • Audio out – 3.5 mm output for audio (line level) that can be connected to a public address (PA) system or an active speaker with a built-in amplifier.
- Page 50 AXIS Q1615 Mk III Network Camera Specifications 3–6 Configurable Digital input – Connect to pin 1 to activate, or leave floating 0 to max 30 V DC (Input or Output) (unconnected) to deactivate. Pin 3 and 4 can be supervised. To use supervised input, install end-of-line resistors.
- Page 51 AXIS Q1615 Mk III Network Camera Specifications • Two-wire RS422 simplex • Four-wire RS422 full duplex point to point communication Function Notes RS485B alt RS485/422 RX(B) RX pair for all modes (combined RX/TX for 2-wire RS485) RS485A alt RS485/422 RX(A)
-
Page 52: Troubleshooting
5. Use the installation and management software tools to assign an IP address, set the password, and access the device. The installation and management software tools are available from the support pages on axis.com/support. You can also reset parameters to factory default through the device’s web interface. Go to Maintenance > Factory default and click Default. -
Page 53: Technical Issues, Clues, And Solutions
AXIS Q1615 Mk III Network Camera Troubleshooting You can use AXIS Device Manager to upgrade multiple devices at the same time. Find out more at axis.com/products/axis-device-manager. Technical issues, clues, and solutions If you can’t find what you’re looking for here, try the troubleshooting section at axis.com/support. -
Page 54: Performance Considerations
You might need to increase the TTL (Time To Live) value. No multicast H.264 Check with your network administrator that the multicast addresses used by the Axis device displayed in the client are valid for your network. -
Page 55: Contact Support
Heavy network utilization due to poor infrastructure affects the bandwidth. • Viewing on poorly performing client computers lowers perceived performance and affects frame rate. • Running multiple AXIS Camera Application Platform (ACAP) applications simultaneously may affect the frame rate and the general performance. Contact support Contact support at axis.com/support. -
Page 56: Ptz Drivers
PTZ drivers PTZ drivers APTP This is a list of models supported by this driver. The physical installation depends on your Axis product and the PTZ unit. Important Check what serial communication your Axis product and the PTZ unit will support. - Page 57 Pelco Spectra Mini • Videotec DTRX3/PTH310P • Videotec ULISSE • PTK AMB • YP3040 Other models may be supported but this has not been verified by Axis. Technical information DEFAULT capabilities for PTZ driver: Driver Pelco 4.17 Version DEFAULT serial configuration: PortMode...
-
Page 58: Visca
To change serial port settings, go to System > Plain config > Serial in the device’s web interface. Visca This is a list of models supported by this driver. The physical installation depends on your Axis product and the PTZ unit. Important Check what serial communication your Axis product and the PTZ unit will support. - Page 59 AXIS Q1615 Mk III Network Camera PTZ drivers Note Different PTZ units may have other capabilities (both less and more). Movement Absolute Relative Continuous Tilt Zoom Focus Iris AutoIris AutoFocus IrCutFilter BackLight OSDMenu Connection For the RS485/RS422 pin assignment on your device, see RS485/RS422 connector on page 50.
- Page 60 User manual Ver. M6.2 AXIS Q1615 Mk III Network Camera Date: September 2023 © Axis Communications AB, 2020 - 2023 Part no. T10153024...
Need help?
Do you have a question about the Q1615 Mk III and is the answer not in the manual?
Questions and answers