Advertisement
Available languages
Available languages
Quick Links
Advertisement
Chapters

Related Manuals for Axis Q1615 Mk II


Summary of Contents for Axis Q1615 Mk II
- Page 1 AXIS Q1615 Mk II Network Camera Installation Guide...
- Page 3 English France: Français Deutschland: Deutsch Italia: Italiano España: Español 日本: 日本語 中文: 简体中文...
- Page 4 To purchase further licenses, contact your reseller. search by product, category, or phrase Liability • report problems to Axis support staff by logging in to your private support area Every care has been taken in the preparation of this •...
- Page 5 Contact information Disposal and recycling Axis Communications Inc. When this product has reached the end of its useful life, 300 Apollo Drive dispose of it according to local laws and regulations. For Chelmsford, MA 01824 information about your nearest designated collection point, United States of America contact your local authority responsible for waste disposal.
- Page 7 AXIS Q1615 Mk II Network Camera Safety information Hazard levels DANGER Indicates a hazardous situation which, if not avoided, will result in death or serious injury. WARNING Indicates a hazardous situation which, if not avoided, could result in death or serious injury.
- Page 8 Battery The Axis product uses a 3.0 V CR2032 lithium battery as the power supply for its internal real-time clock (RTC). Under normal conditions this battery will last for a minimum of five years. Lithium coin cell 3.0 V batteries contain 1,2-dimethoxyethane; ethylene glycol dimethyl ether...
- Page 9 AXIS Q1615 Mk II Network Camera This Installation Guide provides instructions for installing AXIS Q1615 Mk II Network Camera on your network. For other aspects of using the product, see the User Manual available at www.axis.com Installation Steps 1. Make sure the package contents, tools and other materials necessary for the installation are in order.
-
Page 10: Table Of Contents
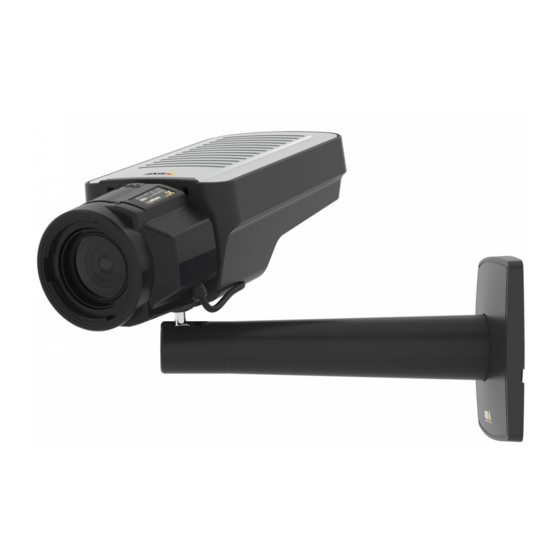
AXIS Q1615 Mk II Network Camera Product overview Status LED indicator Lens Network connector (PoE) Control button (1) Function button (2) microSD Card slot Audio in Audio out I/O connector... - Page 11 AXIS Q1615 Mk II Network Camera 10 Iris connector 11 Power connector 12 Power LED indicator 13 Network LED indicator 14 RS485/RS422 connector LED Indicators Note • The Status LED can be configured to be unlit during normal operation. To configure, go to Settings >...
-
Page 12: Lens
AXIS Q1615 Mk II Network Camera Status LED behavior for focus assistant Note Only valid for optional P-iris, DC-iris or manual iris lenses. The status LED flashes when the Focus Assistant is active. Color Indication The image is out of focus. - Page 13 AXIS Q1615 Mk II Network Camera NO TICE TICE TICE Due to local regulations or the environmental and electrical conditions in which the product is to be used, a shielded network cable (STP) may be appropriate or required. All cables connecting the product to the network and that are routed outdoors or in demanding electrical environments shall be intended for their specific use.
-
Page 14: Control Button
For location of the control button, see Product overview on page 10. The control button is used for: • Resetting the product to factory default settings. See page 21. • Connecting to an AXIS Video Hosting System service. To find out more about this service, see axis.com... -
Page 15: Function Button
AXIS Q1615 Mk II Network Camera Function button Note Focus assistant is only valid for optional P-iris, DC-iris or manual iris lenses. Use the function button to activate the following functions: Leveling assistant - This function helps to make sure the camera is level. To start the leveling assistant, press the button for about 3 seconds. - Page 16 AXIS Q1615 Mk II Network Camera Specifications Operating Conditions The Axis product is intended for indoor use. Product Temperature Humidity AXIS Q1615 Mk II 0 °C to 55 °C 10-85% RH (non-condensing) (32 °F to 122 °F) Connectors I/O connector 4–pin terminal block...
-
Page 17: Audio In
AXIS Q1615 Mk II Network Camera Power Connector 2-pin terminal block for DC power input. Use a Safety Extra Low Voltage (SELV) compliant limited power source (LPS) with either a rated output power limited to ≤100 W or a rated output current limited to ≤5 A. - Page 18 AXIS Q1615 Mk II Network Camera Function Notes RS485B alt RX pair for all modes (combined RX/TX for 2-wire RS485) RS485/422 RX(B) RS485A alt RS485/422 RX(A) TX pair for RS422 and 4-wire RS485 RS485/RS422 TX(B) RS485/RS422 TX(A) Important The maximum cable length is 30 m (98 ft).
- Page 19 To unmount, go to Settings > System > Storage in the camera web interface. Find the device on the network To find Axis devices on the network and assign them IP addresses in Windows®, use AXIS IP Utility or AXIS Device Manager. Both applications are free and can be downloaded from axis.com/support.
- Page 20 AXIS Q1615 Mk II Network Camera Adjust zoom and focus for optional lenses If the camera is mounted so that you cannot look at the image and access the lens at the same time, use the Focus Assistant, see Focus assistant for optional lenses on page 20.
- Page 21 It is also possible to reset parameters to factory default through the web interface. Go to Settings > System > Maintenance and click Default. Further information • For the latest version of this document, see axis.com • The user manual is available at axis.com...
- Page 22 AXIS Q1615 Mk II Network Camera • To check if there is updated firmware available for your device, see axis.com/support • For useful online trainings and webinars, see axis.com/academy Warranty information For information about Axis’ product warranty and thereto related information, go to...
- Page 23 AXIS Q1615 Mk II Network Camera Informations sur la sécurité Niveaux de risques DANGER Indique une situation dangereuse qui, si elle n'est pas évitée, entraînera le décès ou des blessures graves. AVERTISSEMENT Indique une situation dangereuse qui, si elle n'est pas évitée, pourrait entraîner le décès ou des blessures graves.
- Page 24 éviter d'endommager le produit. Batterie Le produit Axis utilise une batterie au lithium CR2032 3,0 V comme alimentation de son horloge en temps réel interne (RTC). Dans des conditions normales, cette batterie a une durée de vie minimale de cinq ans.
- Page 25 AXIS Q1615 Mk II Network Camera Les piles boutons 3,0 V au lithium contiennent du 1,2-diméthoxyéthane, éthylène glycol diméthyl éther (EGDME), CAS n° 110-71-4.
- Page 27 AXIS Q1615 Mk II Network Camera Ce guide d’installation explique comment installer la caméra AXIS Q1615 Mk II sur votre réseau. Pour toute autre information relative à l’utilisation du produit, consultez le manuel de l’utilisateur disponible sur le site www.axis.com Procédure d’installation...
- Page 28 AXIS Q1615 Mk II Network Camera Vue d'ensemble du produit Voyant d’état Objectif Connecteur réseau (PoE) Bouton de contrôle (1) Bouton Fonction (2) Logement de carte microSD Entrée audio Sortie audio Connecteur E/S...
- Page 29 AXIS Q1615 Mk II Network Camera 10 Connecteur de l’iris 11 Connecteur d'alimentation 12 Voyant DEL d’alimentation 13 Voyant DEL réseau 14 Connecteur RS485/RS422 Voyants Note • Vous pouvez configurer la LED de statut de telle sorte qu'elle soit éteinte en fonctionnement normal.
- Page 30 AXIS Q1615 Mk II Network Camera Power LED Indication Verte Fonctionnement normal. Orange Le voyant vert/orange clignote pendant la mise à niveau du firmware. Comportement du voyant d’état pour l'assistant de mise au point Note Valable uniquement pour les objectifs à diaphragme P, DC ou manuel en option.
- Page 31 AXIS Q1615 Mk II Network Camera • Lorsque la caméra n’est pas mise à niveau, les voyants d'état clignotent alternativement en rouge, vert et orange et le signal sonore est émis à intervalles lents. Les deux voyants d'état clignotent brièvement en vert pour indiquer que le nivellement s’améliore.
- Page 32 AXIS Q1615 Mk II Network Camera Connecteur audio • Entrée audio – entrée de 3,5 mm pour microphone mono ou signal d’entrée mono (le canal de gauche est utilisé pour le signal stéréo). • Sortie audio – sortie de 3,5 mm (niveau de ligne) qui peut être connectée à un système de sonorisation ou à...
- Page 33 Le bouton de commande permet de réaliser les opérations suivantes : • Réinitialisation du produit aux paramètres d’usine par défaut. Cf. page 40. • Connexion au service du Système d’hébergement vidéo AXIS. Pour en savoir plus sur ce service, consultez le site axis.com. Bouton de fonction Note L'assistant de mise au point est uniquement valable pour les objectifs à...
- Page 34 Sortie CC 12 V, maxi. 50 mA Entrée/sortie configurée comme entrée Entrée/sortie configurée comme sortie Caractéristiques techniques Conditions d'utilisation Le produit Axis est uniquement destiné à une utilisation en intérieur. Produit +Température Humidité AXIS Q1615 Mk II De 0°C à 55°C Humidité...
- Page 35 AXIS Q1615 Mk II Network Camera Connecteurs Connecteur d'E/S Bloc terminal à 4 broches Pour un exemple de schéma, consultez Schémas de connexion page 34. Fonction Notes Caractéristiques 0 V CC (-) Peut servir à alimenter le matériel auxiliaire. Sortie CC 12 V CC Remarque : cette broche ne peut être utilisée...
- Page 36 AXIS Q1615 Mk II Network Camera Connecteur audio Connecteurs audio 3,5 mm (stéréo) 1 Pointe 2 Anneau 3 Manchon Masse Entrée audio Équilibré : Entrée micro/ligne Équilibré : Entrée micro/ligne point chaud point froid Déséquilibré : Entrée Déséquilibré : Inutilisé...
- Page 37 AXIS Q1615 Mk II Network Camera Fonction Bro- Notes RS485B alt Paire RX pour tous les modes (RX/TX combiné pour RS485 à RS485/422 RX(B) 2 fils) RS485A alt RS485/422 RX(A) Paire TX pour RS422 et RS485 à 4 fils RS485/RS422 TX(B)
- Page 38 AXIS Q1615 Mk II Network Camera Trouver le périphérique sur le réseau Pour trouver les périphériques Axis présents sur le réseau et leur attribuer des adresses IP sous Windows®, utilisez AXIS IP Utility ou AXIS Device Manager. Ces applications sont gratuites et peuvent être téléchargées via axis.com/support.
- Page 39 AXIS Q1615 Mk II Network Camera Réglez le zoom et la mise au point des objectifs en option Si la caméra est montée de telle sorte qu’il est impossible de regarder l’image et d’accéder à l’objectif en même temps, utilisez l’assistant de mise au point, voir Assistant de mise au point pour objectifs en option page 39.
- Page 40 AXIS Q1615 Mk II Network Camera 1. Installez la caméra ou placez-la de façon à ce qu’elle ne puisse pas bouger. 2. Desserrez la commande de zoom en la tournant dans le sens inverse des aiguilles d’une montre. Déplacez la commande pour régler le niveau du zoom. Resserrez la commande de zoom.
- Page 41 • Le manuel d'utilisateur est disponible sur le site axis.com • Pour vérifier s'il existe un firmware mis à jour pour votre appareil, voir axis.com/support • Pour accéder à des formations et webinaires en ligne utiles, voir axis.com/academy Informations sur la garantie Pour plus d'informations sur la garantie du produit Axis et des informations connexes, rendez-vous sur axis.com/warranty.
- Page 43 AXIS Q1615 Mk II Network Camera Sicherheitsinformationen Gefährdungsstufen GEFAHR Weist auf eine gefährliche Situation hin, welche, falls nicht verhindert, zu Tod oder schweren Verletzungen führen kann. WARNUNG Weist auf eine gefährliche Situation hin, welche, falls nicht verhindert, zu Tod oder schweren Verletzungen führen kann.
- Page 44 • Verwenden Sie zum Reinigen ein sauberes, mit destilliertem Wasser angefeuchtetes Tuch. • Verwenden Sie nur Zubehör, das den technischen Vorgaben Ihres Produkts entspricht. Dieses ist von Axis oder Drittanbietern erhältlich. Axis empfiehlt die mit Ihrem Produkt kompatible Stromversorgung von Axis.
- Page 45 AXIS Q1615 Mk II Network Camera Lithium-Knopfzellen (3,0 V) enthalten 1,2-Dimethoxyethan; Ethylenglycoldimethylether (EGDME), CAS-Nr. 110-71-4.
- Page 47 AXIS Q1615 Mk II Network Camera In dieser Anleitung wird die Installation der AXIS Q1615 Mk II-Netzwerk-Kamera in Ihrem Netzwerk beschrieben. Weitere Informationen zur Nutzung dieses Produkts finden Sie im Benutzerhandbuch unter www.axis.com. Installationsschritte 1. Sicherstellen, dass der Packungsinhalt, die Werkzeuge und anderes für die Installation erforderliche Material vollzählig und verwendbar sind.
- Page 48 AXIS Q1615 Mk II Network Camera Produktübersicht LED-Statusanzeige Objektiv Netzwerkanschluss (PoE) Steuertaste (1) Funktionstaste (2) microSD-Karteneinschub Audioeingang Audioausgang E/A-Anschluss...
-
Page 49: Led-Statusanzeige
AXIS Q1615 Mk II Network Camera 10 Blendenanschluss 11 Netzanschluss 12 LED-Betriebsanzeige 13 LED-Netzwerkanzeige 14 RS485-/RS422-Anschluss LEDs Beachten • Die Status-LED kann so eingestellt werden, dass sie während des Normalbetriebs nicht leuchtet. Zum Konfigurieren Settings > System > Plain config (Einstellungen > System >... -
Page 50: Objektiv
AXIS Q1615 Mk II Network Camera Netz-LED Bedeutung Normalbetrieb. Grün Gelb Blinkt während einer Firmware-Aktualisierung grün/orange. Verhalten der LED-Statusanzeige für den Fokus-Assistenten Beachten Nur anwendbar auf optionale Objektive mit P-Iris, DC-Iris oder manueller Blende. Die Status-LED blinkt, wenn der Fokus-Assistent aktiviert ist. -
Page 51: Netzwerkanschluss (Poe)
AXIS Q1615 Mk II Network Camera Anschlüsse und Tasten Für die technischen Daten und Betriebsbedingungen siehe Seite 54. Netzwerkanschluss RJ45-Ethernetanschluss mit Power over Ethernet (PoE). HINWEIS HINWEIS HINWEIS Aufgrund örtlicher Vorschriften bzw. je nach Umgebung oder elektrischer Anlage, in/mit der das Produkt verwendet wird, kann ein abgeschirmtes Netzwerkkabel (STP) empfehlenswert oder notwendig sein. - Page 52 AXIS Q1615 Mk II Network Camera Audioanschluss • Audioeingang – 3,5 mm, für ein Monomikrofon oder ein Monosignal (der linke Kanal wird von einem Stereosignal benutzt). • Audioausgang – 3,5-mm-Audioausgang (Leitungspegel) zum Anschluss an eine Beschallungsanlage (PA) oder einen Aktivlautsprecher mit integriertem Verstärker. Für den Audioausgang muss ein Stereostecker verwendet werden.
-
Page 53: Steuertaste
Die Steuertaste hat folgende Funktionen: • Zurücksetzen des Produkts auf die Werkseinstellungen. Siehe Seite 60. • Anschließen an einen AXIS Video Hosting System-Service Weitere Informationen zu diesem Dienst finden Sie auf axis.com. Funktionstaste Beachten Der Fokusassistent arbeitet nur in Verbindung mit Objektiven mit P-Iris, DC-Iris oder manuell einstellbarer Iris. - Page 54 0 V (-) DC DC-Ausgang 12 V, max. 50 mA E/A als Eingang konfiguriert E/A als Ausgang konfiguriert Technische Daten Betriebsbedingungen Das Axis Produkt ist für die Verwendung in Innenräumen konzipiert. Produkt Temperatur Luftfeuchtigkeit AXIS Q1615 Mk II 0 °C bis 55 °C...
- Page 55 AXIS Q1615 Mk II Network Camera Anschlüsse E/A-Anschluss 4-poliger Anschlussblock Ein Beispielschaltbild finden Sie unter Anschlussschaltbilder auf Seite 54. Funktion Kon- Hinweise Technische Daten takt 0 V DC (-) Gleichstrom- Kann für die Stromversorgung von 12 V DC ausgang Zusatzgeräten verwendet werden.
-
Page 56: Audioeingang
AXIS Q1615 Mk II Network Camera Audioanschlüsse 3,5-mm- Audioanschlüsse (stereo) 2 Ring 1 Spitze 3 Schaft Audioeingang Symmetrisch: „Hot“-Eingang Symmetrisch: „Cold“- Erdung Mikrofon/Audio Mikrofon-/Leitungseingang Unsymmetrisch: Eingang Unsymmetrisch: Nicht belegt Mikrofon/Audio Audioausgang Erdung Leitungsausgang, mono (mit Leitungsausgang, mono (mit Stereostecker kompatibel) Stereostecker kompatibel) Das interne Mikrofon wird standardmäßig verwendet. - Page 57 AXIS Q1615 Mk II Network Camera Funktion Kon- Hinweise takt RS485B alt RX-Paar für alle Modi (kombinierter RX/TX für RS485 mit 2 RS485/422 RX(B) Leitern) RS485A alt RS485/422 RX(A) TX-Paar für RS-422 und RS-485 mit vier Leitern RS-485/RS-422 TX(B) RS-485/RS-422...
- Page 58 AXIS Q1615 Mk II Network Camera Das Gerät im Netzwerk ermitteln Mit AXIS IP Utility und AXIS Device Manager die Axis Geräte im Netzwerk ermitteln und ihnen unter Windows® IP-Adressen zuweisen. Beide Anwendungen sind kostenlos und können von axis.com/support heruntergeladen werden.
- Page 59 AXIS Q1615 Mk II Network Camera Einstellen von Fokus und Zoom optionaler Objektive Wenn die Kamera so montiert ist, dass sich die Bildqualität nicht während des Einstellens des Objektivs prüfen lässt, den Fokus-Assistenten verwenden. Siehe Fokus-Assistent für optionale Objektive auf Seite 59.
- Page 60 AXIS Q1615 Mk II Network Camera 1. Die Kamera so fixieren oder platzieren, dass sie nicht bewegt werden kann. 2. Lösen Sie den Zoomregler, indem Sie ihn gegen den Uhrzeigersinn drehen. Bewegen Sie den Regler und stellen Sie die Zoomstärke ein. Drehen Sie den Zoomregler wieder fest.
- Page 61 Die aktuelle Version dieses Dokuments finden Sie auf axis.com • Das Benutzerhandbuch steht auf axis.com zur Verfügung. • Unter axis.com/support finden Sie die aktuellen Firmwareversionen für Ihr Gerät. • Nützliches Onlinetraining und Webinare finden Sie unter axis.com/academy. Gewährleistungsinformationen Informationen zur Gewährleistung für Axis-Produkte und andere in diesem Zusammenhang...
- Page 63 AXIS Q1615 Mk II Network Camera Informazioni di sicurezza Livelli di pericolo PERICOLO Indica una situazione pericolosa che, se non evitata, provoca morte o lesioni gravi. AVVERTENZA Indica una situazione pericolosa che, se non evitata, potrebbe provocare la morte o lesioni gravi.
- Page 64 Batteria Il dispositivo Axis utilizza una batteria al litio da 3 V CR2032 come alimentazione per il suo orologio in tempo reale (RTC) interno. In condizioni normali questa batteria avrà una durata minima di cinque anni.
- Page 65 AXIS Q1615 Mk II Network Camera Le batterie a bottone al litio da 3 V contengono 1,2-dimetossietano; etere dimetilico di glicole etilenico (EGDME), CAS n. 110-71-4.
- Page 67 AXIS Q1615 Mk II Network Camera La presente Guida all'installazione fornisce le istruzioni necessarie per installare la telecamera di AXIS Q1615 Mk II nella rete in uso. Per ulteriori informazioni sull'utilizzo del prodotto, consultare la Guida per l'utente disponibile all'indirizzo www.axis.com.
- Page 68 AXIS Q1615 Mk II Network Camera Panoramica del dispositivo Indicatore LED di stato Obiettivo Connettore di rete (PoE) Pulsante di controllo (1) Tasto Funzione (2) Slot per scheda microSD Ingresso audio Uscita audio Connettore I/O...
- Page 69 AXIS Q1615 Mk II Network Camera 10 Connettore del diaframma 11 Connettore di alimentazione 12 Indicatore LED di alimentazione 13 Indicatore LED di rete 14 Connettore RS485/RS422 Indicatori LED Nota • Il LED di stato può essere configurato per essere spento durante il normale funzionamento.
-
Page 70: Obiettivo
AXIS Q1615 Mk II Network Camera LED di alimentazione Indicazione Verde Funzionamento normale. Giallo Luce lampeggiante verde/gialla durante l'aggiornamento del firmware. Comportamento del LED di stato per l'Assistente di messa a fuoco Nota Valido solo per obiettivi con P-Iris, diaframma DC o manuale. -
Page 71: Connettore Di Rete (Poe)
AXIS Q1615 Mk II Network Camera • Quando la telecamera non è in posizione orizzontale, i LED lampeggiano ed emettono una luce rossa, verde e arancione e il segnale acustico viene emesso a intervalli brevi. Entrambi i LED emettono brevemente una luce verde lampeggiante a indicare che il livellamento sta migliorando. - Page 72 AXIS Q1615 Mk II Network Camera Connettore audio • Ingresso audio: ingresso da 3,5 mm per un microfono mono o un segnale mono line-in (il canale sinistro viene utilizzato da un segnale stereo). • Uscita audio: 3,5 mm (di linea) che è possibile collegare a un sistema di indirizzo pubblico (PA) o a un altoparlante con amplificatore integrato.
-
Page 73: Tasto Funzione
Il pulsante di comando viene utilizzato per: • Ripristinare le impostazioni predefinite di fabbrica del dispositivo. Vederepagina 80. • Collegarsi a un servizio AXIS Video Hosting System. Per ulteriori informazioni su questo servizio, vedere il sito axis.com Tasto Funzione Nota L'Assistente di messa a fuoco è... - Page 74 AXIS Q1615 Mk II Network Camera Schema delle connessioni Connettore I/O 0 V CC (-) Uscita CC 12 V, max 50 mA I/O configurato come ingresso I/O configurato come uscita Dati tecnici Condizioni di funzionamento Il dispositivo Axis è destinato all'uso interno.
- Page 75 AXIS Q1615 Mk II Network Camera Connettori Connettore I/O Morsettiera a 4 pin Per un esempio di schema, consultare Schema delle connessioni alla pagina 74. Funzione Note Specifiche 0 V CC (-) Uscita CC Il pin può essere utilizzato anche per 12 V CC alimentare una periferica ausiliaria.
-
Page 76: Ingresso Audio
AXIS Q1615 Mk II Network Camera Connettore audio Connettori audio da 3,5 mm (stereo) 1 Punta 2 Anello 3 Guaina Ingresso audio Bilanciato: Ingresso microfono Bilanciato: Ingresso microfono Terra segnale "Hot"/linea segnale "Cold"/linea Non bilanciato: Ingresso Non bilanciato: Inutilizzato microfono/linea... - Page 77 AXIS Q1615 Mk II Network Camera Funzione Note RS485B alt Coppia RX per tutte le modalità (RX/TX combinata per RS485 RS485/422 RX(B) con due cavi) RS485A alt RS485/422 RX(A) Coppia TX per RS422 e RS485 con quattro cavi RS485/RS422 TX(B)
- Page 78 AXIS Q1615 Mk II Network Camera Individuazione del dispositivo sulla rete Per trovare i dispositivi Axis sulla rete e assegnare loro un indirizzo IP in Windows®, utilizzare AXIS IP Utility o AXIS Device Manager. Queste applicazioni sono entrambe gratuite e possono essere scaricate dal sito Web axis.com/support.
- Page 79 AXIS Q1615 Mk II Network Camera Regolare lo zoom e la messa a fuoco per gli obiettivi opzionali Se la telecamera è montata in una posizione che non consente di visualizzare l'immagine e accedere all'obiettivo contemporaneamente, utilizzare l'Assistente di messa a fuoco; vedere Assistente di messa a fuoco per obiettivi opzionali alla pagina 79.
- Page 80 AXIS Q1615 Mk II Network Camera 1. Installare o posizionare la telecamera dove non potrà essere spostata. 2. Allentare la levetta di regolazione dello zoom ruotandola in senso antiorario. Spostare la levetta per impostare il livello di zoom. Riavvitare la levetta dello zoom.
- Page 81 Per verificare se sono stati pubblicati aggiornamenti del firmware per il proprio dispositivo, vedere axis.com/support • Per servizi di formazione utili e webinar, visita il sito axis.com/academy Informazioni sulla garanzia Per informazioni sulla garanzia del dispositivo Axis e informazioni ad esso relative, consultare la pagina axis.com/warranty.
- Page 83 AXIS Q1615 Mk II Network Camera Información de seguridad Niveles de peligro PELIGRO Indica una situación peligrosa que, si no se evita, provocará lesiones graves o la muerte. ADVERTENCIA Indica una situación peligrosa que, si no se evita, puede provocar lesiones graves o la muerte.
- Page 84 Batería Este producto de Axis utiliza una batería de litio CR2032 de 3,0 V como fuente de alimentación del reloj interno en tiempo real. En condiciones normales, esta batería durará un mínimo de cinco años.
- Page 85 AXIS Q1615 Mk II Network Camera Las pilas de botón de litio de 3,0 V contienen 1,2-dimetoxietano; éter dimetílico de etilenglicol (EGDME), n.º CAS 110-71-4.
- Page 87 AXIS Q1615 Mk II Network Camera Esta guía de instalación incluye las instrucciones necesarias para instalar la cámara de red AXIS Q1615 Mk II en su red. Para conocer otros aspectos de uso del producto, vea el manual del usuario disponible en www.axis.com.
- Page 88 AXIS Q1615 Mk II Network Camera Información general del producto Indicador LED de estado Objetivo Conector de red (PoE) Botón de control (1) Botón de función (2) Ranura para tarjetas microSD Entrada de audio Salida de audio Conector de E/S...
- Page 89 AXIS Q1615 Mk II Network Camera 10 Conector de iris 11 Conector de alimentación 12 Indicador LED de alimentación 13 Indicador LED de red 14 Conector RS485/RS422 Indicadores LED Nota • Se puede configurar el LED de estado para que se apague durante el funcionamiento normal.
-
Page 90: Objetivo
AXIS Q1615 Mk II Network Camera LED de alimentación Indicación Verde Funcionamiento normal. Parpadea en verde/ámbar durante la actualización del firmware. Ámbar Comportamiento del indicador LED de estado del Asistente de enfoque Nota Válido únicamente para objetivos opcionales iris de tipo P, DC o manual. -
Page 91: Conector De Red (Poe)
AXIS Q1615 Mk II Network Camera Conectores y botones Para conocer las especificaciones y las condiciones de funcionamiento, consulte página 94. Conector de red Conector Ethernet RJ45 con alimentación a través de Ethernet (PoE). A A A VISO VISO VISO Debido a la normativa local o a las condiciones ambientales y eléctricas en las que se... - Page 92 AXIS Q1615 Mk II Network Camera Conector de audio • Entrada de audio – Entrada de 3,5 mm para micrófono mono, o entrada de línea de señal mono (se usa el canal izquierdo de una señal estéreo). • Salida de audio: Salida para audio (nivel de línea) de 3,5 mm que se puede conectar a un sistema de megafonía pública o a un altavoz con amplificador incorporado.
-
Page 93: Botón De Control
• Restablecer el producto a la configuración predeterminada de fábrica. Consulte página 100. • Conectarse a un servicio AXIS Video Hosting System. Para obtener más información acerca de este servicio, visite axis.com Botón de función Nota El Asistente de enfoque solo es válido para objetivos opcionales iris de tipo P, DC o manual. - Page 94 Salida de CC 12 V, 50 mA máx. E/S configurada como entrada E/S configurada como salida Especificaciones Condiciones de funcionamiento El producto de Axis se ha diseñado para su uso en interior. Producto Temperatura Humedad AXIS Q1615 Mk II De 0 °C a 55 °C Humedad relativa: del 10 al 85 %(sin condensación)
- Page 95 AXIS Q1615 Mk II Network Camera Conectores Conector de E/S Bloque de terminales de 4 pines Para ver un ejemplo del diagrama, consulte Diagramas de conexión en la página 94. Función Notas Especificaciones 0 V CC (-) Salida de CC...
-
Page 96: Entrada De Audio
AXIS Q1615 Mk II Network Camera Conector de audio Conectores de audio de 3,5 mm (estéreo) 1 Punta 2 Anillo Manguito Entrada de Balanceada: entrada de Balanceada: entrada de Tierra audio línea/micrófono de señal línea/micrófono de señal "fría" "caliente" No balanceada: sin utilizar No balanceada: Entrada de línea/micrófono... - Page 97 AXIS Q1615 Mk II Network Camera Notas Función RS485B alt Par RX para todos los modos (RX/TX combinados para RS485 RS485/422 RX(B) de dos cables) RS485A alt RS485/422 RX(A) Par TX para RS422 y RS485 de cuatro cables RS485/RS422 TX(B)
- Page 98 AXIS Q1615 Mk II Network Camera Localice el dispositivo en la red Para localizar dispositivos Axis en la red y asignarles direcciones IP en Windows®, utilice AXIS IP Utility o AXIS Device Manager. Ambas aplicaciones son gratuitas y pueden descargarse desde axis.com/support.
- Page 99 AXIS Q1615 Mk II Network Camera Ajuste del zoom y el enfoque en objetivos opcionales Si la cámara está montada de manera que no se puede ver la imagen y acceder al objetivo al mismo tiempo, utilice el Asistente de enfoque; consulte Asistente de enfoque para objetivos opcionales en la página 99.
- Page 100 AXIS Q1615 Mk II Network Camera 1. Monte o coloque la cámara de modo que no pueda moverse. 2. Afloje la palanca de zoom girándola en el sentido contrario a las agujas del reloj. Mueva la palanca para establecer el nivel de zoom. Apriete de nuevo la palanca de zoom.
- Page 101 Para comprobar si existe un firmware actualizado disponible para su dispositivo, vaya a axis.com/support. • Para consultar webinars y cursos en línea que pueden resultarle útiles, vaya a axis.com/academy. Información de garantía Para obtener más detalles sobre la garantía del producto Axis y la información relacionada con ella, visite axis.com/warranty.
- Page 103 AXIS Q1615 Mk II Network Camera 安 安 安 全 全 全 情 情 情 報 報 報 危 危 危 険 険 険 レ レ レ ベ ベ ベ ル ル ル 危険 回避しない場合、死亡または重傷につながる危険な状態を⽰します。 警告 回避しない場合、死亡または重傷につながるおそれのある危険な状態を ⽰します。 注意 回避しない場合、軽傷または中程度の怪我につながるおそれのある危険...
- Page 104 AXIS Q1615 Mk II Network Camera 安 安 安 全 全 全 ⼿ ⼿ ⼿ 順 順 順 注記 • 本製品は、お使いになる地域の法律や規制に準拠して使⽤してください。 • Axisは、シールドネットワークケーブル (STP) の使⽤を推奨します。 • Axisは、カテゴリーCAT5e以上のネットワークケーブルの使⽤を推奨します。 • 本製品を屋外またはそれに準じる環境で使⽤する場合は、認定済みの屋外⽤ 筐体に収納して設置する必要があります。 • 本製品は乾燥した換気のよい環境に保管してください。 • 本製品に衝撃または強い圧⼒を加えないでください。 • 本製品を不安定なポール、ブラケット、表⾯、または壁に設置しないで ください。 • 本製品を設置する際には、適切な⼯具のみを使⽤してください。 電動⼯具を...
- Page 105 AXIS Q1615 Mk II Network Camera このインストールガイドでは、AXIS Q1615 Mk IIネットワークカメラをお使いのネッ トワークにインストールする⼿順について説明します。 製品の使⽤の詳細について www.axis.com は、 で⼊⼿できるユーザーズマニュアルを参照してください 設 設 設 置 置 置 ⼿ ⼿ ⼿ 順 順 順 1. パッケージの内容、ツールなど、設置に必要なものが揃っていることを 105ページ 確認します。 を参照してください。 106ページの、製品の概要 2. 製品の概要を確認します。 を参照してください 112ページ 3. 仕様を確認します。 を参照してください。...
- Page 106 AXIS Q1615 Mk II Network Camera 製 製 製 品 品 品 の の の 概 概 概 要 要 要 ステータスLEDインジケーター レンズ ネットワークコネクター (PoE) コントロールボタン (1) 機能ボタン (2) microSDカードスロット ⾳声⼊⼒ ⾳声出⼒ I/Oコネクター...
- Page 107 AXIS Q1615 Mk II Network Camera 10 アイリスコネクター 11 電源コネクター 12 電源LEDインジケーター 13 ネットワークLEDインジケーター 14 RS485/RS422コネクター LED イ イ イ ン ン ン ジ ジ ジ ケ ケ ケ ー ー ー タ タ タ ー ー ー 注意 • ステータスLEDは、正常動作時に消灯させることができます。 設定するに...
- Page 108 AXIS Q1615 Mk II Network Camera 電 電 電 源 源 源 LED 説 説 説 明 明 明 緑 正常動作。 オレンジ ファームウェアアップグレード中は緑とオレンジで 交互に点滅します。 フ フ フ ォ ォ ォ ー ー ー カ カ カ ス ス ス ア ア ア シ シ シ ス ス ス タ タ タ ン ン ン ト ト ト ⽤ ⽤ ⽤ ス ス ス テ テ テ ー ー ー タ タ タ ス ス ス LED LED の...
- Page 109 AXIS Q1615 Mk II Network Camera カメラが⽔平になると、両⽅のLEDが緑⾊に点灯し、ブザーが連続⾳に • なります。 カメラが⽔平でないと、LEDは⾚、緑、橙の組み合わせで点滅し、ブザーが • ⻑い間隔で鳴ります。 両⽅のLEDが⼀時的に緑⾊に点滅し、⽔平化が改善したことを⽰します。 コ コ コ ネ ネ ネ ク ク ク タ タ タ と と と ボ ボ ボ タ タ タ ン ン ン 112ページ 仕様と動作条件については、 を参照してください。...
- Page 110 AXIS Q1615 Mk II Network Camera ⾳ ⾳ ⾳ 声 声 声 コ コ コ ネ ネ ネ ク ク ク タ タ タ ー ー ー ⾳ ⾳ ⾳ 声 声 声 ⼊ ⼊ ⼊ ⼒ ⼒ ⼒ - モノラルマイクロフォンまたはラインインモノラル信号⽤ (左...
- Page 111 AXIS Q1615 Mk II Network Camera SD カ カ カ ー ー ー ド ド ド ス ス ス ロ ロ ロ ッ ッ ッ ト ト ト 注記 • SDカード損傷の危険があります。 SDカードの挿⼊と取り外しの際には、鋭 利な⼯具や⾦属性の物を使⽤したり、過剰な⼒をかけたりしないでくださ い。 カードの挿⼊や取り外しは指で⾏ってください。 • データ損失や録画データ破損の危険があります。 本製品の稼働中はSDカード を取り外さないでください。 取り外しの前に、製品のWebページからSD カードをマウント解除してください。...
- Page 112 AXIS Q1615 Mk II Network Camera 接 接 接 続 続 続 図 図 図 I/O コ コ コ ネ ネ ネ ク ク ク タ タ タ 0 V DC (-) DC出⼒12 V、最⼤50 mA I/O (⼊⼒として設定) I/O (出⼒として設定) 仕 仕 仕 様 様 様...
- Page 113 AXIS Q1615 Mk II Network Camera コ コ コ ネ ネ ネ ク ク ク タ タ タ ー ー ー I/O コ コ コ ネ ネ ネ ク ク ク タ タ タ ー ー ー 4ピンターミナルブロック 112ページの、接続図 接続例の図については、...
- Page 114 AXIS Q1615 Mk II Network Camera ⾳ ⾳ ⾳ 声 声 声 コ コ コ ネ ネ ネ ク ク ク タ タ タ 3.5 mm⾳声コネク タ (ステレオ) 3 スリー 1 チップ 2 リング ブ ⾳ ⾳ ⾳ 声 声 声 ⼊ ⼊ ⼊ ⼒ ⼒ ⼒...
- Page 115 AXIS Q1615 Mk II Network Camera 機 機 機 能 能 能 ピ ピ ピ ン ン ン 備 備 備 考 考 考 RS485Bまたは すべてのモードのRXペア (2ワイヤーRS485のRX/TXペ RS485/422 RX(B) ア) RS485A5Bまたは RS485/422 RX(A) RS485/RS422 TX(B) RS422および4ワイヤーRS485のTXペア RS485/RS422 TX(A) 重要 ケーブルの最⼤⻑は30 mです。...
- Page 116 AXIS Q1615 Mk II Network Camera ネ ネ ネ ッ ッ ッ ト ト ト ワ ワ ワ ー ー ー ク ク ク 上 上 上 の の の デ デ デ バ バ バ イ イ イ ス ス ス を を を 検 検 検 索 索 索 す す す る る る...
- Page 117 AXIS Q1615 Mk II Network Camera オ オ オ プ プ プ シ シ シ ョ ョ ョ ン ン ン の の の レ レ レ ン ン ン ズ ズ ズ の の の ズ ズ ズ ー ー ー ム ム ム と と と フ フ フ ォ ォ ォ ー ー ー カ カ カ ス ス ス の の の 調 調 調 整 整 整...
- Page 118 AXIS Q1615 Mk II Network Camera 1. カメラが動かないようにしっかりと固定します。 2. ズーム調節レバーを反時計回りに回してゆるめます。 レバーを動かして ズーム倍率を設定します。 ズーム調節レバーを締め直します。 3. フォーカスリングの固定ネジをゆるめてフォーカスリングを反時計⽅向に いっぱいまで回し、最も離れた位置にフォーカスを合わせます。 4. 機能ボタンを押して、すぐに離します。 ステータスLEDが緑⾊に点滅し て、フォーカスアシスタントが有効になります。 レンズの調節が可能になる前にステータスLEDが⾚または⻩⾊に点滅する場 合は、⼿順7に従ってフォーカスアシスタントを終了してから、⼿順3〜7を 108ページの、フォーカスアシスタ 繰り返してください (上記の注を参照)。 ント⽤ステータスLEDの動作 を参照してください。 5. フォーカスリングを時計⽅向にいっぱいまでゆっくりと回します。 6. ステータスLEDが緑または⻩⾊ (⾚以外) に点滅するまでフォーカスリングを 反時計⽅向にゆっくりと回します。 7. 機能ボタンをもう⼀度押し、フォーカスアシスタントを終了します。 フォー カスアシスタントは15分後に⾃動的にオフになります。 8. フォーカスリングの固定ネジを締め直します。...
- Page 119 AXIS Q1615 Mk II Network Camera axis.com/support のサポートページに、インストールおよび管理ソフト ウェアツールが⽤意されています。 Webインターフェースを使⽤して、各種パラメーターを⼯場出荷時の設定に戻すこ ともできます。 Settings Settings Settings > > > System System System > > > Maintenance Maintenance ( ( ( 設 設 設 定 定 定 > > > シ シ シ ス ス ス テ テ テ ム ム ム > > > メ メ メ ン ン ン テ テ テ ナ ナ ナ ン ン ン...
- Page 121 AXIS Q1615 Mk II Network Camera 安 安 安 全 全 全 信 信 信 息 息 息 危 危 危 险 险 险 等 等 等 级 级 级 危险 表示如果不避免则会导致死亡或严重伤害的危险情况。 警告 表示如果不避免则可能导致死亡或严重伤害的危险情况。 小心 表示如果不避免则可能导致轻微或中度伤害的危险情况。 注意 表示如果不避免则可能导致财产损失的情况。 其 其 其 他 他 他 消 消 消 息 息 息 等 等 等 级 级 级...
- Page 122 AXIS Q1615 Mk II Network Camera 安 安 安 全 全 全 说 说 说 明 明 明 注意 • 使用安讯士产品时应遵守当地法律和法规。 • 安讯士推荐使用屏蔽网络电缆 (STP)。 • 安讯士建议使用类别 CAT5e 或更高级别的网线。 • 要在室外或类似环境中使用安讯士产品,应将该产品安装在获得批准的室外 防护罩中。 • 在干燥通风的环境中存放安讯士产品。 • 避免将安讯士产品暴露在冲击或高压环境下。 • 请勿将产品安装在不稳固的立杆、支架、表面或墙壁上。 • 安装安讯士产品时,仅使用适用的工具。 使用电动工具过度施力可能导致...
- Page 123 AXIS Q1615 Mk II Network Camera 该安装指南说明了如何在网络上安装 AXIS Q1615 Mk II 网络摄像机。有关使用该产品 www.axis.com 的其他信息,请参见用户手册,网址: 安 安 安 装 装 装 步 步 步 骤 骤 骤 第123 1. 请确保包装内含物、工具以及安装所需的其他材料状况良好。 请参见 页 。 产品概述 在第124页 2. 仔细阅读产品概述。 请参见 第129页 3. 仔细阅读规格。 请参见...
- Page 124 AXIS Q1615 Mk II Network Camera 产 产 产 品 品 品 概 概 概 述 述 述 LED 状态指示灯 镜头 网络接口(PoE) 控制按钮 (1) 功能按钮 (2) microSD 卡插槽 音频输入 音频输出 I/O 接口...
- Page 125 AXIS Q1615 Mk II Network Camera 10 光圈接口 11 电源接口 12 LED 电源指示灯 13 LED 网络指示灯 14 RS485/RS422 接口 LED 指 指 指 示 示 示 灯 灯 灯 备注 • 状态 LED 可配置为在正常工作期间不亮。 要进行配置,请转到设 设 设 置 置 置 > > > 系 系 系...
- Page 126 AXIS Q1615 Mk II Network Camera 当对焦助手处于活动状态时, LED 状态指示灯闪烁。 指 指 指 示 示 示 颜 颜 颜 色 色 色 红色 图像失焦。 调整镜头。 淡黄色 图像接近对焦。 镜头需要微调。 绿色 图像已对焦。 对 对 对 焦 焦 焦 助 助 助 手 手 手 的 的 的 蜂 蜂 蜂 鸣 鸣 鸣 器 器 器 信 信 信 号 号 号...
- Page 127 AXIS Q1615 Mk II Network Camera 注意 由于当地法规或产品使用场所的环境和电气条件,可能需要使用屏蔽网络电缆 (STP)。 将产品连接到网络的所有电缆以及在室外或恶劣电气环境中布放的电缆 应专用于其特定用途。 确保根据制造商的说明安装网络设备。 有关法规要求的 Electromagnetic compatibility (EMC) on page 4 信息,请参见 。 I/O 连 连 连 接 接 接 器 器 器 在外部设备结合了移动侦测、事件触发和报警通知等功能的情况下,使用 I/O 连接器。 除 0 V DC 参考点和电源(DC 输出)外,I/O 连接器还提供连接至以下模块的接口:...
- Page 128 AXIS Q1615 Mk II Network Camera 1 尖部 2 中间环 3 尾段 音 音 音 频 频 频 输 输 输 入 入 入 平衡: “热”信号麦克风/ 平衡: “冷”信号麦克风/ 接地 线路输入 线路输入 不平衡: 麦克风/线路输入 不平衡: 未使用 音 音 音 频 频 频 输 输 输 出 出 出...
- Page 129 AXIS Q1615 Mk II Network Camera 调 调 调 平 平 平 辅 辅 辅 助 助 助 - - - 此功能有助于确保摄像机处于水平位置。 要启动水平助手,请按下按钮约 3 秒。 再次按下以停用水平助手。 状态 LED 和蜂鸣器信号可帮助实现摄像机水平,请 使用水平助手时的 LED状态指示灯状态和蜂鸣器信号 在第126页 参见 。 当蜂鸣器连续 发出蜂鸣声时,摄像机处于水平状态。 聚 聚 聚 焦 焦 焦 助 助 助 手 手 手 - - - 此功能用于启用聚焦助手。 要启用聚焦助手,则按下并快速松开按钮。 再...
- Page 130 AXIS Q1615 Mk II Network Camera 产 产 产 品 品 品 温 温 温 度 度 度 湿 湿 湿 度 度 度 AXIS Q1615 Mk 0 °C 至 55 °C 10-85% 相对湿度(无冷凝) (32 °F 至 122 °F) 接 接 接 口 口 口...
- Page 131 AXIS Q1615 Mk II Network Camera 电 电 电 源 源 源 接 接 接 口 口 口 2 针接线端子用于 DC 电源输入。使用符合安全超低压 (SELV)规定,且额定输出功率 ≤100 W 或额定输出电流 ≤5 A 的有限电源(LPS)。 音 音 音 频 频 频 连 连 连 接 接 接 器 器 器...
- Page 132 AXIS Q1615 Mk II Network Camera 功 功 功 能 能 能 针 针 针 备 备 备 注 注 注 RS485B alt 适用于所有模式的 RX 对(适用于双线 RS485 的组合 RS485/422 RX(B) RX/TX) RS485A alt RS485/422 RX(A) RS485/RS422 用于 RS422 和 4 线 RS485 的 TX 线对...
- Page 133 AXIS Q1615 Mk II Network Camera 在 在 在 网 网 网 络 络 络 上 上 上 查 查 查 找 找 找 设 设 设 备 备 备 若要在网络中查找安讯士设备并为它们分配 Windows® 中的 IP 地址,请使 用 AXIS IP Utility 或 AXIS 设备管理器。 这两种应用程序都是免费的,可以从 axis.com/support 上下载。...
- Page 134 AXIS Q1615 Mk II Network Camera 1. 转到设 设 设 置 置 置 > 图 图 图 像 像 像 > 对 对 对 焦 焦 焦 。 2. 单击微 微 微 调 调 调 。 3. 调整自动对焦区域,使其覆盖要位于焦点的图像的部分。 如果没有选择自动对焦区域,摄像机将聚焦于整个场景。 我们建议您以...
- Page 135 AXIS Q1615 Mk II Network Camera 重 重 重 置 置 置 为 为 为 出 出 出 厂 厂 厂 默 默 默 认 认 认 设 设 设 置 置 置 重要 重置为出厂默认设置时应谨慎。 重置为出厂默认设置会将所有设置(包括 IP 地址)重置为出厂默认值。 将产品重置为出厂默认设置: 1. 断开产品电源。...
- Page 136 Installation Guide Ver. M2.6 AXIS Q1615 Mk II Network Camera Date: January 2020 © Axis Communications AB, 2016 - 2020 Part No. 2090924...