Advertisement
Quick Links
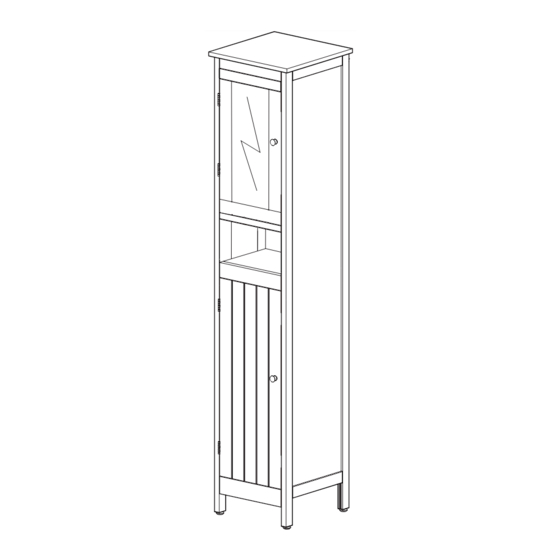
Boston Tall Unit with Mirror
Assembly Instructions -
Dimensions
Width - 36.5cm
Depth - 36.5cm
Height - 171.5cm
Important -
Please read these instructions fully before starting assembly
If you need help or have damaged or missing parts, call the Customer Helpline: 08456 400800
Please keep for future reference
833/1757
Issue 2 - 21/04/11
Advertisement

Related Manuals for Justwise Boston 833/1757


Summary of Contents for Justwise Boston 833/1757
- Page 1 Boston Tall Unit with Mirror Assembly Instructions - 833/1757 Please keep for future reference Dimensions Width - 36.5cm Depth - 36.5cm Height - 171.5cm Important - Please read these instructions fully before starting assembly If you need help or have damaged or missing parts, call the Customer Helpline: 08456 400800 Issue 2 - 21/04/11...
-
Page 2: Wall Fixing
P/O No: K10776/10 Imported by: The glass used with this product is annealed mirror glass of a Justwise Group Ltd nominal thickness of 3 mm. It is not required to comply with BS 6206. 6 The Shires If a glass component is chipped or broken, replace with glass of the Shire Hill Industrial Estate type described on this label. - Page 3 Parts Components - If you have damaged or missing components, call the Customer Helpline: 08456 400800 Please check you have all the parts listed below 4 Top panel x 1 (36.5x36.5cm) Inside 5 Panel x 2 (33.8x31.4cm) 6 Stretcher x 4 (28x2.2cm) 1 Front panel x 1 2 Back panel x 1...
- Page 4 Components - Fittings Please check you have all the parts listed below Note: The quantities below are the correct amount to complete the assembly. In some cases more fittings may be supplied than are required. Wall strap x 2 40mm Wood dowel x 16 30mm screw x 12 30mm Wood dowel x 4 16mm knob screw x 2...
- Page 5 Assembly Instructions Step 1 Preparing stretchers Fit wood dowels into the holes in both ends of stretchers Fit wood dowels into the holes in both ends of shelf Step 2 Attaching stretchers Groove Lay back panel flat onto to face down the floor with the fixing holes facing up.
- Page 6 Assembly Instructions Step 3 Attaching top and bottom panels Assemble top panel back panel using screws Note: The front of the top panel has been labelled for easier identification. Assemble both panels to back panel using screws Bottom Step 4 Fitting side panels Carefully slide side panels into the grooves in...
- Page 7 Assembly Instructions Step 5 Attaching door knobs Attach door knobs to the upper and lower doors using screws Step 6 Attaching front panel With help, carefully lower front panel down into position. Note: Ensure the wood dowels are aligned and ensure side panels inside the grooves in front panel...
- Page 8 Assembly Instructions Step 7 Fitting shelves Fit shelf support pins at the desired height in upper and lower cabinets. Locate shelves onto the support pins. Note: The front edges of shelves have been labelled for easier identification. Labelled underneath Labelled underneath...
- Page 9 Note: Screws are not supplied. Assembly is complete. Customer helpline:08456 400800 If you need help for have damaged or missing parts, call the Justwise Group Ltd., 6 The Shires, Shirehill Industrial Estate, Saffron Walden, Essex. CB11 3AP...
Need help?
Do you have a question about the Boston 833/1757 and is the answer not in the manual?
Questions and answers