Table of Contents
Advertisement
Quick Links
Date purchased | Fecha de compra
If you have questions or need assistance
during assembly, please call 1-800-241-7548.
Si tiene alguna pregunta o si Necesita
ayuda durante el Ensamblado, llámenos Al
1-800-241-7548
Tools needed for assembly:
Phillips Screwdriver
Flat Head Screwdriver
Two adjustable wrenches
Hammer
11/03/14 • 42804880
15302034
Herramientas necesarias para el armado:
Destornillador Phillips
Destornillador de hoja plana
Dos llaves regulables
Martillo
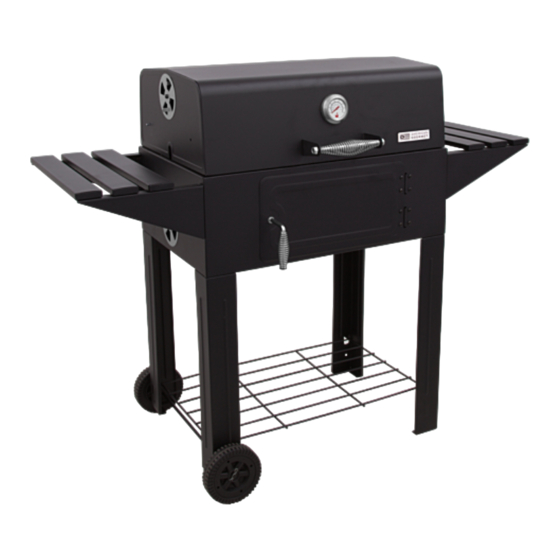
CHARCOAL
GRILL 615
Advertisement
Chapters
Table of Contents

Related Manuals for Thermos 615


Summary of Contents for Thermos 615
-
Page 1: Product Record Information
CHARCOAL 15302034 GRILL 615 Date purchased | Fecha de compra If you have questions or need assistance during assembly, please call 1-800-241-7548. Si tiene alguna pregunta o si Necesita ayuda durante el Ensamblado, llámenos Al 1-800-241-7548 Tools needed for assembly:... -
Page 2: Table Of Contents
THIS GRILL IS FOR OUTDOOR USE TABLE OF CONTENTS ONLY. Product Record Information ..... . .1 Safety Symbols....... 2-3 WARNING Preparing to Use Your Grill. - Page 3 WARNING WARNING Most surfaces on this unit are hot when in use. Use extreme FAILURE TO READ AND FOLLOW INSTRUCTIONS caution. Keep others away from unit Always wear protective FOR LIGHTING CHARCOAL MAY RESULT IN SERIOUS clothing to prevent injury. PERSONAL INJURY AND OR PROPERTY DAMAGE.
-
Page 4: Preparing To Use Your Grill
PREPARING TO USE YOUR GRILL GRILL MAINTENANCE Before cooking with your grill, the following steps should be Frequency of clean up is determined by how often the grill is closely followed to both cure the finish and season the interior used. - Page 5 Know When Your Fire is Ready Grilling with Wood Chips/Wood Chunks For a more robust smoke flavor while using charcoal briquettes Successful charcoal grilling depends on a good fire. The general or lump charcoal, try adding wood chips or several wood chunks rule for knowing when your coals are ready for grilling is to make to the fire.
-
Page 6: Limited Warranty
LIMITED WARRANTY This warranty only applies to units purchased from an authorized retailer. Manufacturer warrants to the original consumer-purchaser only that this product shall be free from defects in workmanship and materials after correct assembly and under normal and reasonable home use for the periods indicated below beginning on the date of purchase*. -
Page 7: Símbolos De Seguridad
ÍNDICE ESTA PARRILLA SOLO SE PUEDE USAR EN EXTERIORES. Información de inscripción de la garantía ....1 Símbolos de seguridad ......7-8 ADVERTENCIA Preparativos para usar su parrilla . - Page 8 ADVERTENCIA ADVERTENCIA La mayoría de las superficies de esta unidad EL NO LEER Y SEGUIR LAS INSTRUCCIONES PARA están calientes cuando está en uso. Sea ENCENDER EL CARBÓN, PUEDE OCASIONAR sumamente cuidadoso. No deje que las demás LESIONES GRAVES Y DAÑOS MATERIALES. personas se acerquen a la unidad.
-
Page 9: Preparativos Para Usar Su Parrilla
PREPARACIÓN PARA USAR SU PARRILLA MANTENIMIENTO DE LA PARRILLA Antes de cocinar con su parrilla, debe seguir al pie de la letra os La frecuencia de la limpieza depende de cuánto se use la siguientes pasos para curar el acabado y el acero del interior. Si parrilla. -
Page 10: Consejos Para Cocinar
Cómo asar con astillas/trocitos de madera Cómo saber cuándo está listo el fuego Para lograr un sabor ahumado más fuerte con briquetas o La buena calidad del asado al carbón depende de la calidad del carbón de madera en bloques, pruebe poner varias astillas o fuego en la parrilla. -
Page 11: Garantía Limitada
GARANTÍA LIMITADA Esta garantía es válida únicamente para las unidades adquiridas de los distribuidores autorizados. El fabricante le garantiza únicamente al consumidor- comprador original, que este producto no presentará defectos de mano de obra ni de materiales por el período indicado a continuación, contado desde la fecha de compra*, si se arma correctamente y se usa en el hogar, en condiciones normales y razonables. -
Page 12: Parts List
PARTS LIST Description Firebox Bottom Rear Panel f/ Firebox Logo Plate Grease Can Holder Long Leg Short Leg Side Shelf Bracket, LF/ RB Side Shelf Bracket, LB/ RF Daisy Wheel Damper Lid Handle Lid Stop Wire Wood Rack Axle Wheel Ash Pan Hanger Ash Pan Cooking Grate... -
Page 13: Lista De Piezas
LISTA DE PIEZAS Clave Cant. Descripción Unidad de cámara de combustión Tablero posterior Tapa Logotipo de la Plata Portalatas para la grasa Patas largas Patas cortas Soporte de repisa lateral, izq.fron./der.tras. Soporte de repisa lateral, izq.tras./der.fron. Regulador de tiro, de tipo Margarita Asa de la tapa Alambres de parada de tapa Rejilla para la leña... -
Page 14: Parts Diagram
PARTS DIAGRAM DIAGRAMA DE PIEZAS... -
Page 15: Assembly
ASSEMBLY ENSAMBLAR Open carton and place contents onto a clean floor. Place bottom on ground with clean out door opening facing ground. Attach rear panel to the bottom with (3) 1/4-20x1/2” hex screws. Note: Rear Panel is installed with flanges inside the firebox. Abra la caja de cartón y coloque su contenido sobre el suelo. - Page 16 With lower section still in position from previous step, attach (1) short leg to the right end and (1) long leg to left end of the bottom assembly using (3) 1/4-20x1/2” hex screws from outside and flange nuts on inside. Con la sección inferior colocada en el paso anterior, fije (1) pata corta en el extremo derecho y (1) fuera y las tuercas de brida dentro.
- Page 17 This may require at least two people Attach (1) short leg and (1) long leg to rear of bottom assembly using (3) 1/4-20x1/2" hex screws from outside and flange nuts from the inside. Assemble the wood rack to the legs using (4) 1/4-20x 3/4" hex screws, (4) 1/4" flat washers, and (4) 1/4-20 flange nuts as shown in Figure A.
- Page 18 Insert a cotter pin through the hole in one end of the axle and bend it so it won’t back out (A). Slide a wheel onto the axle. Slide axle through hole in bottom of short leg as shown. Slide the other wheel onto the end of the axle.
- Page 19 Attach handle bracket to lid using (2) 1/4-20x1/2” Hex screws and (2) 1/4-20 flange nuts. Place temperature gauge through the hole above the front handle. Secure temperature gauge with wing nut from inside the top assembly. Colocar la manija Soporte al principio de montaje usando (2) 1/4-20x1/2 "tornillos hexagonales a través de colocación de los tornillos de soporte a través de agujeros frontal y ttaching con (2) 1/4-20 nuts.
- Page 20 Place lid on bottom assembly. Align hinges on back of unit. With the aid of a helper attach hinges to lid Assembly using (4) 1/4-20x1/2” hex screws. using (4) 1/4-20x1/2” hex screws. Coloque la unidad superior sobre la unidad inferior. Alinee los orificios de las bisagras en la parte trasera de la unidad. Con ayuda de otra persona, fije las bisagras a la unidad superior con (4) tornillos hexagonales 1/4-20x1/2”.
Need help?
Do you have a question about the 615 and is the answer not in the manual?
Questions and answers