
Subscribe to Our Youtube Channel
Related Manuals for Reely SKYLAND


Summary of Contents for Reely SKYLAND
- Page 1 Bedienungsanleitung SKYLAND Modellflugzeug RfF Best.-Nr. 2201305 Seite 7 - 27 Operating Instructions SKYLAND Model Airplane RtF Item No. 2201305 Page 28 - 49...
- Page 4 100%...
-
Page 7: Table Of Contents
Inhaltsverzeichnis Seite Einführung ................................9 Symbol-Erklärung ..............................9 Bestimmungsgemäße Verwendung ........................10 Lieferumfang ..............................10 Erste Schritte ..............................11 Sicherheitshinweise ............................12 6.1 Allgemein ..............................12 6.2 Versicherungspflicht .............................12 6.3 Betrieb .................................12 Batterie- und Akkuhinweise ..........................13 7.1 Allgemein ..............................13 7.2 Flugakku ..............................13 7.3 Batterien/Akkus ............................13 Sicherheitsfunktionen am Modell ........................14 8.1 Virtueller Pilot ...............................14 8.2 Fail Safe ...............................14 8.3 Timer ................................14... - Page 8 12.1 Flugmodus wählen .............................21 12.2 Ansprechverhalten von Höhenruder einstellen ..................21 12.3 Starten / Trimmung überprüfen / Landen / Flug beenden ................21 13. Trimmung ................................22 13.1 Trimmtaster ..............................22 13.2 Trimmung im Flug einstellen ........................22 13.3 Trimmung manuell einstellen ........................22 14. Fluganleitung für Anfänger ..........................23 14.1 Flugbereich auswählen ..........................23 14.2 Starten ...............................23 14.3 Fliegen ...............................23...
-
Page 9: Einführung
1. Einführung Sehr geehrte Kundin, sehr geehrter Kunde, wir bedanken uns für den Kauf dieses Produkts. Dieses Produkt entspricht den gesetzlichen, nationalen und europäischen Anforderungen. Um diesen Zustand zu erhalten und einen gefahrlosen Betrieb sicherzustellen, müssen Sie als Anwender diese Bedienungsanleitung beachten! Diese Bedienungsanleitung gehört zu diesem Produkt. -
Page 10: Bestimmungsgemäße Verwendung
3. Bestimmungsgemäße Verwendung Bei diesem Produkt handelt es sich um ein elektrisch angetriebenes Flugmodell, das mit Hilfe des beiliegenden Sen- ders (Funk-Fernsteuerung) drahtlos per Funk gesteuert wird. Das Modell ist für den Einsatz in geeigneten Hallen ausgelegt und darf im Außenbereich nur an windstillen oder schwach windigen Tagen geflogen werden. -
Page 11: Erste Schritte
5. Erste Schritte Wenn Sie das Modell zum ersten mal montieren/bedienen, befolgen Sie die folgende Schritte in der gegebenen Reihenfolge: 1. Machen Sie sich mit der Sicherheit vertraut. Lesen Sie unbedingt the Sicherheitshinweise und Hinweise zum Gebrauch von Flugakkus und Batterien. Für die Bedienung des Modells besteht eine Versicherungspflicht. -
Page 12: Sicherheitshinweise
6. Sicherheitshinweise Lesen Sie sich die Bedienungsanleitung aufmerksam durch und beachten Sie insbesondere die Sicherheits- hinweise. Falls Sie die Sicherheitshinweise und die Angaben zur sachgemäßen Handhabung in dieser Be- dienungsanleitung nicht befolgen, übernehmen wir für dadurch resultierende Personen-/Sachschäden keine Haftung. Außerdem erlischt in solchen Fällen die Gewährleistung/Garantie. 6.1 Allgemein •... -
Page 13: Batterie- Und Akkuhinweise
7. Batterie- und Akkuhinweise 7.1 Allgemein • Batterien/Akkus gehören nicht in Kinderhände. • Lassen Sie Batterien/Akkus nicht offen herumliegen, es besteht die Gefahr, dass diese von Kindern oder Haustie- ren verschluckt werden. Suchen Sie in einem solchen Fall sofort einen Arzt auf! •... -
Page 14: Sicherheitsfunktionen Am Modell
8. Sicherheitsfunktionen am Modell Das Modell ist mit einigen Sicherheitsfunktionen ausgerüstet, die das Modell vor Beschädigung und den Piloten und Drittpersonen vor Verletzung schützen helfen. 8.1 Virtueller Pilot Falls Sie während des Flugs unsicher werden, bringen Sie den rechten Steuerknüppel in die Mittelstellung. Das Modell geht mit Hilfe des Gyroskop automatisch in den Normalflug über. -
Page 15: Modell Montieren
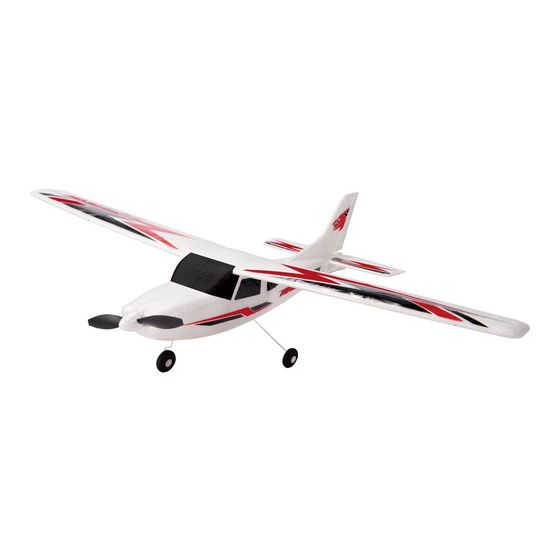
9. Modell montieren A1 A2 A3 In diesem Kapitel montieren Sie das Modell. Das fertig montierte Modell sieht wie in Abbildung aus. Befolgen Sie die Schritte in der aufgeführten Reihenfolge. 9.1 Tragfläche montieren 1. Führen die Tragfläche wie in Abbildung gezeigt in den Rumpf ein. -
Page 16: Sender
10. Sender Der Sender ist eine Mode 2 Ausführung. 10.1 Bedienelemente... -
Page 17: Batterien Einlegen/Austauschen
Bauteil Funktion keine Funktion Ein-/Aus-Schalter Sender ein- und ausschalten Taste MODE Flugmodus wählen Rechter Steuerknüppel Höhen- und Seitenruder Trimmtaster Trimmen von Höhenruder Trimmtaster Trimmen von Seitenruder Smartphone-Halter Smartphone-Halter zum Hochklappen Timer-Taste Timer starten Motoren sperren Motorsperre-Taste Keine Funktion Lichtschalter Rückstelltaste reset Gyroskop zurücksetzen Linker Steuerknüppel Motorfunktion... -
Page 18: Vor Dem Fliegen
11. Vor dem Fliegen Befolgen Sie die Schritte in der aufgeführten Reihenfolge vor jedem Flug. 11.1 Modell auf Schäden überprüfen • Prüfen Sie das Modell auf Beschädigungen. Berichtigen Sie Beschädigungen vor dem nächsten Flug. • Die Räder müssen frei drehen können. •... -
Page 19: Steuerfunktionen Überprüfen
6. Schließen Sie die Akkufachabdeckung. Stellen Sie sicher, dass sie einrastet. 7. Stellen Sie das Modell auf das Fahrwerk und lassen es für mindestens 3 Sekunden ruhen, damit die Elektronik einen Selbsttest durchführen kann. 11.3.2 Sender und Empfänger koppeln Nachdem Sie den Akku angeschlossen haben und der Selbsttest durchgeführt ist, koppeln Sie die Fernbedienung und den Empfänger. -
Page 20: Fliegen
11.4.4 Seitenruder C3 C4 (R11). 1. Entsperren Sie den Motor mit der Motorsperre-Taste 2. Bewegen Sie den rechten Steuerknüppel nach rechts - Das Seitenruder muss sich nach rechts bewegen. 3. Bewegen Sie den rechten Steuerknüppel nach links - Das Seitenruder muss sich nach links bewegen. 4. -
Page 21: Flugmodus Wählen
12.1 Flugmodus wählen Das Modell ist mit zwei Modi ausgerüstet: • Stabilisierungsmodus: der Pilot wird vom verbauten virtuellen Piloten unterstützt. Anfänger sollten unbedingt den Stabilisierungsmodus auswählen. • Manueller Modus: das Modell wird ausschließlich vom Piloten gesteuert. Aktivieren Sie den gewünschten Modus durch Betätigen der Taste MODE (R3): •... -
Page 22: Trimmung
13. Trimmung Sollte Ihr Modell im geraden Flug die Tendenz aufweisen, ständig in eine Richtung zu ziehen, so korrigieren Sie mit Hilfe der Trimmung die erforderliche Neutralstellung der jeweiligen Ruder. 13.1 Trimmtaster Die Trimmtaster am Sender (R5 – R8) ermöglichen die Modelltrimmung während des Flugs. Der zuletzt eingestellte Trimmwert wird automatisch gespeichert und nach dem erneuten Einschalten des Senders aufgerufen. -
Page 23: Fluganleitung Für Anfänger
14. Fluganleitung für Anfänger 14.1 Flugbereich auswählen Für die ersten Flugversuche empfehlen wir Ihnen eine große Wiese, einen Sport- oder Modellflugplatz oder eine große Lager- bzw. Sporthalle. Sollten Sie den Erstflug im Außenbereich durchführen, so warten Sie einen schwach- windigen bis windstillen Tag ab. 14.2 Starten •... -
Page 24: Landen
14.5 Landen Verletzungsgefahr! Versuchen Sie nie das Modell mit der Hand abzufangen. • Fliegen Sie große flache Kreise. Ziehen Sie dabei nicht zu stark am Höhenruder, um die Flughöhe gezielt zu verringern. Wählen Sie die letzte Kurve vor dem Landeanflug so, dass die Landung bei einem Betrieb im Außen- bereich gegen den Wind erfolgt, Sie im Notfall ausreichenden Platz für die Landung haben und die Flugrichtung beim Landeanflug nicht mehr wesentlich korrigiert werden muss. -
Page 25: Gyroskop Zurücksetzen
16.2 Gyroskop zurücksetzen Das verbaute Gyroskop wird für die Geradestellung des Modells benötigt. Falls die Grundeinstellung aus irgendwel- chen Grüden verändert wurde, ist eine Neueinstellung wie folgt möglich: Voraussetzung: Der Flugakku ist angeklemmt und der Sender in Betriebsbereitschaft. 1. Bringen Sie das Modell in eine vollständig waagerechte Position. 2. -
Page 26: Unterhalt
17. Unterhalt 17.1 Ersatzteile Wichtig! Sollten Sie beschädigte oder verschlissene Teile erneuern müssen, so setzen Sie nur Original-Ersatzteile ein. Eine Ersatzteilliste finden Sie auf www.conrad.com im Download-Bereich zum jeweiligen Produkt. 17.2 Propellerwechsel Verletzungsgefahr! Klemmen Sie den Flugakku ab! Tauschen Sie ein Propellerblatt wie folgt aus: 1. -
Page 27: Entsorgung
19. Entsorgung 19.1 Produkt Elektronische Geräte sind Wertstoffe und gehören nicht in den Hausmüll. Entsorgen Sie das Produkt am Ende seiner Lebensdauer gemäß den geltenden gesetzlichen Bestimmungen. Entnehmen Sie evtl. eingelegte Batterien/Akkus und entsorgen Sie diese getrennt vom Produkt. 19.2 Batterien/Akkus Sie als Endverbraucher sind gesetzlich (Batterieverordnung) zur Rückgabe aller gebrauchten Batterien/ Akkus verpflichtet;... - Page 28 Table of contents Page Introduction ................................30 Explanation of symbols ............................30 Intended use ..............................31 Package contents ..............................31 Introduction ................................32 Safety instructions .............................33 6.1 General information .............................33 6.2 Compulsory insurance ..........................33 6.3 Operation ..............................33 Battery information .............................34 7.1 General information .............................34 7.2 Flight battery ..............................34 7.3 Batteries ...............................34 Safety features of the model ..........................35 8.1 Virtual pilot ..............................35...
- Page 29 12.1 Selecting the flight mode ...........................42 12.2 Setting elevator response ..........................42 12.3 Take-off / Checking trim settings / Landing / Ending the flight ..............42 13. Trimming ................................43 13.1 Trim buttons ...............................43 13.2 Trimming in-flight ............................43 13.3 Trimming manually .............................44 14. Flight instructions for beginners .........................44 14.1 Selecting a suitable location ........................44 14.2 Take-off ..............................44 14.3 Flying .................................45...
-
Page 30: Introduction
1. Introduction Dear customer, Thank you for purchasing this product. This product complies with statutory, national and European regulations. To ensure that the product remains in this state and to guarantee safe operation, always follow the instructions in this manual. These operating instructions are part of this product. -
Page 31: Intended Use
3. Intended use This product is an electrically driven model aeroplane which is controlled wirelessly via the remote control provided. The model is designed for use in suitable indoor halls and must only be used outdoors when there is little or no wind. The model is pre-assembled and comes with a built-in remote control system and drive components. -
Page 32: Introduction
5. Introduction If you are assembling/using the model for the first time, follow the steps below in the stated order: 1. Familiarise yourself with the safety precautions. Read the safety instructions and information on the use of flight batteries. You are required to have insurance in order to use the model. Details can be found in sections 6. -
Page 33: Safety Instructions
6. Safety instructions Read the operating instructions and safety information carefully. If you do not follow the safety information and information on proper handling in these operating instructions, we will assume no liability for any result- ing personal injury or damage to property. Such cases will invalidate the warranty/guarantee. 6.1 General information •... -
Page 34: Battery Information
7. Battery information 7.1 General information • Keep batteries out of reach of children. • Do not leave batteries lying around, as they present a choking hazard for children and pets. Seek immediate medi- cal advice if a battery is swallowed. •... -
Page 35: Safety Features Of The Model
8. Safety features of the model The model is equipped with some safety features that help to prevent damage to the model and injuries to the pilot and other people. 8.1 Virtual pilot If you lose control of the model during a flight, move the right-hand joystick to the centre. The model will use the gyroscope to automatically resume a normal flight path. -
Page 36: Assembling The Model
9. Assembling the model A1 A2 A3 This section explains how to assemble the model. The assembled model is shown in fig. Follow the steps in the specified order. 9.1 Attaching the wing 1. Slide the wing into the fuselage as shows. -
Page 37: Remote Control
10. Remote control The remote control features a Mode 2 design. 10.1 Operating elements Component Function No function On/Off switch Switch the remote control on and off MODE button Select the flight mode Right-hand joystick Elevator and rudder Trim button Elevator trim Trim button Rudder trim... -
Page 38: Inserting/Replacing The Batteries
10.2 Inserting/replacing the batteries Beep: The remote control will beep constantly when the batteries need to be replaced. When this occurs, replace the batteries immediately. 1. Turn the remote control upside down. 2. Remove the screw on the battery compartment cover. 3. -
Page 39: Before Flying
11. Before flying Before each flight, follow the steps below in the specified order. 11.1 Check the model for damage • Check the model for signs of damage. Repair any damage before the next flight. • The wheels must be able to turn freely. •... -
Page 40: Connect Flight Battery And Pair Remote Control/Receiver
11.3 Connect flight battery and pair remote control/receiver B1 B2 Important! When the flight battery is connected, the automatic controls may start the model unex- pectedly. Keep body parts and objects away from the propellers! 11.3.1 Connect battery 1. If switched on, switch the remote control off with the on/off switch (R2). 2. - Page 41 11.4.2 Motor function (R11). 1. Unlock the motor via the motor lock button 2. Move the left-hand joystick (R14) slowly upwards until the motor is at full load 3. Move the joystick back to the lowest position. The motor will switch off. 4.
-
Page 42: Flying The Model
12. Flying the model If you are flying the model for the first time, read the instructions in section 14. Flight instructions for beginners. The flight time depends on how you fly the model and the outdoor temperature. The battery perfor- mance decreases at lower outdoor temperatures. -
Page 43: Trimming
3. Take off at full motor power against the wind. - You can either place the model in your hand or on the ground 4. Check the trim settings shortly after take-off. Details of the trim settings can be found in section 13. Trimming. 5. -
Page 44: Trimming Manually
13.2.2 Elevator Set the elevator trim so that the model ascends at a flat angle at full motor power and flies at a constant height when the motor is switched off. Centre of gravity: Changing the position of the flight battery changes the model's centre of gravity. This should be noted when trimming the controls. -
Page 45: Flying
• When fine tuning the altitude and correcting the direction of flight, it is only necessary to move the remote control joysticks briefly and by small amounts. • Once the desired altitude has been reached, reduce the motor power or switch off the motor. Start the first curve. 14.3 Flying •... -
Page 46: Troubleshooting
16. Troubleshooting 16.1 Problems/Solutions Problem Solution The model does not respond. Charge the flight battery. Check the connections on the model. Re-establish the connection between the remote control and the receiver. The remote control does not respond. Check the remote control batteries. Check the polarity of the batteries. -
Page 47: Maintenance
3. Connect the flight battery. 4. Hold the remote control at least 60 cm away from the model, and then switch on the remote control via the on/ off switch. 5. Leave the model for approximately 3 seconds. 6. Unlock the motor via the motor lock button (R11). -
Page 48: Declaration Of Conformity (Doc)
18. Declaration of Conformity (DOC) Conrad Electronic SE, Klaus-Conrad-Straße 1, D-92240 Hirschau, hereby declares that this product conforms to Directive 2014/53/EU. Click on the following link to read the full text of the EU Declaration of Conformity: www.conrad.com/downloads Select a language by clicking on the corresponding flag symbol, and then enter the product order number in the search box. -
Page 49: Technical Data
20. Technical data Remote control: Power supply ..........3x 1.5 V AAA batteries Number of channels ........3 Frequency range ...........2.425 – 2.465 GHz Transmission power ........max. 13 dBm Range ............max. 200 m Dimensions (W x H x D) ........154 x 70 x 126 mm Weight ............142 g (without batteries) Model aircraft: Power supply .......... - Page 52 Dies ist eine Publikation der Conrad Electronic SE, Klaus-Conrad-Str. 1, D-92240 Hirschau (www.conrad.com). Alle Rechte einschließlich Übersetzung vorbehalten. Reproduktionen jeder Art, z. B. Fotokopie, Mikroverfilmung, oder die Erfassung in elektronischen Datenverarbeitungsanlagen, bedürfen der schriftlichen Genehmigung des Herausgebers. Nachdruck, auch auszugsweise, verboten. Die Publikation entspricht dem technischen Stand bei Drucklegung. Copyright 2020 by Conrad Electronic SE.
Need help?
Do you have a question about the SKYLAND and is the answer not in the manual?
Questions and answers