Table of Contents
Advertisement
Quick Links
Advertisement
Table of Contents

Related Manuals for Covert LC32


Summary of Contents for Covert LC32
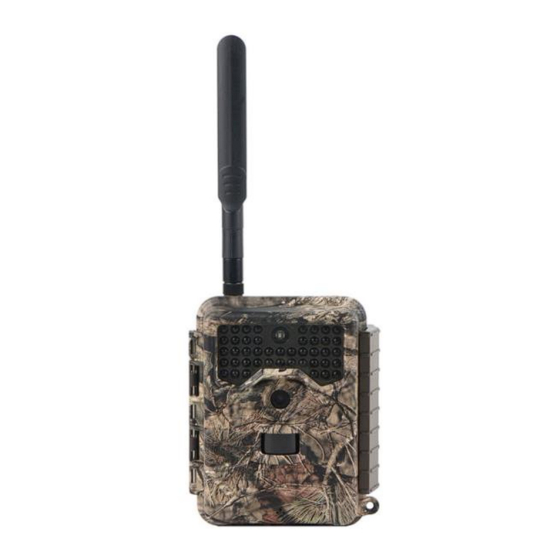
- Page 1 LC32 Covert Scouting Camera Instruction Manual...
-
Page 2: Table Of Contents
Table of Contents Camera Button Info Diagram ........4 Installing the Batteries…………………………………………..6 Installing the SD Card………………………………………...….6 Select and Attach to a Base Unit.....…..…. 8 Locating Linked Cameras.....:…………………….…11 2.4G Test Mode....:………………………....…..12 Customizing the Camera Settings: ………………..…..17 PIR tab: ..............19 SYS tab: ..............22 Viewing photos on the Color Display: .... - Page 3 Camera: -Minimum of 4 AA Batteries -(1) 8GB SD Card (Up to 32GB) Congratulations on your purchase of the LC32 Covert Scouting Camera! We truly value your business and will continue to provide you top quality customer service should you ever need help with any of our products.
-
Page 4: Camera Button Info Diagram
Camera Button Info Diagram:... -
Page 6: Installing The Batteries
Installing the Batteries: The LC32 can function short term on 4AA batteries. We suggest you use 12AA batteries to maximize camera performance and battery life. Using Covert 2300mAh, NiMH rechargeable AA batteries can extend the battery life significantly when using a solar panel or other external power source. - Page 7 Understanding Main Screen Info: 2.4GHz Megapixels Signal Bar Signal Chosen Camera/Video Value Icon # of Megabytes Remaining on Card Lora Base ID Time Battery life Date indicator...
-
Page 8: Select And Attach To A Base Unit
Select and Attach to a Base Unit (LB-A/V) Below is the base unit menu. Total Number of Linked Battery Life Base Unit ID Cameras Indicator Signal New Round of Photos Received S1 is the from S1 connected camera in which the base unit is Total currently... - Page 9 For example, if you have 3 linked cameras to attach, then you can choose any 3 IDs out of S1-S9.) Second, turn on the LC32 (linked camera) to the setup mode. Choose the net tab to set the Base ID.
- Page 10 Then, type the base unique ID showing on your LB-A main screen and select LoRa linked camera ID here. For example, if you set it as S1, you will see S1 on your LB-A main screen after it is successfully linked.
-
Page 11: Locating Linked Cameras
10 on the GHz signal strength. We recommend placing the base unit at the highest elevation point. 2.4GHz Signal Strength After you link the connected camera (LC32) to the base unit, please do a test photo. See next page for instructions. -
Page 12: G Test Mode
2.4GHz Test mode It is important for you to upload a photo to base unit via Lora 2.4G when you finish locating linked cam. To do that SD card must already have photos or you can manually take a photo by press right button when camera on its interface. - Page 13 Upload Delay Settings: Default setting is 30 mins. The base unit will wake up and communicate with LC32 cameras every 30 minutes. If there are 3 linked cameras (S1, S2, S3) connected, the base unit will wake up and check on S1. If there are new...
- Page 14 photos, it will receive and upload those photos. And 30 minutes later, it will wake up to communicate with S2. This is the power saving technique designed to optimize your battery life. If you set the camera to Real Time, the base unit will work instantly and whenever there are photos from the linked cameras, it will upload to the portal &...
- Page 15 only when your base unit is using auxiliary power. (Solar panel with rechargeable batteries and a 6V, etc.)
- Page 16 Accessing the Quick Menu Setup: Your camera is set to function with the default settings without any further customization. However, you will likely want to set the time and date. The following information will help you customize your camera settings so you can get the most out of the trail camera experience.
-
Page 17: Customizing The Camera Settings
Customizing the Camera Settings: (Cam) Press the MENU button once to open the customization menus. You will see Camera Mode and Customize tabs on the screen. Press the ▼ button one time. Camera Mode should be highlighted in blue. Press OK. Under the Camera Mode tab, select whether you want Photo, Video or Picture+Video. - Page 18 and Video Length will show up. Under the Customize menu, press the ► button to change the photo size. You may choose between: 3MP, 5MP, 8MP, 10MP ,12MP, up to 32MP Press OK to save. Press the ▼ button one time until Flash Range is highlighted.
-
Page 19: Pir Tab
PIR and Time Lapse Options: (PIR) Press the ▼ button to highlight the Trigger Mode option in blue. Under this setting you can choose PIR Trigger (Where the camera is triggered by heat or motion only), Time Lapse (Where you tell your camera to take pictures every 5 seconds up to 24 hours) or Both. - Page 20 10 seconds before it allows itself to be triggered again by heat or motion. Press OK to save. If you chose PIR + Time Lapse, the camera will take photos by heat and motion as well as time lapse.
- Page 21 Work-Time Menu: (WKT) If you only want your camera to be on during part of the day each day you can set the Work Time function(s). Press the ▼ button to highlight the Work Time 1 option. The default setting is OFF. Press the ▲...
-
Page 22: Sys Tab
System Menu: (SYS) The SYS tab controls all the internal system information such as Setting the clock, Time stamp, Flash range, Password, Overwrite, and Format. SETTING THE CLOCK: Press the ▼ button one time to highlight the Set Clock option. Press OK. You will see the following screen. - Page 23 Press the ▼ button to choose how you want your date displayed on the pictures. Press the ► to navigate to the Month, Day, and Year. Use the ▲ and ▼ buttons to make your selections. Press the ► to navigate to the Time, Date and Seconds. (Military Time Only).
- Page 24 camera without the password. This is a very important security feature. If you forget your password, please email us at support@dlccovert.com or call us at 877-462-1799 to request RA #. RENAME: The default setting is OFF. Press the ▼ button to highlight the Rename option in blue. Press OK.
- Page 25 FORMAT: Formatting your SD card clears everything off the card. (It will delete any pictures that are stored on the card!) We recommend formatting your SD card every time before using your camera. Even if you have a new SD card, you should always format the card before you use it in the camera.
-
Page 26: Viewing Photos On The Color Display
Viewing photos on the color display: You can view your photos on the color display when in the field. Press the OK button to play a slideshow of the pictures stored on your SD camera. Use the ▲ and ▼ buttons to toggle through the photos. If you see photos you want to delete, show the image on the screen, and press the MENU button. -
Page 27: Tricks And Tips On Field Setup
USB port on your home computer or USB capable television. The USB will recognize the new hardware and download the proper driver to view the images or videos. The screen on the camera will say Mass Storage. If the image files do not automatically open, you will need to open it using Windows Explorer to locate the camera. - Page 28 • Use the Covert Tree60 mounting system to mount the camera up higher pointing down on them for a better look. Works great when you do not have a straight tree to attach to.
-
Page 29: Warranty
This warranty includes two-year repair or replacement service on product from date of purchase. If you have problems with this product, please do not contact the store you purchased it from. Contact Covert Scouting Cameras Customer service toll free at 877-... - Page 30 24 hours. Proof of purchase will be required for replacement. Covert Warranty Policy and Procedure: To receive repair or replacement by Covert Scouting Cameras two-year warranty, we ask you to do the following: -All returns must have a Return Authorization (RA#) prior to sending in the camera.
- Page 31 4. Please make sure all the accessories are removed (i.e. SD Cards, batteries, solar panels SIM cards, straps, ETC.) before shipping. All accessories received by Covert Scouting Cameras will NOT be returned. 5. This warranty only covers manufactures’ defects and does not cover damaged caused by...
-
Page 32: Warranty Policy And Procedure
1. Outside the US, service is the available through the distributor/reseller of purchase. 2. All returns must have an RA# provided by Covert. Copy of Proof of Purchase is required for all returns. 3. Covert is not responsible for lost or damaged products incurred during the shipping process. - Page 33 To repair damage, malfunction, or degradation of performance caused using non-Covert supplies or consumables or the use of Covert supplies not specified for use with this product. d. To repair an item that has been modified or integrated with other products when the...
- Page 34 10 days of purchase. To replace items that have been refilled, are used up, abused, misused, or tampered with in any way. To install replacement items that are not considered customer replaceable. k. To support software not supplied by Covert...
- Page 35 To provide software or firmware updates or upgrades. Any service identified in the above list and provided by Covert at the Customer’s request shall be invoiced to the customer, at Covert’s then current rates for parts, labor, and shipping. THE ABOVE WARRANTIES ARE GIVEN BY COVERT...
- Page 36 TO THE EXTENT ALLOWED BY LOCAL LAW, EXCEPT FOR THE OBLIGATIONS SPECIFICALLY SET FORTH IN THIS WARRANTY STATEMENT, IN NO EVENT SHALL COVERT AND ITS VENDORS BE LIABLE FOR ANY INDIRECT, SPECIAL, INCIDENTAL OR CONSEQUENTIAL DAMAGES (INCLUDING LOSS OF PROFITS) WHETHER BASED ON CONTRACT, TORT,...
Need help?
Do you have a question about the LC32 and is the answer not in the manual?
Questions and answers