Advertisement
- 1 Safety Instructions
- 2 Product Scope
- 3 Notice
- 4 Components
- 5 Installation Instructions
- 6 Assembling the Waste Box
- 7 Operating the Panel
- 8 Explanation of Functions
- 9 Method of Oil Extraction
- 10 Reference Table
- 11 Baking Method
- 12 Cleaning Method
- 13 Treatment and Preservation of Oil
- 14 Electrical Power Table
- 15 Electrical Schematic Diagram
- 16 Troubleshooting Tips
- 17 Documents / Resources
- Don't connect this machine to a power source before you read this manual completely. Keep this manual for future reference.
- Picture is for reference only; there may be slight changes to the actual product.
- Continuous improvement made to the product is subject to change without being informed.
Safety Instructions

Possible accidents could occur if you operate this machine without reading the instructions.
 Notice: If you operate this product with disregard to the instructions, your product, property, or yourself could be endangered.
- Please read the operation instruction of the manual in detail while using this machine, and keep this book for future reference.
- In order to prevent accidents or danger, the power cord or plug must be replaced by the manufacturer or the maintenance department designated by the manufacturer.

Product Scope
This product is able to squeeze: peanuts, sesame seeds, vegetable seeds, tea seeds, soybeans (shell and grind to about 5mm before the extracting the oil), sunflower kernels and walnuts (shell and crumb to about 5mm before the extracting the oil). This product does not apply to grains or seeds where the oil content is low and cannot be shelled (such as corn).
*Note: The product is designed for family indoor use, and is not applicable to commercial purpose; otherwise, the product longevity may be shortened.
Notice
Before using this product, please read the instructions in detail and use this machine with regard to the instructions.
- Please do not share the power source of this product with other high-powered electrical equipment.
- To prevent the electric surge and any possible danger, please use this machine according to the instructions.
- This machine is strictly prohibited from being immersed in water. This includes the power line and the plug as well.
- Please attention while you or someone else is operating this machine as to avoid possible accidents or danger.
- If you have discovered any damaged parts or damage to the product structure, please do not use this product. You should also never attempt to perform maintenance to the machine by yourself; maintenance should be done by a professional so as to avoid possible accidents or danger.
- Children or disabled people should never operate this machine without parental guidance or supervision.
- Please do not use this product on or near high-temperature areas or appliances.
- Please be careful while moving the machine or oil cup after the completion of the extraction of oil, so as to avoid the splashing or spilling of oil.
- Please do not touch or move any moving parts while the oil press is operating.
- Please don't insert any foreign or metal objects into the oil press so as to prevent any accidents, fire or short circuiting.
- Please don't start the machine while the squeezing chamber is not completely in place.
- Before cleaning this machine, please switch off the power supply and pull the plug out while the machine is idle or being moved.
- Be sure not to place the machine near any flammable material or objects.
- In order to prevent danger, have the damaged power line or plug replaced by the manufacturer or the maintenance department.
- While pulling out the plug, make sure to not pull the actual cord, but the plug itself. You are also prohibited from handling the plug or power cord with wet hands.
- Before using the machine, please ensure that the oil press is placed on a firm, flat, table-top surface.
- Please don't place the machine in an area where it is in the arm's reach of children.
- Please be sure to pull the plug out of its power supply when you are done using it.
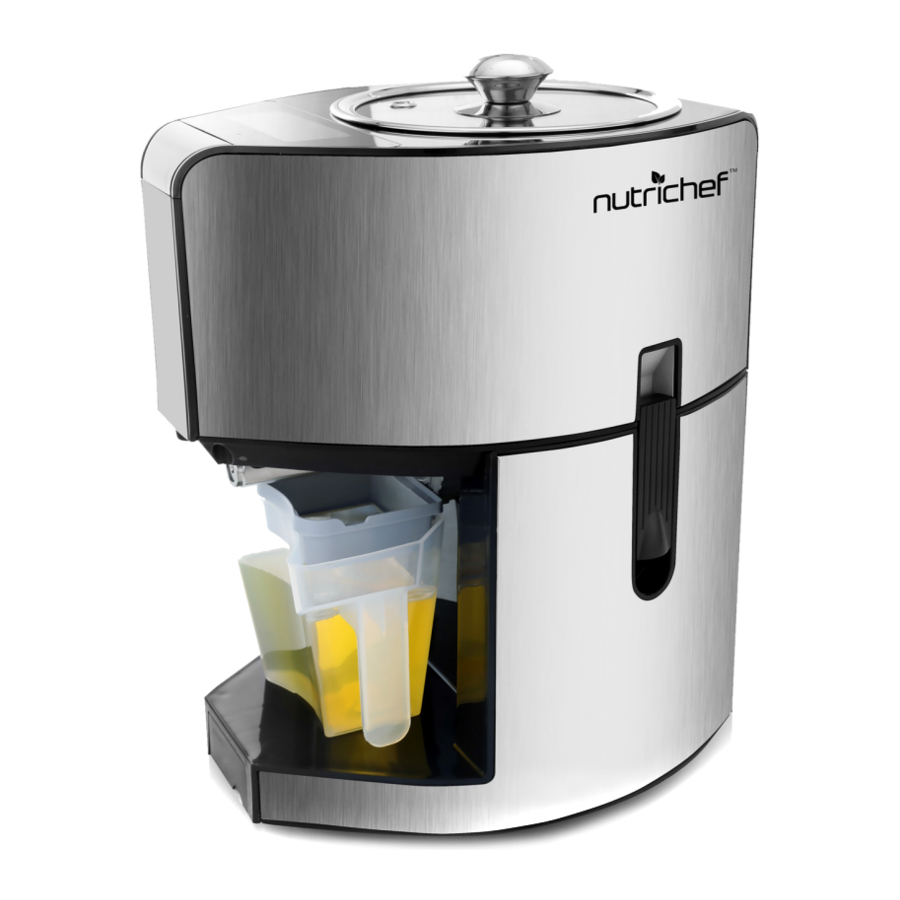
Components

- Pan
- Cover
- Upper main body
- Operation panel
- Protection cover
- Squeezing chamber componen
- Heater
- Fastening nut
- Squeezing chamber assembly
- Nut
- Filter
- Lower main body
- Oil receiving cup
- Drawer ( for small parts)
- Slag receiving box
- Small push rod
- Screw driver
- Small brush
- Big brush
- Glove
(Components above are subject to actual product.)
Installation Instructions

Check if the silicon ring is put on the hex head side of the screw
- Put the lower main body on a smooth, flat table; insert the screw in the motor output bearing hole from the hex head side.
![]()
- Insert the squeezing chamber into the squeezing chamber component the same way that you installed the screw.
![]()
- Tighten the squeezing chamber component by tightening the nut in a clockwise direction.
![]()
- Put the protection cover onto the upper main body as shown in the above picture (arrow).
![]()
- Attach the upper body to the lower body; fasten the screw to make both parts stable and firmly connected
![]()
- Place the oil receiving container directly in front of the machine (underneath the nozzle) so as to catch the oil that is being extracted while the machine is in use.
![]()
- Take out the small push rod, the screwdriver, and small from manual package, pull out the drawer located on the bottom of the machine and place them inside.
![]()


Assembling the Waste Box
- Insert the two "Board B" pieces into the card slot on Board A from the bottom up, (Picture 1 and Picture 2)

- Insert the Board A card slots into the two Board B slots from top to bottom. (Picture 3)
![]()
- Fold the bottoms of Board B toward the inside. (Picture 4)
![]()
- Fold the bottoms of Board A toward the inside. (Picture 5)
![]()
- Tighten the 4 buckles on Board A to Board B (Picture 6)
![]()


Operating the Panel

In the process of the oil extraction, the LCD panel will flash and show the operation status and running time of the current stage.
Explanation of Functions
- Power Button: While plugged in, the buzzer will sound with a beep; only the power button is workable at this time. Touch the "
![]() " button with the power connected; now the time screen should show "00:00". The default settings will have "Peanut" and "Well Done" (baking level) selected. Touch the "
" button with the power connected; now the time screen should show "00:00". The default settings will have "Peanut" and "Well Done" (baking level) selected. Touch the " ![]() " button again to switch it off.
" button again to switch it off. - Function Button: touch the "
![]() " button; there is a "Well Done", "Medium", "Mild" and "Raw" option. It is recommended that certain plants/seeds/grains only use two of these options.
" button; there is a "Well Done", "Medium", "Mild" and "Raw" option. It is recommended that certain plants/seeds/grains only use two of these options. - Start Button: Once you are finished selecting the correct settings, press "
![]() " to begin the oil extraction.
" to begin the oil extraction. - Reverse Function: press the "
![]() " button for 3 seconds; the machine will reverse the gear so that the plant/grains will be pushed upward; once the plant/grains are loosened, it will stop.
" button for 3 seconds; the machine will reverse the gear so that the plant/grains will be pushed upward; once the plant/grains are loosened, it will stop. - Stop Function: while operating this machine, if the "Stop" button is touched, the machine will stop. It will return to the next step when the "
![]() " button is touched (If you press and hold "
" button is touched (If you press and hold " ![]() " for 3 seconds, the machine stops and all the settings are canceled).
" for 3 seconds, the machine stops and all the settings are canceled).
Method of Oil Extraction
- Place the oil receiving cup and waste receiving box in the correct space. (Picture 7)
![]()
- Pour the oil plants/grains into the pan on the top of the machine and then cover it with the lid. Pay attention to the line indicating the Max Level; your plants/grains should not exceed this line. (Picture 8)
![]()
- Firstly, touch the "Power" button and then the "Oil Plant" and "Function" buttons to choose the correct settings. After this, press the "Start" button and the machine will start working.
- When the oil extraction finishes, the machine will stop automatically; the buzzer will beep five times to indicate to the user that the process has finished.
- The oil cup can be taken out after the completion of the extraction of oil. You may pour the oil into a glass container for storing.
- Put on the glove, unscrew the locking nut and disassemble the squeezing chamber for cleaning (Please refers to CLEANING METHOD for details)


Notice:
- To prevent hands or other foreign objects from touching the squeezing chamber components during operation, a safety switch is installed below the cover, so that the cover must be in a closed state during the whole extraction course.
- The temperature of the squeezing chamber is quite high after the completion of the extraction of oil; be sure not to touch it by hand. Be sure to put on your glove before disassembly and cleaning.
- Heater, pan and glass cover is hot during and after the extraction of oil. Pay attention not to touch it while dismantling the upper shell, so as to prevent from scalding. (Picture 9)
![]()
- During operation, please check whether the waste receiving box is full. You may replace this with a box with a bigger capacity if needed.
- In case of an outage or other problems in the process of the extraction of oil, and the oil plants need to be taken out, please take the oil receiving cup out first. Scoop out the oil with a spoon and then hold the product with both hands, and pour out the residue. (Note: do not pour the oil out towards the front, so as to prevent the oil from entering into any parts of the machine that can't be cleaned. Please switch off the power supply before doing so) (Picture 10)
![]()
- In the case that any of the plants/grains that you are trying to extract oil from are too big, the feed opening may be blocked. If this happens, please open the cover, poke and prod the feed opening with a chopstick lightly, close the cover, and continue the extraction of oil.
- Be sure to chop up any enlarged plants/grains/nuts to about 5mm, so as to prevent the feed opening from being blocked.
- While squeezing sesame and smaller grains in the extractor, because of the shape and size of them, they may become adhered to the inside wall of the storing chamber. At this time, tap the outer side of the upper shell with the both hands so the residue falls out. If this doesn't work, follow the steps to disassemble and clean this.
- In the process of the extraction of oil, please be sure to install the protective cover, so as to prevent the waste or oils to be splashed from the waste-hole and possibly scalding you. Also, you must not stand next to the waste hole of the machine without installing the protective cover while it is operating.
- In case of power outage in the process of the extraction of oil, be sure to take out the squeezing chamber and clean it, so as to prevent waste blockage when you continue the operation of the machine.


Reference Table
| Oil plants | Peanut | Black sesame | White sesame | Rapeseed | Sunflower seed |
| Oil extraction rate | 35-48% | 35-42% | 40-48% | 25-35% | 40-50% |
| Oil plants | Soybean | Flaxseed | Tea seed | Walnut | |
| Oil extraction rate | 8-11% | 25-34% | 28-35% | 40-68% |
Note:
The production place, storing time, baking time and the like of oil plants will affect the oil extraction rate, so please select the highest quality oil plants for the extraction of oil when buying your plants/grains/nuts to obtain the best oil possible.
Baking Method
If users would like to bake peanuts and soybeans manually, please follow the instructions below to bake them in the right way. Choose "Other" for the Oil Plants selection and the "Raw" function; then, press the "Start" button. The machine will heat up in 6 minutes before extraction.
The best oil yield from peanuts and soybeans can be obtained through suitable baking. If the baking time is too short, there will be cases of not extracting a large amount of oil.
On the contrary, if the baking time is too long, the oil extraction yield will be affected, so please read below contents carefully
Baking method: Using microwave oven, roaster or pan.
Baking time: Baking in small quantities is the best method. For example, 500g of peanuts will require a baking time of roughly 4 minutes; soybeans will take about 10 minutes. (Baking time will differ because of the moisture content of oil plants). If baking quantity is big, make sure to stir them during the baking to get uniform baking.
Three judgment standards are as follows:
- Bake until the aroma of the plant/grain/nut can be smelled.
- Bake to the degree that the plant/grain/nut can be eaten.
- Bake until the peanut skin can be taken off easily by hand and/or the shell of the soybean cracks.
While squeezing peanuts, please play close attention to the waste outlet. Unsuitable baking times and small pieces of peanut might stick to the feeding channel and affect normal extraction. If there's no waste coming out for 1 minute, open the cover, use the push rod or a chopstick to poke the feeding channel of the pan (using your hand is forbidden).
Smaller nuts have relative low yield of oil and will easily get stuck in the feeding channel. Please use only big pieces of plants/grains/nuts.
Cleaning Method
- Pull out the fasteners on both sides and remove the upper main body.
- Twist the lock nut (Picture 11) in the counter-clockwise direction, and then pull them outward to take out the squeezing chamber components.
![]()
- Hold the squeezing chamber with one hand, and pull the screw with the other hand, pulling them away from each other. If they are too difficult to separate, the small push rod accessory can be used for supporting the screw from the mouth, and lightly tap it to separate. (Picture 12)

- Clean up the oil residue on the screw and squeezing chamber with the brush, then rinse with water and dry; if the residue at the mouth of the squeezing chamber is difficult to clean, clean this with the small screwdriver; and clean the residue inside the squeezing chamber with the cleaning brush.
- If there's residual oil stain or waste particle on the waste receiving plate, clean with water after taking out the waste receiving plate.
- After the extraction of oil, lightly wipe the inner wall of the pan with wet cloth. Water cleaning is prohibited in this part.


Treatment and Preservation of Oil
- Let the virgin oil stand for about 8 hours. The upper layer is the edible oil, and the bottom layer is sauce, both of which can be eaten by cooking or cold mixing.
- Please pour the oil squeezed into the glass bottle to keep in a cool and dark place (it's suggested to store the oil in the refrigerator). The oil is suggested to be eaten within two weeks.
Electrical Power Table
| Rated voltage | Rated frequency | Heating power | Pressing power | Rated capacity |
| 110V | 60Hz | 550W | 130W | 750g (a pound and a half) |
Electrical Schematic Diagram

Troubleshooting Tips
| Problem | Analysis | Troubleshooting Method |
| The display screen isn't bright enough while operating |
|
|
| The machine is beeping during the process of extracting oil |
|
|
| "E2" warning appears on the screen |
|
|
| Difficulty separating the Screw and squeezing chamber |
|
|
| Low oil yield |
|
|
| The extraction is stopping in the middle of the process |
|
|
| Oil is running from waste outlet |
|
|
| No oil comes out from the oil outlet |
|
|
| Powdery extraction |
|
|

Documents / ResourcesDownload manual
Here you can download full pdf version of manual, it may contain additional safety instructions, warranty information, FCC rules, etc.
Advertisement


Need help?
Do you have a question about the PKOPR15 and is the answer not in the manual?
Questions and answers