Advertisement
- 1 IMPORTANT SAFEGUARDS
- 2 Dehydration - Preserving Food
- 3 What is Dehydration
- 4 Tools You Need To Get Started
- 5 Basic Food Preparation Tips
- 6 Filling the Drying Trays
- 7 Prevent Dripping
- 8 How Long Does it Take to Dehydrate Food
- 9 General Operating Tips
- 10 Setting Up Your Device
- 11 How To Operate Your Device
- 12 Device Troubleshooting Guide
- 13 Documents / Resources
IMPORTANT SAFEGUARDS
When using electrical appliances, basic safety precautions should always be followed including the following:
- Read all instructions.
- Do not touch hot surfaces. Use handles or knobs.
![shock hazard]() To protect against electrical shock do not immerse cord, plugs, or the base unit in water or other liquid.
To protect against electrical shock do not immerse cord, plugs, or the base unit in water or other liquid.- Close supervision is necessary when any appliance is used by or near children.
- Unplug from outlet when not in use and before cleaning. Allow to cool before putting on or taking off parts.
- Do not operate any appliance with a damaged cord or plug or after the appliance malfunctions or has been damaged in any manner. Return appliance to the nearest authorized service facility for examination, repair, or adjustment.
- The use of accessory attachments not recommended by the appliance manufacturer may cause injuries.
- Do not use outdoors.
- Do not let cord hang over edge of table or counter, or touch hot surfaces.
- Do not place on or near a hot gas or electric burner, or in a heated oven.
- Extreme caution must be used when moving an appliance containing hot oil or other hot liquids.
- Always attach plug to appliance first, then plug cord into the wall outlet. To disconnect, turn any control to "off", then remove plug from wall outlet.
- Do not use appliance for other than intended use.
SAVE THESE INSTRUCTIONS
 This appliance has a polarized plug (one blade is wider than the other). To reduce the risk of electric shock, this plug is intended to fit into a polarized outlet only one way. If the plug does not fit fully into the outlet, reverse the plug. If it still does not fit, contact a qualified electrician. Do not attempt to modify the plug in any way.
Household Use Only
Dehydration - Preserving Food
Thousands of years ago, one of the few ways people had to preserve foods was by laying them out to dry in the sun. Before such modern appliances as refrigerators and before chemical preservatives, dehydration was an easy way to safely store foods for use at a later time when food was scarce or not in season. Your new food dehydrator applies modern science to this ancient art to bring you a controlled, predictable, and safe way to preserve foods at home.
Dehydrating food opens a new dimension in preserving fruits, vegetables and meats to you. Your new food dehydrator will be able to perfectly capture the fresh-picked, in-season flavor and nutrition of almost any food for out-of-season eating enjoyment. These dried foods can be more easily stored because they are less likely to spoil and they take up less room as well. They also weigh less making them perfect for camping or backpacking meals. Dried fruit snacks are delicious and nutritious. Ingredients for your favorite soup recipes can be dried and stored which also make a great last-minute meals, ready to cook.
Your food dehydrator keeps the temperature in the drying chamber at a fan-assisted and controlled constant. Food is bathed in a constant stream of warm, dry air which gently removes the moisture from the food. The result is beautifully dried food every time.
You will find that drying food is practical and economical as well as easy. And it all starts with your state-of-the-art food dehydrator.
What is Dehydration
Dehydration refers to a process in which moisture is removed from food, allowing the dried food to be stored safety for later use. It's main benefit over other such ancient methods (such as smoking) is that it adds no flavors and removes few nutrients from the food being dehydrated.
When done properly, few nutrients are lost during dehydration. According to the Food and Drug Administration (FDA), dehydrating retains 95-97% of the nutrients in the original food. In contrast, canning only preserves 20-30% and freezing only retains 40-60% of the food's nutrition.
Dehydrated food tastes good too! Since natural flavors concentrate as you remove moisture, the dried product is naturally delicious.
As you will soon learn, reconstitution is an integral part of dehydration. Reconstitution refers to the adding of water to the dried food. When allowed to soak in water, dried food absorbs the water and swells back to its original size, shape and texture while retaining nearly 100% of its original flavor and nutrition.
Tools You Need To Get Started
- Paring knife (stainless steel blade).
- Cutting board
- Storage containers
Additional tools that make the job easier and faster can include:
- A food processor or other similar appliance for faster and consistent slicing.
- A steamer and basket, or kettle and collapsible steamer for blanching.
- Blender for making fruit puree for fruit leather.
- A small notebook to keep track of times and recipes that work for you as well as those that don't.
Basic Food Preparation Tips
To Peel or Not to Peel
The peels of fruits and vegetables often contain much of the food's nutritional value. Thus, it is better not to peel if the dried food is to be eaten as snacks or used in cookies. On the other hand you will want to peel apples intended for pies or tomatoes intended for soups. Generally, if you would normally peel the food for a specific recipe, plan to peel the food before it is to be dehydrated.
Cutting Makes a Difference
One of the most important factors in successful dehydration is how the foods are sliced. When drying fruits it helps to get all the slices about the same thickness so they all dry to the same moisture level at the same time. Thick slices dry more slowly than thin slices. The thickness you choose is up to you, but slicing all the pieces to as close to the same size as is possible will help ensure success and consistency.
The skin of many foods naturally protects the food, but it can hamper the dehydration process. During dehydration moisture escapes best from a cut or broken surface, not through the tough skin. Therefore, the larger the cut area, the faster and better the food will dehydrate.
For this reason, thin stalked vegetables like green beans asparagus, and rhubarb should be cut in half the long way, or with an extreme diagonal cut to expose as much of the inner parts of the food as possible.
Fruit should be sliced across the core and not down through the core. Try to always make thin, flat cuts.
Broccoli stems should be halved or quartered, depending upon diameter. Small fruits like strawberries can be cut in half. Even smaller berries should either be cut in half or blanched slightly to break the skin.
Filling the Drying Trays
When loading the food into the trays you can use all of the trays' top surface, but some airflow must be maintained. Try to place the food in a single layer where possible. This is particularly important with foods like banana slices and pineapple rings and not quite as important with beans. If some of the pieces come out with too much moisture when you are finished, one of the reasons is that it might have been covered by other pieces of food.
Dehydration removes the moisture and will cause the food to shrink as it dries. This allows you to store the same amount of food in a smaller space, but it also means that as the food shrinks during the drying process, smaller pieces can fall through the holes in the drying trays. To prevent this, particularly when drying chopped or shredded foods, line the trays with mesh tray Inserts before laying out the food. Chopped food should not be spread thicker than 3/8 inch. Use a fork to expose the mesh tray insert in several places to provide proper air circulation.
If you do not have mesh tray inserts available, use nylon netting, needlepoint canvas, cheesecloth or similarly, coarse woven fabric. When lining the tray be sure to cut an opening for the tray's center hole, The fabric should be food safe, allow air to pass through it, and it must be laundered before being used. Use care when choosing fabric as sticky foods may not be able to be easily removed, and particles from the fabric may stick to the food pieces.
It may be necessary to stir the finely chopped food once or twice during dehydration to ensure even drying of all the pieces. To do so, turn the machine off, unplug it, remove the trays, stir, then reassemble and restart the machine according to the instructions.
Prevent Dripping
Some foods such as very ripe tomatoes and citrus or sugared fruits may drip. If too much liquid drips into the bottom of the unit it can be damaged necessitating service. Additionally, The dripping from a tray above can change the flavor of different foods on lower trays To help lessen dripping, after placing food on drying trays and before placing them on the dehydrator base, tap the tray firmly downward on a towel laid on the counter top a few times to remove excess moisture.
To catch any remaining dripping during dehydration that may occur with very moist foods, use fruit leather sheets placed on the bottom two trays. Alternate the sheets on one half of the two trays (i.e.. the left side of the first tray and the right side of the second tray). Then place these two bottom trays on the dehydrator base before placing the remaining trays with the food to be dried above them. When rotating trays, wipe the fruit leather sheets, but leave these two trays at the bottom of the stack of trays. When the food becomes dry enough so that it is no longer dripping, remove the fruit leather sheets from the two bottom trays to enhance air flow.
Do not use wax paper in place of the fruit leather sheets as the wax on the paper wilt melt at dehydration temperatures which can taint the food or damage the dehydrator.
Always remember to leave the center hole of each tray uncovered.
How Long Does it Take to Dehydrate Food
It is impossible to give exact drying times because there are so many factors that affect drying time. These factors include:
- The moisture content of each food
- The thickness or size of the prepared food
- The humidity and temperature in the room where the dehydrator is operating
- The density of the food
The food you choose also plays a part. The age of the food, where and how the food was grown, how it has been stored along its journey to you, and other factors all affect how long it might take to dehydrate.
But don't worry. With a little experience you will soon be able to tell when you are slicing the foods just about how long it will take, and which foods will dry soonest and which will take the longest.
Here is a good example: tomatoes are normally quite juicy. Their high moisture content will make them take longer to dry than many other foods. On the other hand, cabbage, which has a relatively low moisture level will take a much shorter time to dry. Citrus fruits like oranges will generally take longer than apples for the same reason.
So how do you know how long to let the foods dry? After the dehydrator runs for a while remove the trays and examine the foods. Don't be afraid to "peek!" This will help you learn about the drying process and how long it takes. For foods with higher moisture levels like fruits and meats, check them periodically after about the first four hours of drying time. Foods with a lower starting moisture content like herbs and leafy vegetables or chopped and shredded foods may dry sooner so need to be checked after about two or three hours and more often after that. You will soon get a "feel" for how long foods take to dry.
Don't worry, though. It is better to over-dry the food then leave too much moisture in it. Moist foods are more likely to spoil during storage. If foods have been over-dried and seem brittle or slightly browned they are still usable for soups or most baked goods They may take slightly longer to reconstitute and require additional water, but their flavor and quality is generally not impaired.
General Operating Tips
Before operating your food dehydrator for the first time please be sure to completely read the "Important Safeguards", and read and understand the following instructions.
- Wash and dry the trays and any other parts which will contact the food.
- The first time you turn on your dehydrator you may notice an aroma. This is normal. To avoid this smell from being transferred to the food, place one tray and the lid on the base allow the unit to run without food in place until the aroma is gone. This is only necessary the very first time you use the dehydrator, and takes less then one hour.
- Place the dehydrator on a flat, dry, heat resistant and stable surface. Make sure there is at least one inch of clearance around the dehydrator to ensure proper air flow.
- Prepare foods, according to the instructions given in this manual and fill the drying trays. NEVER cover the center hole in the trays or the vents on the top lid!
- Make sure the drying trays are securely nestled on top of each other and on the unit's base.
- Plug the power cord into any standard 100-120 volt household outlet.
- Consult the various tables at the end of this manual to get an idea as to when food is properly dehydrated and ready to be stored.
Tray Rotation
Inspect drying trays periodically. When you notice that the food in the lower trays is more dry than the upper trays, rotate the trays. To do so, remove all the trays as a unit, then remove the lid. Place the top tray of the removed stack on the base first, then follow by repeating with the next tray in the stack. Continue until all trays have been rotated, then replace the top cover.
Care and Maintenance
After each use, clean the drying trays and dehydrator lid with warm, soapy water. Do not wash trays, lid or base in dishwasher. Stubborn particles may be removed by soaking and/or using a plastic scrubber. Do not use abrasive materials or solvents to clean plastic!
To clean the dehydrator's base (the bottom part with the motor and heating element), unplug and wipe clean with a damp sponge or cloth. NEVER immerse the base in water or allow liquid to flow into the area that contains the electrical parts.
Storage
After the dehydrator is cleaned, dry all parts, stack drying trays on the base, and store in a safe place.
Setting Up Your Device
Before operating your Dehydrator for the first time please be sure to completely read and understand the instructions in this booklet. Wash and dry the trays and any other parts which will contact the food.
Stacking The Trays
Before you begin placing the food on the tray decide which way they will be aligned. It is possible to stack them for thick slices or thin cut foods. If the tabs at the corners of the trays are aligned (one above the other indicated by the arrow at "A" below) it creates a spacing suitable for thick slices. If the tabs are offset (indicated by the arrow at "B" below) this creates a space suitable for thin slices. The position of these tabs is changed by rotating a tray 1/4turn. The wide portion of the trays always face down ("C" below)! Wide and narrow spacing can be mixed in a stack of trays. Use as few trays as you like, but always use the cover on the top tray. See the photos below:

How To Operate Your Device
Your food dehydrator is simple to use and is designed to make the dehydration process simple and accurate if the instructions are followed. Be sure that you have read the safety tips at the beginning of this manual before proceeding.
The first time you turn on your food dehydrator you may notice an aroma. This is a normal by-product of the manufacturing process. To avoid this smell from being transferred to the food, place one tray and the lid on the base, and following the instructions below for your specific model, allow the unit to run without food in place until the aroma is gone. This is only necessary the very first time you use the dehydrator, and takes less then one hour.
Before you begin preparing your food, wash and dry the trays and the lid. Locate the base where the dehydrator will be left during the drying process and insure that the cord will reach an outlet in a safe manner. In this way, as you prepare the food you can place it right on the trays. As a tray is filled it can be placed on the dehydrator and you will be ready to start the dehydrator in no time!.
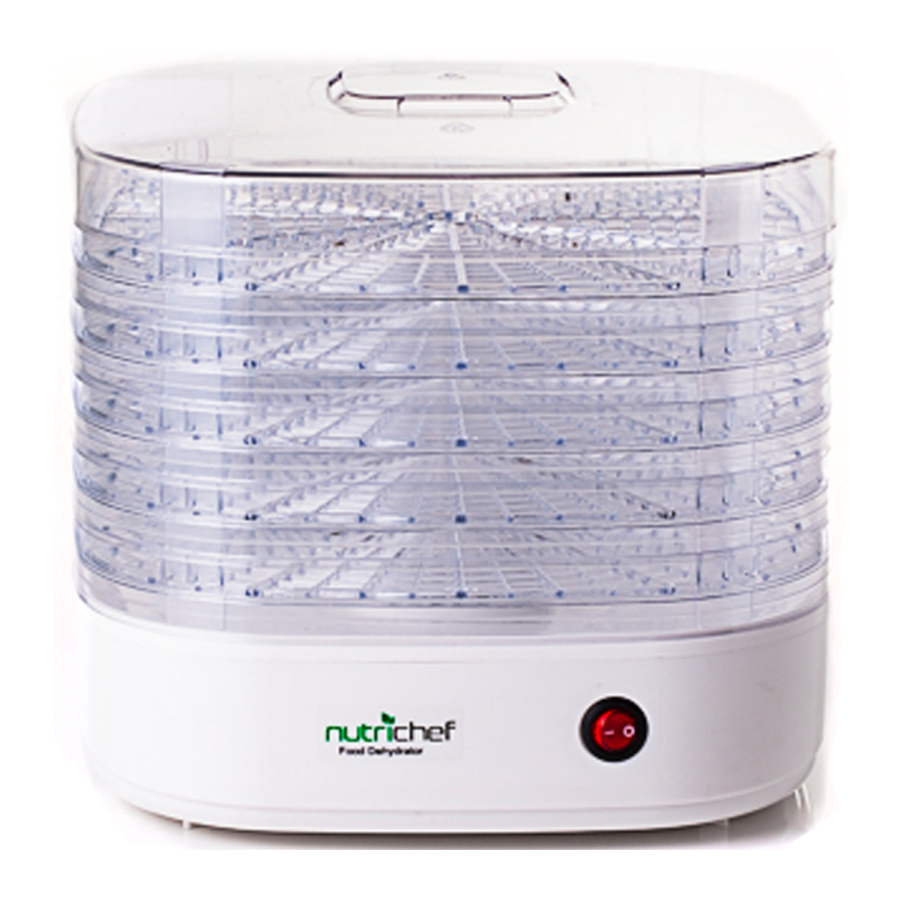
The KN128F is equipped with an "ON/OFF" switch. The temperature is electronically controlled, preset at the factory and is not adjustable by the user. The switch gives the user a convenient way to turn the dehydrator off while changing or rotating trays.
To operate the Food Dehydrator
- Locate the appliance in a safe place.
- Load and then inset the trays.
- Insert plug in proper outlet.
- Select the switch's "ON" position. The switch itself will illuminate indicating that the unit is on. You may also hear the fan operating.
- When the dehydration process has completed to your satisfaction, turn the switch "OFF" and remove the plug from the outlet.
If you will not be available to turn the dehydrator off at the correct time you may want to connect the dehydrator to an automatic appliance timer. Be sure that the timer's specifications state that the timer has a capacity of at least 5 amps.
Device Troubleshooting Guide
| Symptom | Possible Cause | Possible Remedies |
No Heat | No power to unit |
|
No Heat | . Broken wire in unit | Not user repairable. Return for service. |
Heat OK | Motor stalled or fan blocked |
|
Slow Drying | Trays overfilled Fan jammed or running to slowly Air leaks due to warped or improperly stacked trays |
|
Uneven Drying | Variation in food thickness and ripeness Trays not rotated Too much material in drying trays |
|
Over heating or Insufficient Heat | Temperature control not functioning at proper range | Temperature in lowest tray should be approximately 140°F with empty trays in place. If temperature varies significantly return for service. |
Noisy Fan/ Motor | Foreign matter in fan Motor bearings worn |
|

Documents / ResourcesDownload manual
Here you can download full pdf version of manual, it may contain additional safety instructions, warranty information, FCC rules, etc.
Advertisement


Need help?
Do you have a question about the PKFD06 and is the answer not in the manual?
Questions and answers