Table of Contents
Advertisement
Quick Links
SERVICE MANUAL
LED TV
Model No. LE48M7000A
MSD6369
Chassis
WARNING
This service information is designed for experienced repair technicians only and is not designed for use by the general public.
It does not contain warnings or cautions to advise non-technical individuals of potential dangers in attempting to service a product.
Products powered by electricity should be serviced or repaired only by experienced professional technicians. Any attempt to service or repair
the product or products dealt with in this service information by anyone else could result in serious injury or death.
©2013 Qingdao Haier Electronics Co., Ltd.
All rights reserved. Unauthorized copying and distribution is a violation of law.
Advertisement
Table of Contents

Related Manuals for Haier LE48M7000A


Summary of Contents for Haier LE48M7000A
- Page 1 Products powered by electricity should be serviced or repaired only by experienced professional technicians. Any attempt to service or repair the product or products dealt with in this service information by anyone else could result in serious injury or death. ©2013 Qingdao Haier Electronics Co., Ltd. All rights reserved. Unauthorized copying and distribution is a violation of law.
-
Page 2: Table Of Contents
Service Manual Model No.: LE48M7000A CONTENTS Chapter 1. General Information 1-1. Document Information ..............3 1-2. General Guidelines..............3 1-3. Important Notice.................3 1-3-1. Follow the regulations and warnings ............. 3 1-3-2. Be careful to the electrical shock ............3 1-3-3. Electro static discharge (ESD)..............3 1-3-4. - Page 3 Service Manual Model No.: LE48M7000A 4-3-2. Connector definition ................15 4-4. LCD Panel ..................16 Chapter 5. Installation Instructions 5-1. Accessories ................18 5-2. External Equipment Connections..........19 Chapter 6. Operation Instructions 6-1. Front Panel Controls..............20 6-2. Back Panel Controls ..............21 6-3. Setting Up Your Remote Control ..........22 Chapter 7.
-
Page 4: Chapter 1. General Information
Service Manual Model No.: LE48M7000A Chapter 1. General Information 1-1. Document Information Document format: Adobe PDF Author: shouwang.wen Compiler: 1-2. General Guidelines When servicing, observe the original lead dress. If a short circuit is found, replace all parts which have been overheated or damaged by the short circuit. -
Page 5: About Lead Free Solder (Pbf)
Service Manual Model No.: LE48M7000A components commonly are called Electrostatically Sensitive (ES) Devices. The following techniques should be used to help reduce the incidence of component damage caused by electros static discharge (ESD). Electrostatically Sensitive (ES) Devices Some semiconductor (solid-state) devices can be damaged easily by static electricity. Such components commonly are called Electrostatically Sensitive (ES) Devices. - Page 6 Service Manual Model No.: LE48M7000A 1. Always unplug the receiver AC power cord from the AC power source before: a. Removing or reinstalling any component, circuit board module or any other receiver assembly. b. Disconnecting or reconnecting any receiver electrical plug or other electrical connection.
-
Page 7: Ordering Spare Parts
Service Manual Model No.: LE48M7000A 12. Use only a grounded-tip soldering iron to solder or unsolder ES devices. 13. Use only an anti-static type solder removal device. Some solder removal devices not classified as "anti-static" can generate electrical charges sufficient to damage ES devices. - Page 8 Service Manual Model No.: LE48M7000A Caution: A “caution ” is used when there is danger that the reader, through incorrect manipulation, may damage equipment, loose data, get an unexpected result or has to restart(part of) a procedure. Warning: A “warning” is used when there is danger of personal injury.
-
Page 9: Specification List
Model No.: LE48M7000A 2-1. Specification list LE48M7000A Model LE55M7000A Screen Size 48" Aspect Ratio 16:9 Resolution 1920x1080 Brightness (cd/m²) Contrast 2000:1 Response Time (ms) Angel of View H:170°, V:160° Color Display 16.7M OSD Language English Color System Audio System BG/DK/I... -
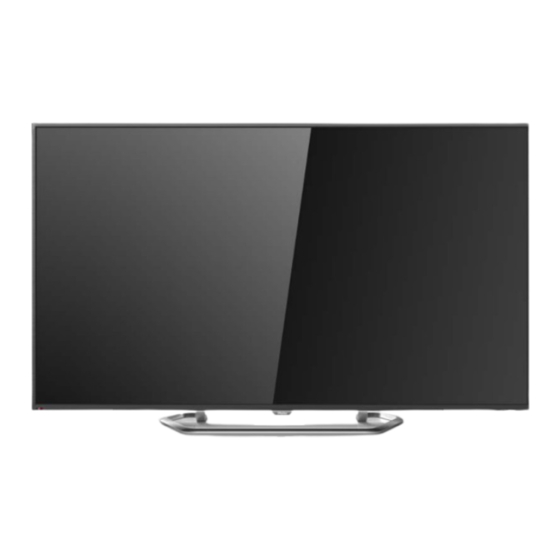
Page 10: External Pictures (Four Faces)
Service Manual Model No.: LE48M7000A 2-2. External pictures (four faces) Front Side Up Side... - Page 11 Service Manual Model No.: LE48M7000A Right Side Back Side...
-
Page 12: Chapter 3. Disassemble And Assemble
Service Manual Model No.: LE48M7000A Chapter 3. Disassemble and Assemble 3-1. LE48M7000A 3-1-1. Remove the Stand 3-1-3. Remove the Mainboard 1. Remove the three screws indicated with red circles. 2. Remove the main board. 1. Lay down the TV set . -
Page 13: Remove The Remote Control Board
Service Manual Model No.: LE48M7000A 3-1-6. Remove the Remote Control Board And the Key Board Remove the Remote Control Board and the Key Board indicated byred circle in below picture. -
Page 14: Chapter 4. Location Of Controls And Components
Service Manual Model No.: LE48M7000A Chapter 4. Location of Controls and Components 4-1. Board Location D Wifi Board B Board A Board C Panel Parts number Description DH1UB0D0306M A Board main board 6007460247 B Board power board 712-48085-V8350 C Panel... -
Page 15: Mainboard
Service Manual Model No.: LE48M7000A 4-2. Mainboard 4-2-1. Function Description Process signal which incept from exterior equipment then translate into signal that panel can display. 4-2-2. Connector definition IR & Key Interface LED Backlight control interface CN604 Pin number Signal name... - Page 16 Service Manual Model No.: LE48M7000A CN34(2P_2.54mm) Pin number Signal name Woofer- Woofer+ J802/J805(4P_2.54mm) Pin number Signal name USB_D- USB_D+ Ground J807(2P_2.0mm) Pin number Signal name LOGO LED+ Ground AMP_Power(4P_2.54mm) Pin number Signal name AMP_ Pwr AMP _ Pwr Ground Ground X1(10P_2.54mm)
-
Page 18: Lcd Panel
Service Manual Model No.: LE48M7000A 4-3. LCD Panel Backlight Unit LVDS CONNECTOR... - Page 19 Service Manual Model No.: LE48M7000A...
- Page 20 Service e Manual Model No.: LE48M7000A Chapt er 5. In nstallat tion Ins s tructio o ns 5-1. Acc cessories Ba atteries emote Con ntrol...
-
Page 21: External Equipment Connections
Service Manual Model No.: LE48M7000A 5-2. External Equipment Connections Antenna Connection Connect a DVD Player or VCR to Your TV Connect your aerial to the back of the TV into the ANTENNA IN socket. There are two ways in which you can connect a DVD player or VCR to your TV. -
Page 22: Chapter 6. Operation Instructions
Service Manual Model No.: LE48M7000A Chapter 6. Operation Instructions 6-1. Front Panel Controls 5 VOL+ Press to increase the volume. POWER Press to turn the TV on and off. 6 MENU Press to select the main menu. TV channel down. -
Page 23: Back Panel Controls
Service Manual Model No.: LE48M7000A 6-2. Back Panel Controls Service Manual... -
Page 24: Setting Up Your Remote Control
Model No.: LE48M7000A 6-3. Setting Up Your Remote Control When using the remote control, aim it towards the remote sensor on the TV. -
Page 25: Chapter 7. Electrical Parts
Service Manual Model No.: LE48M7000A Chapter 7. Electrical Parts 7-1. Circuit Diagram... - Page 26 Connetor DC/DC 5.15V +12V_Normal +5V_Normal +12V_NORMAL POWER +5V_Standby INPUT VREG5 +5V_Normal +3.3V_Standby +12V_Normal CE37 CE37 +5V_Standby 500mA +12V_Normal CN16 CN16 +12V_Normal R154 R154 C204 C204 C1217 C1217 C1216 C1216 C1215 C1215 +5V_Standby BL-ADJUST +5V_Normal STANDBY BL-ON/OFF Note:靠近端子,减小EMI +5V_Standby Vout=0.765*(1+R1/R2) STANDBY +12V_Normal 320mA Max H :Power on...
- Page 27 +3.3V_Normal +5V_Standby 4'b00110 CA9_ROM_NO_EJ IF-AGC-SEL R179 R179 +3.3V_Normal C194 C194 J806 J806 4'b01100 CA9_EMMC_M2_NO_EJ C189 C189 +5V_Standby UART_RX Haier +3.3V_Standby R201 R201 UART_RX MUST pull high to 5VSTB UART_TX R202 R202 R176 R176 U101 U101 UART_TX M_SCL R198 R198 PWM_PM...
- Page 28 A-DDR3-ODT-T1 MR344 MR344 A_DDR3_ODT A_DDR3_ODT MR345 MR345 A-DDR3-ODT-T2 A-DDR3-BA0-T1 MR342 MR342 A_DDR3_BA0 A_DDR3_BA0 MR343 MR343 A-DDR3-BA0-T2 U100A U100A RP301 RP301 RP307 RP307 A_DDR3_A0 B_DDR3_A0 A-DDR3-BA2-T1 A_DDR3_BA2 A_DDR3_BA2 A-DDR3-BA2-T2 A_DDR3_A0/DDR2_A5 B_DDR3_A0/DDR2_A5 A_DDR3_A1 B_DDR3_A1 A-DDR3-A3-T1 A_DDR3_A3 A_DDR3_A3 A-DDR3-A3-T2 DDR3 2G bit 1600MHz A_DDR3_A1/DDR2_A13 B_DDR3_A1/DDR2_A13 A_DDR3_A2...
- Page 29 Power for panel V_Panel_IN V_Panel V_Panel Q454 Q454 V_Panel V_Panel V_Panel C455 C455 V_Panel CND3 CND3 DCKM DCKP +5V_Normal V_Panel_IN V_Panel C452 C452 M_SDA-1 R450 R450 CCKM CCKP +3.3V Q451 Q451 M_SCL-1 +12V_Normal DIP3/P2.54 DIP3/P2.54 Vsg>1 on CCKM CCKP Vsg<1 off R451 R451 CCKM...
- Page 30 SCART Mini YPBPR &Mini YPbPr_Y YPbPr_Y YPbPr_PB YPbPr_PB YPbPr_PB YPbPr_Y YPbPr_PR YPbPr_PR YPbPr_PR G_EARPHONE3 G_EARPHONE3 D500 D500 D501 D501 D502 D502 R500 R500 R501 R501 R503 R503 R575 R575 MICLIN D571 D571 R563 R563 C505 C505 Close to Mstar IC J500 J500 MICLIN...
- Page 31 Video CON600 CON600 VGA-Rin VGA-Bin VGA-Bin VGA-Gin VGA-Gin VGA-Gin VGA-Rin VGA-Rin VGA-Bin R601 R601 R602 R602 R603 R603 D606 D606 D607 D607 D608 D608 Close to Mstar IC DDC_SCL_D UART_RX DDC_SDA_D UART_TX R605 R605 VGA_VSYNC R606 R606 VGA_HSYNC D600 D600 D601 D601 D602 D602 D603...
- Page 32 USB INTERFACE USB POWER USB ESD分布电容要求<2pF J802 J802 +5VUSB 预留二极管,防止电流倒灌 +5V_Normal 5V_USB R647 R647 USB0_D- D609 D609 USB0_D- R648 R648 USB0_D+ USB0_D+ +5VUSB 5V_USB Note:电容靠近USB(CN600)端子,提供usb读写稳定性 C607 C607 J805 J805 5V_USB R628 R628 USB1_D- USB1_D- R629 R629 USB1_D+ USB1_D+ +5VUSB 5V_USB Note:5.1R电阻靠近端子,减小EOS.
- Page 33 Connector R657 R657 U651 U651 CON650 CON650 MDI_TP MDI_TP MDI_TN MDI_TN R660 R660 TDCT CH_GND R662 R662 RDCT MDI_RP MDI_RP GND1 GND2 MDI_RN MDI_RN R664 R664 R667 R667 LINKON TCM- ORG- ORG+ REGOUT SMDTR16P SMDTR16P CB650 CB650 CB651 CB651 Green Green C653 C653...
- Page 34 HDMI1 CON700 CON700 靠近端子放置 HDMI1_RX2P HDMI1_RX2P HDMI1/5V HDMI1_RX2N DATA2+ HDMI1_RX1P DATA2 SHIELD HDMI1/5V HDMI1_RX2N HDMI1_RX2P R730 R730 HDMI1-RX2P HDMI1_RX1N HDMI1-RX2P DATA2- HDMI1_RX1P R701 R701 HDMI1_RX0P DATA1+ HDMI1_RX2N R731 R731 HDMI1-RX2N R704 R704 HDMI1_RX0N DATA1 SHIELD HDMI1-RX2N HDMI1_RX1N HDMI1_RX1P HDMI1-RX1P HDMI1_CLKP R732 R732 DAT1A-...
- Page 35 AGC RC Filter &I2C SI TUNER AIF-IN- IF-IN- IF_AGC_DM R838 R838 IF_AGC_DTV TUNER POWER ALIF-N C824 C824 J804 J804 ATV,DTB-C/T ATV,DTB-C/T AIF-IN+ IF-IN+ ALIF-P V_TU +3.3V_TU DIF-IN- DIF-IN-# DLIF-N R810 R810 SDA-T T_SDA DTMB,DVB-T2 DTMB,DVB-T2 DIF-IN+ DIF-IN+# IF_AGC R837 R837 IF_AGC_ATV DLIF-P R811...
- Page 36 AUDIO AMP MUTE CONTROL EARPHONE OUT +12V_Normal +12V_amp +3.3V_Normal +3.3V_Normal +12V_amp AMP 5707L R335 R335 CA10+ CA10 C246 C246 C250 C250 R462 R462 C273 C273 C288 C288 C290 C290 C278 C278 +3.3V_Normal C224 C224 +3.3V_Normal C247 C247 C237 C237 R346 R346 C251 C251...
- Page 37 iNAND FLASH SD/MMC Card Reader +3.3V_Normal +3.3V_Normal CON100 CON100 NF_POWER +3.3V_Normal SD-D2 DATA2 SD-CDZ SD-D3 CD/DATA3 R1004 R1004 SD-WP# SD-CMD SD-D1 U1001 U1001 DAT1 C1005 C1005 C1006 C1006 C1007 C1007 SD-D0 SD-CLK NF_CLK NF_D4 DAT0 C1001 C1001 C1002 C1002 C1009 C1009 NF_CMD NF_D5...
- Page 38 PCMCIA POWER VCC-PCMCIA +5V_Normal L1052 L1052 CARD DETECT PCMCIA VCC-PCMCIA VCC-PCMCIA CON1051 CON1051 +5V_Normal PCM_CD1_N PCM_D3 CD1# TS_MDO3 PCM_D4 PCM_CD1_N PCM_CD2_N PCM_CD_N MDO3 TS_MDO4 PCM_D5 R1078 R1078 R1077 R1077 MDO4 R1090 R1090 VCC-PCMCIA TS_MDO5 PCM_D6 MDO5 TS_MDO6 PCM_D7 MDO6 TS_MDO7 PCM_CE_N PCM_CD1_N R1075...
- Page 39 Option Daughter Board Interface CON1100C CON1100C CON1100A CON1100A CON1100B CON1100B +5V_Normal TS_D0 TS_D1 DIF-IN+## DIF-IN-## +5V_Normal TS_D0 TS_D1 DIF+ DIF- TS_D2 TS_D3 TS_D2 TS_D3 +3.3V_Normal TS_D4 TS_D5 IF_AGC_DM +3.3V_Normal TS_D4 TS_D5 IF-AGC +3.3V +3.3V TS_D6 TS_D7 +3.3V_Normal TS_D6 TS_D7 TS_CLK +1.2V_DB +1.2V_DB TS_CLK...
-
Page 40: Chapter 8. Measurements And Adjustments
Service Manual Model No.: LE48M7000A Chapter 8. Measurements and Adjustments 8-1. Service Mode 8-1-1.How to enter into Service Mode The way to the factory mode menu: Step 1: Press Menu, Step 2: Press “8893”, System will be into the factory mode menu when 2 steps above are done. -
Page 41: Picture
Service Manual Model No.: LE48M7000A 8-2-2. PICTURE 1)Video; 2)Picture Mode: Adjust the brightness/contrast/ Saturation/Hue/Sharpness, under Standard/Vivid/User/Soft/E.Guard parameter 3) Picture Curve: Adjust the brightness/contrast/ Saturation/Hue/Sharpness Curve 4)ADC Adjust: AUTO color correction. 5)White Balance: Adjust the pattern of color temperature value 6)Over Scan : Adjust the over scan ... -
Page 42: Sound
Service Manual Model No.: LE48M7000A Chapter 9. Trouble shooting 9-1. Simple check Verify if the television is properly plugged No picture/ No sound Verify if the television is properly supplied power Verify if electricity is available. Verify if correct signals are input... -
Page 43: Debug
Service Manual Model No.: LE48M7000A 8-2-4. SETUP: 1) Upgrade: Upgrade Mboot/Upgrade Main software 2)SSC Adjust:MIUand LVDS setup; 3) Backlight Curve: Adjust backlight curve. 4) Uart Debug: 5 )Aging Mode: Choose the Aging Mode on/off 6) Power On Mode: Choose the automatic... -
Page 44: Software Update
Service Manual Model No.: LE48M7000A 8-3. Software Update 8-3-1. MSD6369 software update... - Page 45 Mstar 6369 Software upgrade method 1.The software unzip after Will produce following files. Copy these two files at the same time under the U disk ,use of RC menu+8893 button,into the factory 2. The U disk inserted TV USB port, open the TV menu Choose Setup Choose Setup...
- Page 46 After the upgrade is complete, the TV will automatically boot. use of RC menu+8893 button,into the factory menu, for initialization ( choose Setup/ Restore To Default “on”) For initialization after the completion of the machine will automatically shutdown, restart can test. Above according to clew operation can be completed, complete software upgrade, the machine will automatically enter the standby mode Note: Software upgrade process can't without electricity, the whole process about need...
-
Page 47: Mainboard Ic Introduction
Service Manual Model No.: LE48M7000A 9-2. Mainboard IC Introduction Top view 6 7 8 9 10 1 2 ... - Page 48 Service Manual Model No.: LE48M7000A Bottom view...
- Page 49 Service Manual Model No.: LE48M7000A Network filter —————TF1102(U651) Voltage convertor 5V to 3.3V———————— GH27G(U2) .Main Flash Memory———————————MX25L1606EM2I-12G (U03) 4. Silicon TUNER ———————————215820(U803) Voltage convertor 5V to 2.5V————————GH23H(U3) Audio Amplifier for subwoofer——————5707A(U39) 7. Audio Amplifier————————————5707L(U38) 8. Buck converter————————————SY80X (U5) 9. DDR——————————————H5TQ2G63DFR-PBC (U300/U301/U302/U303) 10.
-
Page 50: Mainboard Failure Check
Service Manual Model No.: LE48M7000A 9-3. Mainboard Failure Check No picture but have sound No Check the power output Change the Power Board Yes No There’s something wrong Check the CN2 (BLO) with FRC Backlight on/off Yes Verify if the DC/DC No convertor can output the Change the corresponding right Voltage, DC/DC Q45output 5V Yes No Change Verify if the Q46 Q46 output Still having Yes Change Panel problems ... - Page 51 Service Manual Model No.: LE48M7000A No sound but have picture Yes Verify if the speakers are Change the speakers broken No Verify if the main board has the No Check the corresponding audio right input ,according to the source input circuit you connect. you connect. TV/COMPONENT/AV/VGA/HDMI etc. No Verify if U39/U38 has the right Verify if U39/U38 has the right power in output No Yes Change U39/U38 Check Amp_Power input is right Still having problems Change Mainboard ...
- Page 52 Service Manual Model No.: LE48M7000A No sound No picture No Verify if the Power has Change the 5Vstb output Power supply Yes Verify if CN4 Pin3/4 has 5V Change Power board No input Yes No Verify if CN2 Pin1 has 12V Change Power board input Yes Change corresponding Verify if DC/DC convertors have No DC/DC convertor the right output Yes Still having Change Change the software Problems Mainboard ...
- Page 53 Service Manual Model No.: LE48M7000A Poor sound Poor sound No Verify if sound system is Change sound correct . system For ease of use, recommend that customer format the picture and sound settings in the automatic option. Updata the software and Still having make the reboot; or problems change the maiboard ...
- Page 54 Service Manual Model No.: LE48M7000A No color for some channel program (black and white) No color for some chann el program (black and w hite) Verify if the same No Check out of picture and sound problem exists in other system of this channel channels Yes No Change the channel to the right sound check out of picture and sound system system (PAL‐BG SECAM/L) Yes Refer to relative instructions in the Manual for color adjust Updata the software and Still having make the reboot; or problems change the maiboard ...
- Page 55 Service Manual Model No.: LE48M7000A How to know whether the Power board is broken? Check if the power cord co Reconnect the power cord with the No nnect well? outlet or Power board. Yes No Check if the Power board Replace the Power board pls. output 5V and 12V ? Still having Check if Main board / LVDS wire / Panel are in problems good condition ...
-
Page 56: Pannel Failure
Service Manual Model No.: LE48M7000A 9-4. Pannel Failure Failure Mode... - Page 57 Service Manual Model No.: LE48M7000A...
- Page 58 Service Manual Model No.: LE48M7000A...
- Page 59 Service Manual Model No.: LE48M7000A...
- Page 60 Service Manual Model No.: LE48M7000A...
- Page 61 Sincere Forever Haier Group Haier Industrial Park, No.1, Haier Road 266101, Qingdao, China http://www.haier.com Printed in China ...
Need help?
Do you have a question about the LE48M7000A and is the answer not in the manual?
Questions and answers