Table of Contents
Advertisement
Quick Links
Record in the space below the listed information for future reference. The rated current is
printed on the serial number label attached to the oven side trim.
SERIAL NUMBER...............................................................................................
DATE OF PURCHASE..........................................................................................
PURCHASED FROM............................................................................................
.........................................................................................................................
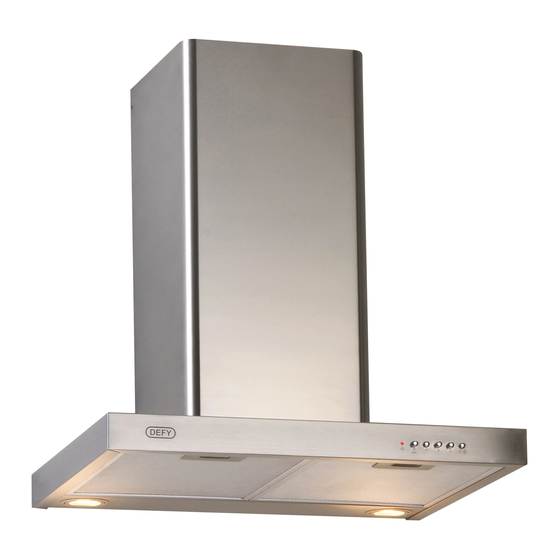
COOKER HOODS
Users Manual
The manufacturer strives for continuous
improvement. For this reason, the text and
illustrations in this manual are subject to change
without notice.
Page 1
DCH317
DCH318
DCH355
Advertisement
Table of Contents

Summary of Contents for Defy DCH317
- Page 1 DCH317 DCH318 DCH355 COOKER HOODS Users Manual Record in the space below the listed information for future reference. The rated current is printed on the serial number label attached to the oven side trim. SERIAL NUMBER………………………………………………………………………………….. DATE OF PURCHASE……………………………………………………………………………... PURCHASED FROM………………………………………………………………………………..
-
Page 2: Explanation Of Symbols
Introduction Dear Customer, Congratulations on the purchase of your new Defy appliance. Please read this manual carefully before using your appliance for the first time and then store it within easy reach for future reference. This manual will provide you with information on how to operate and care for your appliance to gain the maximum benefit from it. - Page 3 Index Important safety instructions. General safety. Safety for children. Safety when working with electricity. Electrical connection. Description. Before use. Mode of operation. Installation. Control Panel. Maintenance and cleaning. Owner’s responsibility. Branches. Warranty. Page 3...
- Page 4 Important safety instructions This section contains safety Do not operate the cooker hood instructions that will help you if it is defective or has any avoid risk of injury and damage. visible damage. All warranties will be void if you Do not carry out any repairs or do not follow these instructions.
- Page 5 Never leave cooking fat or oil Avoid leaving exposed flames unattended. Overheated fat or unattended and always ensure oil can easily catch fire. that the burners are covered as Do not flambé food directly open flames are damaging for under the cooker hood. The the filters and a fire hazard.
-
Page 6: Safety When Working With Electricity
Safety when working with electricity Connect the cooker hood to an earthed outlet/line protected by a fuse of suitable capacity. Have the earth installation made by a qualified electrician. This cooker hood must be earthed and the manufacturer and the seller do not accept responsibility for any damage due to incorrect installation or electrical connection. -
Page 7: Electrical Connection
Electrical connection The cooker hood uses a 220-230V~ / Mode of operation 50Hz power supply. The appliance has been designed as either If the mains power cord is damaged, it an air extractor (The air is drawn in and must be replaced by a qualified cleaned by the aluminium filter and directed electrician. -
Page 8: Installation
Installation The cooker hood must be placed at a distance of 65-75 cm from the cooking surface for best effect. When the cooker hood is located above a gas appliance, the minimum distance between the supporting surface for the cooking vessels on the hob and the lowest part of the range hood that shall be at least 65 cm. - Page 9 1. Position the hood against the wall and mark the position of the support holes (A, B, C, D and E) that are to be drilled. 2. Use a drill bit with an 8 mm diameter to make holes in the wall where you have marked these positions.
- Page 10 Installing carbon filters Remove the air filter then install the carbon filters as indicated in the following diagrams. Attach the air filter to the hood after installing the carbon filters. Note: The carbon filters must never be washed and should be replaced every 3 months.
-
Page 11: Control Panel
Control panel For model CHW 6215 TS and CHW 9215 TS Press “ ” button, and the motor will stop. Press “ ” button and the motor runs at low speed. Press “ ” button and the motor runs at middle speed. Press “... -
Page 12: Maintenance And Cleaning
Maintenance and cleaning WARNING: Before cleaning any General cleaning. (Stainless steel) part of the hood, switch the power Stainless steel is not adversely affected by off at the mains. normal household use but because of its reputation for durability, it is sometimes Cleaning the air filter assumed to be indestructible, and therefore subjected to misuse or even abuse. - Page 13 Should you require them, factory approved, carbon pad filters and installation kits may be purchased from your nearest Defy Service Centre or their authorised agents. The Carbon pad filters are used to purify the air which is released back into the room.
-
Page 14: Owner's Responsibility
KEEP THE WARRANTY CERTIFICATE AND SALES INVOICE AS PROOF OF PURCHASE FOR WARRANTY PURPOSES. PLEASE REGISTER YOUR PRODUCT AT www.defy.co.za DEFY APPLIANCES (PTY) LTD P.O.BOX 12004 JACOBS DURBAN 4026 SOUTH AFRICA Page 14... - Page 15 ZAMBIA: SOUTHGATE INVESTMENTS LTD 160 Long Street, Hilton, Bloemfontein 9301 Plot 1606, Sheki Sheki Road Tel: 051 400 3900 P.O. Box 33681 Bloemfontein.Service@defy.co.za Lusaka, 10101, Zambia Tel: +260 0211 242332/3 CAPE TOWN Fax: +260 0211 242933 5A Marconi Rd. Montague Gardens, 7441 sgiservicecentre@microlink.zm...
-
Page 16: Warranty
Point 1 of this Certificate. 6. For warranties in the Republic of South Africa and Sub-Saharan Africa, please contact your nearest Defy office. Please refer to the previous page for respective South African branches and Sub-Saharan Africa branches.


Need help?
Do you have a question about the DCH317 and is the answer not in the manual?
Questions and answers