Table of Contents
Advertisement
Quick Links
Advertisement
Table of Contents

Related Manuals for Paccar DAF POWERCHOICE 360X


Summary of Contents for Paccar DAF POWERCHOICE 360X
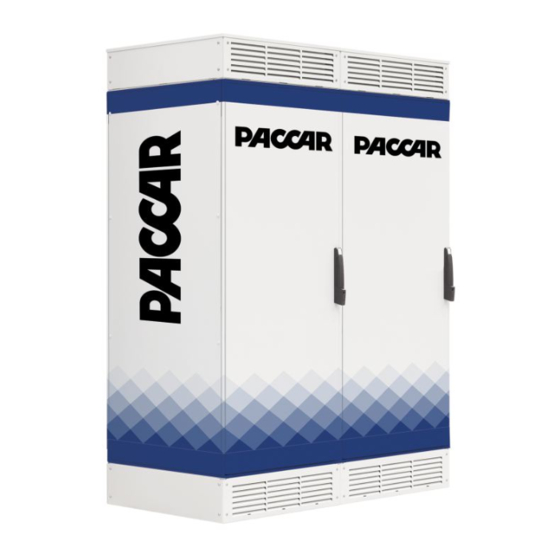
- Page 1 POWERCHOICE 360X CABINET Installation manual A PACCAR COMPANY DRIVEN BY QUALITY...
- Page 2 PACCAR. PACCAR assumes no responsibility for any errors that may appear in this document. In no event shall PACCAR be liable for direct, indirect, special, incidental or consequential damages of any nature or kind arising from the...
-
Page 3: Table Of Contents
Contents Preface About the document 1.1.1 Structure of this document 1.1.2 How to use the documentation Target groups Introduction Site layout considerations Floorplan 2.2.1 Block configuration 2.2.2 Line configuration 2.2.3 Cable gland plate Civil work The foundation Ventilation Mechanical installation Preparation Use a forklift to transport the charger Remove the charger cabinet from the pallet... -
Page 4: Preface
1. Preface This section gives the requirements and instructions for the installation of the Electric Vehicle Supply Equipment (EVSE), the PowerChoice 360X. About the document This document is part of the technical handbook which is an integral part of the Electric Vehicle Supply Equipment (EVSE), cabinet of the PowerChoice 360X. -
Page 5: Introduction
2. Introduction The installation of the EVSE requires administrative work to obtain the required permits as well as work to prepare for the cables, supply, and the foundation of the EVSE. Contact your local representative to obtain the necessary permits. For locations where the EVSE is exposed to direct sunlight and high ambient temperatures for most of the day, it is recommended to install protection from direct sunlight. -
Page 6: Site Layout Considerations
Site Layout Considerations There are several aspects to locating the EVSE equipment at a macroscopic scale that improve performance, lifetime, and ease of operation. These items are very dependent on the end user's site and intended use, so they are covered as concept considerations in this section. The access of the installation site shall be of sufficient size to allow the transport packages for •... -
Page 7: Floorplan
Floorplan The EVSE is designed for a side-by-side installation, with the back of the cabinet against a wall or freestanding. Due to air cooled ventilation the bottom of the EVSE has to be free from debris or obstruction. It is mandatory to respect a clearance of 100 mm at the rear and in between separate units. In the front, the recommended clearance is 1500 mm to provide space for servicing the equipment. -
Page 8: Block Configuration
2.2.1 Block configuration 31 inch (800 mm) 31 inch (800 mm) EVSE EVSE EVSE EVSE Minimum clearance of 15 mm per product creates 30 mm minimum spacing between. The distance between two blocks must be at least 610 mm. 2.2.2 Line configuration Air blow-out Air blow-out... -
Page 9: Cable Gland Plate
2.2.3 Cable gland plate Note: The details below are for each of the base product cabinet. A cable gland plate is provided. This plate may come from the factory several ways: 1. it may be solid, to allow for field punching, 2. It may be pre-drilled to allow easily sourced cord grips, or 3. it may be pre-populated with standard cord grips. -
Page 10: Civil Work
3. Civil work Note: The details below are for each of the base product cabinet. For most installations, some form of civil work will be needed. It is the responsibility of all parties working on the project to ensure the civil, mechanical, and electrical works are executed in compliance with the, local and national codes, standards, rules and regulations. -
Page 11: The Foundation
The foundation Note: Depending on the number of external DC outlets, several sets of output conduits may reside in the up to 3 output areas. Note: The information below are for each of the base product cabinet. 800 mm The EVSE is placed on the foundation. 700 mm The foundation shall be as flat as possible with a maximum slant of 2 mm... -
Page 12: Ventilation
Ventilation Note: The details below are for each of the base product cabinet. Note: When the iron grids are rotated, the IP degree of IP54 is affected for the water ingress part, Take this into account. Dust ingress however is not affected. The EVSE is air cooled by a set of internal fans which take in the air from the ventilation grids in the bottom of the charger cabinet and release the warm air from the ventilation grids in the top of the charger cabinet. -
Page 13: Mechanical Installation
4. Mechanical installation The mechanical installation is executed either by a dedicated party of Heliox, or it is the scope of supply of the site owner. For details, refer to contract as signed and agreed upon. Note that the mechanical installation requires hoisting or lifting tasks. It is the sole responsibility of the installer, to make sure: the mechanical installation work is executed in compliance with the, local and (inter) national •... -
Page 14: Preparation
Preparation 1. Put the pallet with the cabinet on a flat and stable surface with sufficient space to work. 2. Remove and discard the packaging material. 3. Dispose of the packaging material in accordance with the local regulations. Use a forklift to transport the charger 1. -
Page 15: Remove The Charger Cabinet From The Pallet
Remove the charger cabinet from the pallet 1. Remove the bolts (1) on top of the roof (4x). 2. Mount the lifting eyes (2) instead (4x). 3. Connect the lift to the lifting eyes. 4. Before lifting, for stability purposes, close and lock the door. 5. -
Page 16: Electrical Installation
5. Electrical installation Danger: Risk of electrocution. Make sure, it is safe to work on the electrical installation. Energized electrical systems are hazardous and can cause electrical shock. Electrical shock can cause (serious) injury to persons. The AC electrical installation is executed either by a dedicated party of Heliox, or it is the scope of supply of the site owner. -
Page 17: Ac Configuration
5.1.1 AC configuration Incoming AC power supply: TN-C: 3P+PE TN-S: 3P+N+PE Short current rating: 35kA 5.1.2 Grounding instructions This unit must be connected to a grounded, metal, permanent wiring system; or an equipment- grounding conductor is to be run with circuit conductors and connected to equipment-grounding terminal or lead on battery charger. -
Page 18: Connect The Ac Power Supply Cables
Connect the AC power supply cables Caution: Be careful when you install the conical spring washer. The hollow side must face the busbar. Incorrect installed conical spring washers are not short-circuit proof. Incorrect installation will cause (serious) damage to the equipment. 1. -
Page 19: Output Terminal Connections
5.4.1 Output terminal connections Wire Base station Cable Function color/number connection X501:1 X501:2 AC IN X501:3 X501:4 GN/YE X501:PE CAN_H X501:5 CAN from base product CAN_L X501:6 Shield 500SH2 Not used X501:7 Low voltage interface Not used X501:8 Emergency stop from Emergency Stop 1 X501:9 base product... -
Page 20: Interconnection Between Cabinets
5.4.2 Interconnection between cabinets The interconnections between cabinets must be made at the moment of installation of the cabinets. Wire The base station connections* Cable Function color/ interlink between two number cabinets CAN_H X503:5 (cab A) – X503:5 (cab B) CAN from base CAN_L X503:6 (cab A) –... -
Page 21: Dc-Connections
5.4.4 DC-connections Note: The details of the electrical installation mentioned below are for each of the base product cabinet. After installation checks 1. Make sure, visually and by measurement, that the connections are made correctly and at proper locations. - The connections are torque tight and marked. - The resistance is below 0.0250 mOhm per high current connection 2. -
Page 22: Evse Preconditioning
EVSE preconditioning Note: After installation the EVSE must be preconditioned to comply to the climatic specifications. Note: Between the FAT and the SAT of the system, the installer is responsible and liable for complying to the climatic specifications. When not stored, the EVSE system must always be (pre)conditioned. The EVSE (and separate DC outlet cabinets) are prepared for climate (pre)conditioning. - Page 23 5600 PT Eindhoven The Netherlands daf.com ISO14001 IATF16949 Environmental Quality Management System Management System All rights to copyrights, registered trademarks, and trademarks reside with their respective owners. Copyright © 2022 PACCAR/Heliox. All rights reserved. A PACCAR COMPANY DRIVEN BY QUALITY...
Need help?
Do you have a question about the DAF POWERCHOICE 360X and is the answer not in the manual?
Questions and answers