Table of Contents
Advertisement
Quick Links
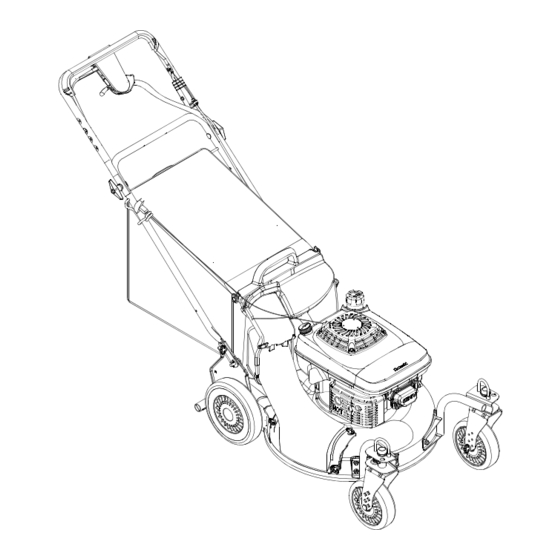
Operator's Manual
21" Self-Propelled
Mower
Model 995
IMPORTANT: Read safety rules and instructions carefully
Warning:
This unit is equipped with an internal combustion engine and should not be used on or near any unimproved forest-covered,
brush-covered or grass-covered land unless the engine's exhaust system is equipped with a spark arrester meeting applicable local or state
laws (if any). If a spark arrester is used, it should be maintained in effective working order by the operator. In the State of California the
above is required by law (Section 4442 of the California Public Resources Code). Other states may have similar laws. Federal laws apply
on federal lands. A spark arrester for the muffler is available through your White Outdoor dealer or contact the service department, P.O.
Box 361131 Cleveland, Ohio 44136-0019.
MTD LLC., P.O. Box 361131, Cleveland, Ohio 44136-0019
PRINTED IN U.S.A.
769-01454.fm
Form No.
(3/2005)
Advertisement
Table of Contents

Related Manuals for MTD White Outdoor 995


Summary of Contents for MTD White Outdoor 995
- Page 1 (Section 4442 of the California Public Resources Code). Other states may have similar laws. Federal laws apply on federal lands. A spark arrester for the muffler is available through your White Outdoor dealer or contact the service department, P.O. Box 361131 Cleveland, Ohio 44136-0019. MTD LLC., P.O. Box 361131, Cleveland, Ohio 44136-0019 PRINTED IN U.S.A. 769-01454.fm Form No.
-
Page 2: Table Of Contents
This information will be necessary to use the manufacturer’s web site and/or help from the Customer Support Department or an authorized White Outdoor dealer. Copy the model number here: Copy the serial number here: MTD LLC P. O. BOX 361131 www.whiteoutdoor.com CLEVELAND,OH 44136 DEALER LOCATOR PHONE NUMBER: 800-949-4483 CUSTOMER SUPPORT Please do NOT return the unit to the retailer from where it was purchased, without first contacting Customer Support. -
Page 3: Important Safe Operation Practices
SECTION 1: IMPORTANT SAFE OPERATION PRACTICES WARNING: This symbol points out important safety instructions which, if not followed, could endanger the personal safety and/or property of yourself and others. Read and follow all instructions in this manual before attempting to operate this machine. Failure to comply with these instructions may result in personal injury. - Page 4 Children 16. Mow in daylight or good artificial light; walk, not run. 17. Stop the blade when crossing gravel drives, Tragic accidents can occur if the operator is not alert to walkways or roads. the presence of children. Children are often attracted to 18.
- Page 5 11. Replace gasoline cap and tighten securely. 4. Mower blades are sharp and can cut. Wrap the 12. If gasoline is spilled, wipe it off the engine and blade or wear gloves, and use extra caution when equipment. Move unit to another area. Wait 5 servicing them.
-
Page 6: Slope Gauge
SECTION 2: SLOPE GAUGE Use this page as a guide to determine slopes where you may not operate safely. Do not operate your lawn mower on such slopes. -
Page 7: Assembling Your Lawn Mower
SECTION 3: ASSEMBLING YOUR LAWN MOWER Removing Unit From Carton Make certain the lower handle is seated securely into the handle bracket assemblies. • Remove staples, break glue on top flaps, or cut tape at carton end and peel along top flap to open Handle Assembly carton. - Page 8 • Fasten the cable to the lower handle with the two cable ties found on the lower handle. Pull the cable Grass Bag Adapter ties tight and trim off the excess. See Figure 4. Cable Tie Lower Handle Wing Nuts Figure 4 Figure 6 Attaching Starter Rope...
-
Page 9: Know Your Lawn Mower
SECTION 4: KNOW YOUR LAWN MOWER Recoil Starter Read this operator’s manual and safety rules before operating your lawn mower. Compare the illustration in The recoil starter is attached to the right upper handle. Figure 9 with your lawn mower to familiarize yourself Stand behind the unit and pull the recoil starter rope to with the location of various controls and adjustments. -
Page 10: Operating Your Lawn Mower
SECTION 5: OPERATING YOUR LAWN MOWER WARNING: WARNING: Be sure no one other than the Read, understand, and follow all operator is standing near the lawn mower while instructions and warnings on the machine and starting engine or operating mower. in this manual before operating. -
Page 11: Making Adjustments
Mulching Bagging Grass Clippings You can use the grass catcher bag to collect clippings Be sure that the lawn is clear of stones, IMPORTANT: while you are operating the mower. sticks, wire, or other objects which could damage lawn • Attach grass catcher following instructions on page mower or engine. - Page 12 Shift Lever Cable • Lift and place the lock pins in the larger holes to lock the wheels for straight ahead operation. Periodic adjustment of the six speed shift cable may be • Place pins in smaller holes to allow casters to rotate necessary due to normal wear on the cable.
-
Page 13: Maintaining Your Lawn Mower
SECTION 7: MAINTAINING YOUR LAWN MOWER • Inspect muffler periodically, and replace if WARNING: Always stop the engine and necessary. Damaged mufflers or spark arresters disconnect the spark plug wire before can create a fire hazard. Make sure to avoid muffler performing any maintenance work or and surrounding areas while the mower engine is adjustments on your lawn mower. -
Page 14: Servicing Your Lawn Mower
SECTION 8: SERVICING THE MOWER • Place the blade on the adapter. Be certain the WARNING: Always stop the engine and blade is aligned and seated on the blade adapter disconnect the spark plug wire before flanges. performing any maintenance work or •... - Page 15 • Remove the hex bolt from the rear of unit holding • Pivot the control arm down away from the pulley the transmission to the mower housing. and belt. See Figure 17. • Lift off the lower pulley assembly and remove the old belt from around the crankshaft.
-
Page 16: Off-Season Storage
• Reinstall the bolt securing transmission to rear mower housing. • Pivot the baffle back to its original position and secure with three hex screws removed earlier. • Lightly lubricate the inside of the blade adapter and reinstall the spacer, wave washer, blade adapter assembly, and blade in the correct order. -
Page 17: Troubleshooting
SECTION 10: TROUBLESHOOTING Problem Cause Remedy Engine fails to start Blade control handle disengaged. Engage blade control handle. Spark plug wire disconnected. Connect wire to spark plug. Fuel tank empty or stale fuel. Fill tank with clean, fresh gasoline. Blocked fuel line. Clean fuel line. -
Page 18: Illustrated Parts List
SECTION 11: PARTS LIST FOR MODEL 995 36 37 47 57 IMPORTANT: proper working machine, use Factory Approved Parts. V-BELTS are specially designed to engage and disengage safely. A substitute (non OEM) V-Belt can be dangerous by not disengaging completely. - Page 19 Model 995 Ref. Part No. Description Ref. Part No. Description 647-04046 Control Handle 748-0318 Wheel Ratchet 731-0904A Upper Control Handle 736-0270 Bell Washer.265 ID x.75 OD 16864 6 Sped. Rack Cable Bracket 710-0751 Hex Cap Screw 1/4-20 x.620 731-0620 Control Lever 737-3000 Grease Fitting 713-0397...
- Page 20 Model 995...
- Page 21 Model 995 Ref. Ref. Part No. Part Description Part No. Part Description 720-0223 Grip 736-3084 Flat Washer.510 ID x 1.120 OD 732-0803A Spring Lever 712-0896 Hex Jam Nut 1/4-28 738-0529 Shoulder Nut.825 x.165 Lg. 782-7598 Belt Keeper 710-0751 Cap Screw 1/4-20 x.620 741-0124 Bearing 736-0270...
- Page 22 Safety & Decorative Labels Some of the labels found on your mower are represented here with the corresponding part numbers. Please use these part numbers when ordering replacement labels. 777S30118 777I20291 777S30128 777S30116 AVOID SERIOUS INJURY OR DEATH • KEEP HANDS AND FEET AWAY FROM ROTATING PARTS.
- Page 23 The Tecumseh Two-Pull Promise Conditions and Products Covered Damage resulting from operational conditions under The Tecumseh Two-Pull Promise where starting may require more than two pulls. Such conditions include, but are not In addition to all other terms and conditions of the limited to: Limited Warranty applicable to the engine on your new 1.
-
Page 24: Warranty
MANUFACTURER’S LIMITED WARRANTY FOR: The limited warranty set forth below is given by MTD LLC with rized service dealer. respect to new merchandise purchased and used in the United MTD does not extend any warranty for products sold States, its possessions and territories.
Need help?
Do you have a question about the White Outdoor 995 and is the answer not in the manual?
Questions and answers