Table of Contents
Advertisement
Quick Links
Advertisement
Table of Contents

Related Manuals for CHERUBINI wiDom Energy Driven Switch C 7


Summary of Contents for CHERUBINI wiDom Energy Driven Switch C 7
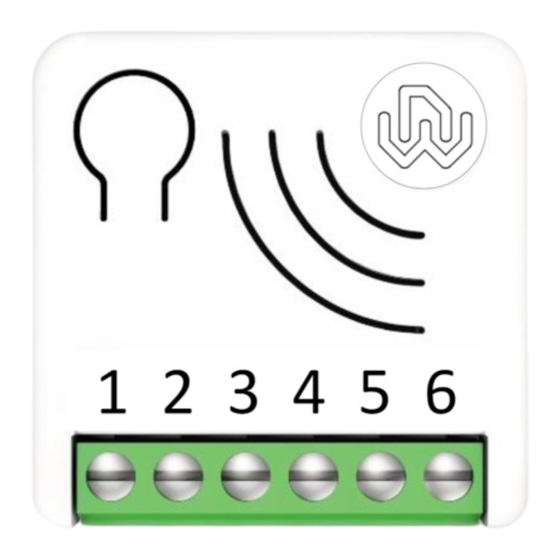
- Page 1 English Energy Driven Switch C 7 1 2 3 4 5 6 EDSC700 Operating Instructions...
-
Page 2: Table Of Contents
Revision History Rev. Doc. Date Page Description 16/03/22 Initial Version 16/3/22 Added Meter command Class 14/04/22 Update parameters 23, 40, 76 06/09/22 Minor description updates Offline setup mode, parameter 42 15/11/22 Integrated Max transmitted power update Content Revision History ................................... II Device Description .................................. - Page 3 Voltage protection ................................16 Advanced Meter configuration ............................16 Meter Report Configuration ..............................18 Disposing the devices ................................20 Compliance with directives ..............................20 Warranty ....................................20 Legal Notes....................................20 Energy Driven Switch C 7 Operating Instructions – www.widom.it...
-
Page 4: Device Description
Device Description Energy Driven Switch C 7 is a device designed to monitor all parameters, usage, faults and overloads of your electrical system. Unlike ordinary energy meters, it is a bi-directional meter capable of measuring both the consumed and produced power, equipped with a relay that can be activated to initiate specific scenarios in relation to detected power levels. -
Page 5: Technical Specifications
Technical Specifications Power Supply 110 - 230 VAC±10% 50/60 Hz Maximum Load on Relay 3750 VA – 250VAC – 15 A System temperature limitation 105 °C Work Temperature From -10° to 40° C < 260 mW in standby Power consumption <... -
Page 6: Electrical Connections Diagram
DANGER: The device must be connected to 230V AC, before carrying out any operation, please make sure that the power main switch is in position. DANGER: Any procedure requiring the use of the Integrated Button is related only to the installation phase and is to be considered a service procedure that must be performed by qualified personnel. -
Page 7: Led Status Indicator
3) Turn the main switch to the ON position 4) Include the device into the Z-Wave™ network TIP: The antenna must not be shortened, removed or modified. To ensure maximum efficiency, it must be installed as shown. Large size metal equipment near the antenna can negatively affect reception. -
Page 8: Smartstart Inclusion
SmartStart Inclusion Z-Wave™ SmartStart aims to shift the tasks related to inclusion of an end device into a Z-Wave™ network away from the end device itself, and towards the more user-friendly interface of the gateway. Z-Wave™ SmartStart removes the need for initiating the end device to start inclusion. Inclusion is initiated automatically on power-ON and repeated at dynamic intervals for as long as the device is not included into a Z-Wave™... -
Page 9: Supported Command Classes
Supported Command Classes Command Class Version Non-Secure CC Secure CC ZWAVEPLUS_INFO ASSOCIATION MULTI_CHANNEL_ASSOCIATION_V2 ASSOCIATION_GRP_INFO TRANSPORT_SERVICE VERSION MANUFACTURER_SPECIFIC DEVICE_RESET_LOCALLY INDICATOR POWERLEVEL SECURITY_2 SUPERVISION FIRMWARE_UPDATE_MD APPLICATION_STATUS CONFIGURATION_V4 NOTIFICATION METER Supporting Command Class Indicator The device supports Indicator V3 with Indicator ID 0x50 (identity). When the device receives an indicator set, the led blinks accordingly to the Indicator set received. -
Page 10: Associations
Associations Energy Driven Switch C 7 can control other devices such as relays or dimmers. The device supports 5 association groups, each of which supports the association of 5 nodes N° of max nodes Group Group Name supported Description Command sent in the group LifeLine Group... - Page 11 The Up Power and Down Power events are defined based on the power value above / below a certain level, over a certain period of time. Both the power levels and the time thresholds of permanence are defined by the user. In case the device recognizes an UP/DOWN Power event threshold, it tries to overcome the situation, by controlling in sequence the: 1.
- Page 12 If the power remains above the threshold and it does so for longer than the Protection time, the control sequence will be repeated. Once the power drops below the threshold value, to activate a new control sequence, it is necessary to wait for at least a time equal to the Protection Time.
- Page 13 Power Consumed Down Power Level 2 kW Time -1.3 kW Produced UP Power Level Device configuration for example 2: Add in the association groups G1 Up Power Level and G1 Down Power Level the devices that control respectively the first load and the second load and set the following configuration parameters. Parameter Description Set the value to 0 so that the device distinguishes between produced...
-
Page 14: Overvoltage Protection
Overvoltage Protection The product can be configured to detect if the voltage remains within a range defined by the user, who can set an Overvoltage limit (parameter 46) and a Down voltage limit (parameter 47). When the voltage values go out of the defined range, a notification is sent to the Lifeline association group. -
Page 15: Reset To The Factory Settings
Z-Wave™ Network. When the device will be included in the network all these configuration parameters will be maintained. To enter in Offline Setup Mode, operate 2 clicks on the integrated button. When the device is in Offline setup mode the LED becomes solid Blue and the following configurations are permitted: 1 click Automated energy load control. -
Page 16: Configurations
Configurations Output configuration Parameter Default Size Parameter Name Description Number Value OUT_TYPE Define the output type. Parameters Values Min: 0 Max: 1 Value Description direct load control or normally Open relay normally Closed relay Parameter Default Size Parameter Name Description Number Value STARTUP_OUT... -
Page 17: Local Control
Local Control Parameter Default Size Parameter Name Description Number Value The value used to control the integrated UP_POWER_LOCAL_CONTROL Relay in case of Up Power Event. Parameters Values Min: 0 Max: 1 Value Description Parameter Default Size Parameter Name Description Number Value The value used to control the integrated DOWN_POWER_LOCAL_CONTROL... -
Page 18: Remote Control
Parameter Size Parameter Name Default Description Number Value CT_TYPE Define the Model of Current Transformer connected to the device Parameters Values Min: 1 Max: 2 Value Description Standard Type Type 2 version Remote control Parameter Default Size Parameter Name Description Number Value UP_POWER_REMOTE_CONTROL... -
Page 19: Voltage Protection
Voltage protection Parameter Default Size Parameter Name Description Number Value Define the Over Voltage Limit in tenth of OVER_VOLTAGE_LIMIT 2530 volt Parameters Values Min: 900 Max: 2530 Value Description 900-2530 Over Voltage limit Parameter Default Size Parameter Name Description Number Value Define the Down Voltage Limit in tenth of DOWN_VOLTAGE_LIMIT... - Page 20 Parameter Default Size Parameter Name Description Number Value UP_POWER_FIRST_ Defines the time of permanence in seconds above the Up TIMEOUT power level after which the First Up Power event occurs Parameters Values Min: 2 Max: 7200 Value Description 2-7200 Specific time expressed in seconds Parameter Default Size...
-
Page 21: Meter Report Configuration
Parameter Default Size Parameter Name Description Number Value Defines the time of permanence in seconds DOWN_POWER_FIRST_TIMEOUT below the Down Power level after which the first Down Power event occurs Parameters Values Min: 2 Max: 7200 Value Description 2-7200 Specific time expressed in seconds Parameter Default Size... - Page 22 Parameter Default Size Parameter Name Description Number Value The percentage of Power change from the last sent METER_ISTANT_REPORT report that triggers a new meter report sequence Parameters Values Min: 0 Max: 100 Value Description No report is sent (for any power change) 1-100 The percentage of Power change from the last sent report that triggers a new meter report sequence Parameter...
-
Page 23: Disposing The Devices
Disposing the devices This product bears the selective sorting symbol for waste electrical and electronic equipment (WEEE) and must be handled pursuant to European Directive WEEE in order to be recycled or dismantled to minimize its impact on the environment. For further information, please contact your local or regional authorities.
Need help?
Do you have a question about the wiDom Energy Driven Switch C 7 and is the answer not in the manual?
Questions and answers