
Related Manuals for CHERUBINI wiDom Smart Dry Contact Switch 7


Summary of Contents for CHERUBINI wiDom Smart Dry Contact Switch 7
- Page 1 English Smart Dry Contact Switch 7 OPERATING INSTRUCTIONS PRODUCT CODE PRODUCT VARIANT DRY700 Standard DRYZRX ZRX (includes the radio communication with CRC)
-
Page 2: Table Of Contents
Timer management ..............................12 Association group management ..........................14 Central Scene management ............................16 ZRX variant of the device ..............................17 Association of a Cherubini Remote Control Serie SKIPPER - POP O GIRO ..............17 Smart Dry Contact Switch 7 - Operating Instructions... - Page 3 Setting additional remote controls ..........................18 Remote control memory clearing ..........................19 Clearing all remote controls ............................19 Controlling the device from a Cherubini Remote Control .................... 20 Disposing the devices ............................... 21 Compliance with directives ............................... 21 Warranty ................................... 21...
-
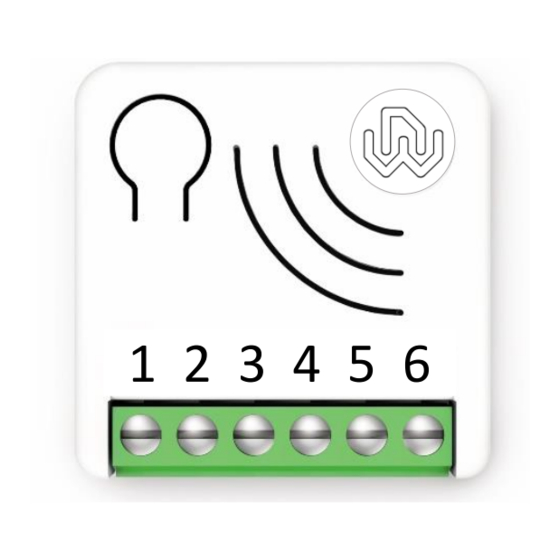
Page 4: Device Description
This device must be used in conjunction with a Security Enabled Z-Wave™ Controller in order to fully utilize all implemented functions. In its ZRX variant the device can also be controlled by Cherubini Remote Controls of SKIPPER - POP OR GIRO series. Integrated Button... -
Page 5: Technical Specifications
Technical Specifications Power supply 110 - 230 VAC±10% 50/60 Hz - 24VDC Maximum Load on Relay 16A resistive Load System temperature limitation 105°C Work temperature From -10° to 40° C < 260 mW in standby Power consumption < 480 mW with working load Radio frequency 868.4 MHz Protection system... -
Page 6: Electrical Connections Diagram
Electrical Connections diagram The device must be supplied by 230 AC or by 24 VDC Power Supply Connections must be done following one of the diagrams below: if you need to control a Load connected on a different power supply system you must follow the diagram on the right side. Controlling a Load connected to the same power supply Controlling a Load connected to an independent power system... -
Page 7: Device Installation
Device Installation 1) Make sure the main switch is set to the OFF position 2) Connect the device based on the diagrams provided 3) Turn the main switch to the ON position 4) Include the device in the Z-Wave™ network TIP: The antenna must not be shortened, removed or modified. -
Page 8: Smartstart Inclusion
Standard exclusion (remove) Only a controller can remove the device from the network. After activating the exclusion function by the controller, the device can be removed by setting it in Learn Mode. The procedure of exclusion can be activated by Removing a node from the Z-Wave™ network and executing 1 or 3 click on the integrated button;... -
Page 9: Supported Command Classes
Supported Command Classes Command Class Version Non-Secure CC Secure CC BASIC ZWAVEPLUS_INFO ASSOCIATION MULTI_CHANNEL_ASSOCIATION ASSOCIATION_GRP_INFO TRANSPORT_SERVICE VERSION MANUFACTURER_SPECIFIC DEVICE_RESET_LOCALLY INDICATOR POWERLEVEL SECURITY_2 SUPERVISION FIRMWARE_UPDATE_MD APPLICATION_STATUS CONFIGURATION_V4 SWITCH_BINARY CENTRAL_SCENE Supporting Command Class Basic The basic command classes are mapped into the Switch Binary Command Class. Basic Command received Mapped Command (Binary Switch) Basic Set (0xFF) -
Page 10: Device Control
Device Control Smart Dry Contact Switch 7 can turn ON and OFF the load by using an external switch, or from remote through a controller. Controlling the device by External Switches For the operation of the device within the Z-Wave™ network and controlling the loads connected to the device, control actions are performed on the external switches. -
Page 11: Associations
Associations Smart Dry Contact Switch 7 can control other devices like other relays or dimmers. The device supports 5 association groups, each of which supports the association of up to 8 devices (nodes): N° of max Group Group nodes Description Command sent Name supported... -
Page 12: Timer Management
Timer Management A timer can be set when switching On and/or Off. It is also possible to define which event will start the timer. (for example only the change on the output due to double clicks). Reset to the factory settings The device can be reset to the original factory settings with 6 consecutive clicks on the integrated button. -
Page 13: Configurations
Configurations Input Configuration Parameter Default Size Parameter Name Description Number Value IN_TYPE Define the input type Parameters Values Min: 0 Max: 2 Value Description no switch input momentary switch (button) toggle switch Parameter Default Size Parameter Name Description Number Value IN_TOGGLE Define which event on the input 1 toggle output. - Page 14 Parameter Default Size Parameter Name Description Number Value IN_ON_EXCLUSION Define which events on the input do not switch-On output. Parameters Values Min: 0 Max: 31 Value Description Disable 1 click 2 clicks 3 clicks Hold down If you support more than 1 event, the value for the configuration parameter is the sum of the event values. For example: 1 click and 2 clicks ->...
-
Page 15: Output Configuration
Output Configuration: Parameter Default Size Parameter Name Description Number Value OUT_TYPE Define the output type. Parameters Values Min: 0 Max: 1 Value Description direct load or normally Open relay normally Closed relay Parameter Default Size Parameter Name Description Number Value Define the output level on startup STARTUP_OUT (status of the device following a restart) - Page 16 2 clicks 3 clicks Hold down Network (status change trigger by gateway or other devices in the Z-Wave™ network) System (based on the startup status, or other timer event) If more than 1 event are supported, the value for the configuration parameter is the sum of the event values. For example: 1 click and 2 clicks ->...
-
Page 17: Association Group Management
Association group management This section defines the configuration parameters associated respectively with the control groups G1, G2, and dimming. Parameter Default Size Parameter Name Description Number Value Define which events on the input control G1 association G1_SETUP group. Parameters Values Min: 0 Max: 31 Value... - Page 18 1 click and 3 clicks -> Parameter value must be 1 + 4 =5 Default value: 2 clicks →2 Parameter Default Size Parameter Name Description Number Value G1_ASS_VALUE The value used to control G1 association group. Parameters Values Min: 0 Max: 102 Value Description...
-
Page 19: Central Scene Management
Parameter Default Size Parameter Name Description Number Value Define the minimum dimming level to control the device in MIN_DIM_LEVEL a dimming group. Parameters Values Min: 1 Max: 99 Value Description 1-99 Specify the minimum dimming value (not null) Central Scene management Parameter Default Size... -
Page 20: Zrx Variant Of The Device
ZRX variant of the device The section is valid ONLY for the ZRX variant of the device. Association of a Cherubini Remote Control Serie SKIPPER - POP O GIRO LEGEND OF THE SYMBOLS: Integrated Button with LED indicator Confirmation of sequence start recognition. -
Page 21: Setting The First Remote Control
Setting the first remote control This operation can only be performed when the product is new, or after a total delete of the memory. Every time you connect the device to the power supply, you have 3 hours to store the first remote control. After this time, the ability to store the remote control is disabled. -
Page 22: Remote Control Memory Clearing
Remote control memory clearing It is possible to delete singly all the memorized remote controls. When the last one is deleted the motor initial condition is restored. The same applies to single channels of a multichannel remote control: just select the channel before performing the sequence. -
Page 23: Controlling The Device From A Cherubini Remote Control
Controlling the device from a Cherubini Remote Control The events on the buttons of the remote control allow the controlling of the load as indicated in the following table. Pulsante Evento Risultato Click Switching on the load ON Hold Down... -
Page 24: Disposing The Devices
Disposing the devices This product bears the selective sorting symbol for waste electrical and electronic equipment (WEEE). This means that this product must be handled pursuant to European Directive 2002/96/EC in order to be recycled or dismantled to minimize its impact on the environment. For further information, please contact your local or regional authorities.
Need help?
Do you have a question about the wiDom Smart Dry Contact Switch 7 and is the answer not in the manual?
Questions and answers