
Related Manuals for Siemens HB573AB 0 Series


Summary of Contents for Siemens HB573AB 0 Series
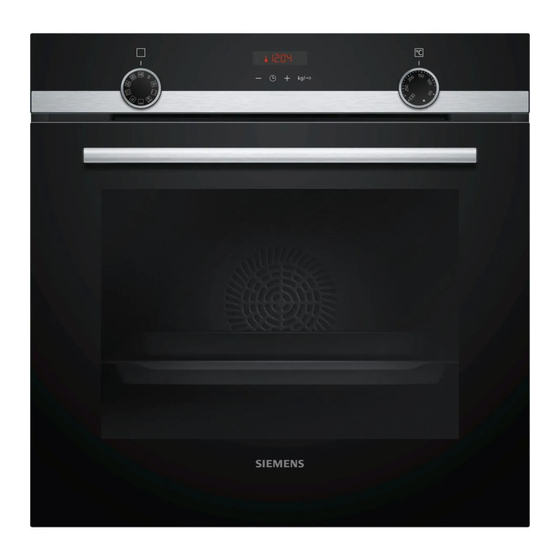
- Page 1 Oven HB573AB.0 User manual and installation instructions Register your product on My Siemens and discover exclusive ser- vices and offers. siemens-home.bsh-group.com/welcome The future moving in. Siemens Home Appliances...
-
Page 2: Table Of Contents
en Safety Futher information and explanations are available online: ¡ Keep the instruction manual and the Table of contents product information safe for future refer- ence or for the next owner. ¡ Do not connect the appliance if it has been USER MANUAL damaged in transit. - Page 3 Safety en Hot steam may escape when you open the 1.4 Safe use appliance door. Steam may not be visible, de- Always place accessories in the cooking com- pending on the temperature. partment the right way round. ▶ Open the appliance door carefully. → "Accessories", Page 8 ▶...
-
Page 4: Safety
en Safety ▶ Never clean accessories at the same time. If the appliance or the power cord is dam- The outside of the appliance gets very hot aged, this is dangerous. when the cleaning function is in progress. ▶ Never operate a damaged appliance. ▶... -
Page 5: Preventing Material Damage
Preventing material damage en 2 Preventing material damage Only leave the cooking compartment to dry with the ▶ 2.1 General door open if a lot of moisture was produced during operation. ATTENTION! Fruit juice dripping from the baking tray leaves stains Objects on the cooking compartment floor at over that cannot be removed. -
Page 6: Familiarising Yourself With Your Appliance
en Familiarising yourself with your appliance 4 Familiarising yourself with your appliance 4.1 Controls Buttons and display The buttons are touch-sensitive surfaces. To se- You can use the control panel to configure all functions lect a function, simply press lightly on the relev- of your appliance and to obtain information about the ant field. - Page 7 Familiarising yourself with your appliance en Symbol Type of heating What it's used for/how it works Hot air gentle Cook selected dishes gently on one level without preheating. The fan distributes the heat from the ring-shaped heating element in the back wall evenly around the cooking compartment.
-
Page 8: Accessories
en Accessories Lighting 4.5 Cooking compartment The oven lamp lights up the cooking compartment. The functions in the cooking compartment make your With most types of heating and functions, the lighting appliance easier to use. lights up during operation. When the function selector is turned to bring operation to an end, the lighting goes Shelf supports out. - Page 9 Push the accessory all the way in, making sure that your appliance in our brochures and online: it does not touch the appliance door. www.siemens-home.bsh-group.com Accessories vary from one appliance to another. When Note: Take any accessories that you will not be using...
- Page 10 en Basic operation Clean the accessories using soapy water and a dish cloth or soft brush. 7 Basic operation When your food is ready, switch off the appliance. 7.1 Switching on the appliance Tips Turn the function selector to any position other than ▶...
- Page 11 Time-setting options en minutes. The timer has its own audible signal so that To set a cooking time again, press the button. ‒ you can tell whether it is the timer or a cooking time When your food is ready, switch off the appli- ‒...
- Page 12 en Programme Cancelling the end time Use the button to set the time. Press the button. You can delete the set end at any time. a The time that is set appears on the display. is highlighted on the display. Requirement: Tip: You can go to the basic settings → Page 14 to Reset the end time to the current time plus the set ▶...
- Page 13 Programme en No. Food Cookware Weight setting Add liquid Shelf Information posi- tion Roasting dish with Weight of the joint No 05 Meat loaf, fresh Minced beef, pork or lamb Roasting dish with Weight of meat Almost cover Do not sear the meat 06 Pot-roasted beef E.g.
- Page 14 en Childproof lock 11 Childproof lock You can secure your appliance to prevent children 11.1 Activating and deactivating the from accidentally switching it on or changing the set- childproof lock tings. Requirement: The function selector must be set to the Note: You can go to the basic settings → Page 14 to "Off"...
- Page 15 Cleaning and servicing en Turn the function selector. 12.3 Discarding changes to the basic ▶ a All changes are discarded and not saved. settings 13 Cleaning and servicing Do not use cleaning products with a high alcohol To keep your appliance working efficiently for a long ▶...
- Page 16 en Self-cleaning Cooking compartment Area Suitable cleaning agents Information Enamel surfaces ¡ Hot soapy water Soak any heavily soiled areas and use a brush or steel wool. Leave the appliance door open to dry the cooking compartment ¡ Vinegar water after cleaning it. ¡...
- Page 17 Shelf supports en Never clean accessories at the same time. ▶ The outside of the appliance gets very hot when the The outside of the appliance gets very hot when the cleaning function is in progress. cleaning function is in progress. Never touch the appliance door.
- Page 18 en Appliance door Pull the whole rail to the front and remove it. ¡ For both rails, ensure that the curved rods are at the front. First, push the rail into the middle of the rear socket until the rail rests against the cooking compartment wall, and then push this back ...
- Page 19 Appliance door en Close the appliance door fully . Grab hold of the Using both hands, press down on the left and right appliance door with both hands (on the left and of the door cover from above to check whether the right) and pull it upwards and out ...
- Page 20 en Appliance door Undoing and removing the left- and right-hand Turn the intermediate pane until the arrow is in screws on the appliance door the top right. Place a folded-up tea towel in the appliance door. Pull the front pane up and out ...
-
Page 21: Troubleshooting
Troubleshooting en Put the door cover in position and push down on it Close the appliance door. until you hear it click into place. Note: Do not use the cooking compartment again until the door panes have been correctly fitted. 17 Troubleshooting You can rectify minor faults on your appliance yourself. -
Page 22: Customer Service
en Troubleshooting Fault Cause and troubleshooting lights up in the dis- Childproof lock is activated. play and no settings Use the button to deactivate the childproof lock. ▶ can be made on the → "Childproof lock", Page 14 appliance. flashes in the dis- The cooking compartment is too hot for the selected operation. -
Page 23: How It Works
Disposal en 18 Disposal Find out here how to dispose of old appliances cor- This appliance is labelled in accord- rectly. ance with European Directive 2012/19/EU concerning used elec- trical and electronic appliances 18.1 Disposing of old appliance (waste electrical and electronic equip- Valuable raw materials can be reused by recycling. - Page 24 en How it works ¡ Keep the appliance door closed when using the Notes ¡ When baking on several layers, always use hot air. grill. Baked goods that are placed in the oven at the Never grill with the appliance door open. same time will not necessarily be ready at the same ¡...
- Page 25 How it works en Food Accessories/cookware Shelf pos- Type of Temperature Cooking ition heating in °C/grill time in mins setting Small yeast cakes Baking tray 150-170 20-30 Biscuits Baking tray 140-160 15-25 Biscuits, 2 or 3 levels Universal pan 140-160 15-25 Baking tray 5+3+1 Bread, 1000 g (in a loaf tin or free- Universal pan...
- Page 26 en How it works ¡ Baking tins/dishes on the wire rack 20.6 Test dishes First wire rack: Level 3 These overviews have been produced for test institutes Second wire rack: Level 1 to facilitate appliance testing in accordance with EN Shelf positions for baking on three levels: 60350-1.
-
Page 27: Installation Instructions
Installation instructions en Recommended settings for grilling Food Accessories/cook- Shelf pos- Type of Temperature in Cooking time in ware ition heating °C/grill setting mins Toasting bread Wire rack 21 Installation instructions Observe this information when installing the appliance. 21.1 General installation instructions Follow these instructions before you start with the installation of the appliance. - Page 28 en Installation instructions ¡ If the tall unit has another back panel in addition to 21.2 Appliance dimensions the element back panels, this must be removed. You will find the dimensions of the appliance here ¡ Only fit the appliance up to a height which allows accessories to be easily removed.
- Page 29 Installation instructions en An all-pole isolating switch must be integrated into the 21.6 Corner installation permanent electrical installation according to the install- Observe the installation dimensions and the installation ation regulations. instructions when installing in a corner. Identify the phase and neutral conductors in the socket.
- Page 30 en Installation instructions For handleless kitchens with vertical bar handle strips: Attach a suitable filling piece in order to cover ‒ any sharp edges and to guarantee a safe install- ation. Pre-drill aluminium profiles to establish a screw ‒ connection . Secure the appliance using a suitable screw ...
- Page 32 Valid within Great Britain: Imported to Great Britain by BSH Home Appliances Ltd. Grand Union House Old Wolverton Road Wolverton, Milton Keynes MK12 5PT United Kingdom Manufactured by BSH Hausgeräte GmbH under the trademark licence of Siemens AG *9001633826* 9001633826 (011216)
Need help?
Do you have a question about the HB573AB 0 Series and is the answer not in the manual?
Questions and answers