Table of Contents
Advertisement
Available languages
Available languages
Quick Links
Advertisement
Table of Contents

Related Manuals for EuroLite LED TMH-17


Summary of Contents for EuroLite LED TMH-17
-
Page 3: Table Of Contents
Diese Bedienungsanleitung gilt für die Artikelnummer 51786065 This user manual is valid for the article number 51786065 Das neueste Update dieser Bedienungsanleitung finden Sie im Internet unter: You can find the latest update of this user manual in the Internet under: www.eurolite.de 3/32 00107658, Version 1.1... -
Page 4: Einführung
- sich die letzte Version der Anleitung im Internet herunter laden EINFÜHRUNG Wir freuen uns, dass Sie sich für einen EUROLITE LED TMH-17 entschieden haben Wenn Sie nachfolgende Hinweise beachten, sind wir sicher, dass Sie lange Zeit Freude an Ihrem Kauf haben werden. - Page 5 Bitte überprüfen Sie vor der ersten Inbetriebnahme, ob kein offensichtlicher Transportschaden vorliegt. Sollten Sie Schäden an der Netzleitung oder am Gehäuse entdecken, nehmen Sie das Gerät nicht in Betrieb und setzen sich bitte mit Ihrem Fachhändler in Verbindung. Der Aufbau entspricht der Schutzklasse I. Der Netzstecker darf nur an eine Schutzkontakt-Steckdose angeschlossen werden, deren Spannung und Frequenz mit dem Typenschild des Gerätes genau übereinstimmt.
-
Page 6: Bestimmungsgemäße Verwendung
BESTIMMUNGSGEMÄSSE VERWENDUNG Bei diesem Gerät handelt es sich um einen kopfbewegten LED-Effektstrahler, mit dem sich dekorative Lichteffekte erzeugen lassen. Dieses Produkt ist für den Anschluss an 100-240 V, 50/60 Hz Wechselspannung zugelassen und wurde ausschließlich zur Verwendung in Innenräumen konzipiert. Dieses Gerät ist für professionelle Anwendungen, z. -
Page 7: Gerätebeschreibung
Soll das Gerät transportiert werden, verwenden Sie bitte die Originalverpackung, um Transportschäden zu vermeiden. Beachten Sie bitte, dass eigenmächtige Veränderungen an dem Gerät aus Sicherheitsgründen verboten sind. Der Serienbarcode darf niemals vom Gerät entfernt werden, da ansonsten der Garantieanspruch erlischt. Wird das Gerät anders verwendet als in dieser Bedienungsanleitung beschrieben, kann dies zu Schäden am Produkt führen und der Garantieanspruch erlischt. -
Page 8: Geräteübersicht
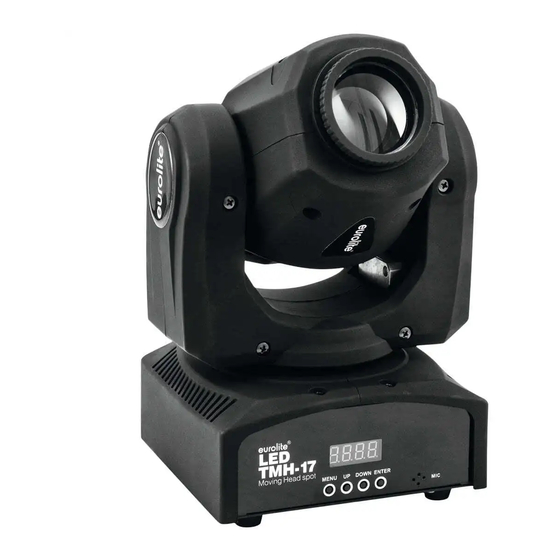
Geräteübersicht (1) Projektorkopf (2) Objektivlinse (3) Fokus (4) Projektorarm (5) Gehäuseschraube (6) Base (7) Lüftungsschlitze (8) Mikrofon (9) Gummifuß (10) Steuereinheit (11) Display (12) Menu-Taste (13) Up-Taste (14) Down-Taste (15) Enter-Taste (16) DMX-Eingang (17) DMX-Ausgang (18) Sicherungshalter (19) Netzanschluss (20) Lüfter 8/32 00107658, Version 1.1... -
Page 9: Installation
INSTALLATION Projektormontage Die Aufhängevorrichtungen des Projektors muss so gebaut und bemessen sein, dass sie 1 Stunde lang ohne dauernde schädliche Deformierung das 10-fache der Nutzlast aushalten kann. Die Installation muss immer mit einer zweiten, unabhängigen Aufhängung, z. B. einem geeigneten Fangnetz, erfolgen. - Page 10 Das Gerät kann direkt auf den Boden gestellt werden oder in jeder möglichen Position im Trussing installiert werden, ohne seine funktionellen Eigenschaften zu verändern. Die Projektorbase lässt sich auf zwei verschiedene Arten montieren. Sichern Sie den Projektor bei Überkopfmontage (Montagehöhe >100 cm) immer mit einem geeignetem Sicherungsseil.
-
Page 11: Anschluss An Den Dmx-512 Controller / Verbindung Gerät - Gerät
Anschluss an den DMX-512 Controller / Verbindung Gerät – Gerät Achten Sie darauf, dass die Adern der Datenleitung an keiner Stelle miteinander in Kontakt treten. Die Geräte werden ansonsten nicht bzw. nicht korrekt funktionieren. Beachten Sie, dass die Startadresse abhängig vom verwendeten Controller ist. Unbedingt Bedienungsanleitung des verwendeten Controllers beachten. -
Page 12: Anschluss Ans Netz
Stellen Sie den Fokus durch Drehen der Objektivlinse ein, um die Projektion scharf zu stellen. Stand Alone-Betrieb Der LED TMH-17 lässt sich im Stand Alone-Betrieb ohne Controller einsetzen. Trennen Sie dazu den LED TMH-17 vom Controller und rufen Sie das vorprogrammierte Programm, wie im Kapitel Control Board beschrieben, auf. Master/Slave-Betrieb Im Master/Slave-Betrieb lassen sich mehrere Geräte synchronisieren, die dann von einem Mastergerät... -
Page 13: Control Board
Control Board Das Control Board bietet mehrere Möglichkeiten: so lassen sich z. B. die DMX-Startadresse eingeben oder das vorprogrammierte Programm abspielen. Drücken Sie die Menu-Taste, so dass sich das Display einschaltet. Durch Drücken der Up/Down-Tasten können Sie sich im Hauptmenü bewegen. Zur Auswahl des gewünschten Menüpunktes drücken Sie die Enter-Taste. -
Page 14: Dmx-Gesteuerter Betrieb
Steuerkanäle 12 bis 22. Bitte vergewissern Sie sich, dass sich die Steuerkanäle nicht mit anderen Geräten überlappen, damit der LED TMH-17 korrekt und unabhängig von anderen Geräten in der DMX-Kette funktioniert. Werden mehrere LED TMH-17 auf eine Adresse definiert, arbeiten sie synchron. - Page 15 Farbrad 00 09 Offen/Weiß 19 0A 13 14 1D Grün 39 1E 27 Blau 28 31 Gelb 32 3B 20% Hellblau 69 3C 45 Orange 46 4F Magenta 50 59 Magenta/Orange 99 5A 63 Orange/Hellblau 100 109 64 6D 39% Hellblau/Gelb 110 119 6E 77 Gelb/Blau...
-
Page 16: Reinigung Und Wartung
00 3B Keine Funktion 60 159 3C 9F Internes Programm 160 255 A0 FF 63% 100% Musiksteuerung Spezialfunktionen, Reset 00 14 Keine Funktion 21 100 15 64 PAN-Bewegung 101 200 65 C8 40% TILT-Bewegung 201 249 C9 F9 PAN-/TILT-Bewegung 250 255 FA FF 98% 100% Reset REINIGUNG UND WARTUNG Der Unternehmer hat dafür zu sorgen, dass sicherheitstechnische und maschinentechnische Einrichtungen... -
Page 17: Sicherungswechsel
Sicherung: T 1 A, 250 V Zubehör: EUROLITE TPC-10 Klammer, silber Best.-Nr. 59006856 EUROLITE Sicherungsseil AG-5 3x600mm bis 5kg sil Best.-Nr. 58010360 PSSO DMX Kabel XLR 3pol 3m sw Neutrik Best.-Nr. 30227810 OMNITRONIC XLR Stecker 3pol 110 Ohm Best.-Nr. 30208430 Bitte beachten Sie: Technische Änderungen ohne vorherige Ankündigung und Irrtum vorbehalten. -
Page 18: Introduction
- download the latest version of the user manual from the Internet INTRODUCTION Thank you for having chosen a EUROLITE LED TMH-17. If you follow the instructions given in this manual, we are sure that you will enjoy this device for a long period of time. - Page 19 Please make sure that there are no obvious transport damages. Should you notice any damages on the A/C connection cable or on the casing, do not take the device into operation and immediately consult your local dealer. This device falls under protection-class I. The power plug must only be plugged into a protection class I outlet.
-
Page 20: Operating Determinations
OPERATING DETERMINATIONS This device is an LED moving-head lighting effect for creating decorative effects. This product is allowed to be operated with an alternating voltage of 100-240 V, 50/60 Hz and was designed for indoor use only. This device is designed for professional use, e.g. on stages, in discotheques, theatres etc. Lighting effects are not designed for permanent operation. -
Page 21: Description Of The Device
DESCRIPTION OF THE DEVICE Features Handy Moving Head Spot with 30 W LED • Compact lightweight • Equipped with a 30 W COB LED • 9 or 11 DMX channels selectable • 7 brilliant, dichroic colors plus white • Rainbow effect with adjustable speed •... -
Page 22: Installation
(10) Control Board (11) Display (12) Menu-button (13) Up-button (14) Down-button (15) Enter-button (16) DMX input (17) DMX output (18) Fuseholder (19) Power input (20) Ventilator INSTALLATION Rigging The installation of the projector has to be built and constructed in a way that it can hold 10 times the weight for 1 hour without any harming deformation. - Page 23 but instead use a professional structural rigger. Improper installation can result in bodily injury and.or damage to property. The projector has to be installed out of the reach of people. If the projector shall be lowered from the ceiling or high joists, professional trussing systems have to be used. The projector must never be fixed swinging freely in the room.
-
Page 24: Dmx-512 Connection / Connection Between Fixtures
DMX-512 connection / connection between fixtures The wires must not come into contact with each other, otherwise the fixtures will not work at all, or will not work properly. Please note, the starting address depends upon which controller is being used. Only use a stereo shielded cable and 3-pin XLR-plugs and connectors in order to connect the controller with the fixture or one fixture with another. -
Page 25: Connection With The Mains
Lighting effects must not be connected to dimming-packs. OPERATION After you connected the effect to the mains, the EUROLITE LED TMH-17 starts running. During the Reset, the motors are trimmed and the device is ready for use afterwards. Turn the objective-lens for adjusting the focus in order to obtain a sharp projection. -
Page 26: Control Board
Control Board The Control Board offers several features: you can simply set the starting address or run the pre- programmed program. The main menu is accessed by pressing Menu until the display is lit. Browse through the menu by pressing Up or Down. -
Page 27: Dmx-Controlled Operation
The device has two different DMX channel modes. The Control Board allows you to assign the DMX starting address, which is defined as the first channel from which the LED TMH-17 will respond to the controller. If you set, for example, the address in the 11 channel mode to channel 12, the device will use the channel 12 to 22 for control. - Page 28 46 4F Magenta 50 59 Magenta/Orange 99 5A 63 Orange/Light blue 100 109 64 6D 39% Light blue/Yellow 110 119 6E 77 Yellow/Blue 120 129 78 81 Blue/Green 130 139 82 8B 51% Green/Red 140 255 8C FF 55% 100% Rainbow effect with increasing speed Static gobo-wheel, gobo shake Open...
-
Page 29: Cleaning And Maintenance
CLEANING AND MAINTENANCE The operator has to make sure that safety-relating and machine-technical installations are inspected by an expert after every four years in the course of an acceptance test. The operator has to make sure that safety-relating and machine-technical installations are inspected by a skilled person once a year. -
Page 30: Technical Specifications
Fuse: T 1 A, 250 V Accessory: EUROLITE TPC-10 Coupler, silver No. 59006856 EUROLITE Safety bond AG-5 3x600mm up to 5kg sil No. 58010360 PSSO DMX cable XLR 3pin 3m bk Neutrik No. 30227810 OMNITRONIC XLR plug 3pin 110 Ohm No. - Page 32 Eurolite is a brand of Steinigke Showtechnic GmbH Andreas-Bauer-Str. 5 97297 Waldbüttelbrunn Germany D00107658 Version 1.0 Publ. 08/11/2017...
Need help?
Do you have a question about the LED TMH-17 and is the answer not in the manual?
Questions and answers