Table of Contents
Advertisement
Advertisement
Table of Contents

Related Manuals for Xiaomi G10 Plus


Summary of Contents for Xiaomi G10 Plus
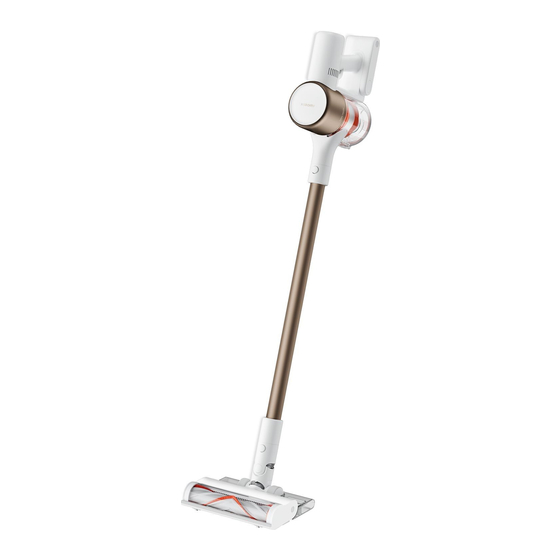
- Page 1 Vacuum Cleaner G10 Plus User Manual...
-
Page 2: Safety Instructions
Safety Instructions This product is for household use only. Read this manual carefully before use, and retain it for future reference. This appliance can be used by children aged from 8 years and above and persons with reduced physical, sensory or mental capabilities or lack of experience and knowledge if they have been given supervision or instruction concerning use of the appliance in a safe way and understand the hazards involved. - Page 3 Keep hair, loose clothing, fingers, and other parts of the body away from the vacuum cleaner's openings and moving parts. Do not point the suction opening, extension rod, or other accessories at your eyes or ears or put them in your mouth. Do not put any object into the vacuum cleaner's openings, nor use the vacuum cleaner with any opening blocked.
-
Page 4: Product Overview
Product Overview Accessories List High Torque Brush Bar Crevice Nozzle Charger 2-in-1 Charging & Storage Mount (includes screw × 2, wall plug × 2, and mounting template sticker) Extension Rod Mini Electric Brush 2-in-1 Brush Nozzle Water Tank Mop Pad (Pre-installed) Note: Illustrations of product, accessories, and user interface in the user manual are for reference purposes only. -
Page 5: Component Name
Component Name Display Screen Antistatic Contact Charging Port Battery Status Indicator Charging Contact Battery Release Button Dust Compartment Release Switch Power Button Press: Turn on Release: Turn off Dust Compartment Dust Compartment Bottom Cover Release Button... -
Page 6: Display Screen
Display Screen Battery Level Indicator Lock/Unlock Status The indicator displays the remaining battery. When the battery level is lower than 10%, the Error Message indicator will change from green to red. Filter Not Installed Roller Brush Stuck Charging/Low Battery Level Indicator Airway Blocked Blinking red: Battery level ≤... -
Page 7: How To Install
How to Install Installing the Accessories onto the Vacuum Cleaner Insert until it clicks into place Note: Mini electric brush should not be used with the extension rod. - Page 8 Installing the 2-in-1 Charging & Storage Mount 1. The 2-in-1 charging & storage mount should be installed in a cool, dry place with an electrical outlet nearby. Prior to installing, ensure that there are not any wires or pipes in the space directly behind where the mount will be installed. 2.
-
Page 9: Battery Status Indicator
Charging Battery Status Indicator Note: means off, means on, and means blinking. Nearly full Low battery Half battery Fully charged Charging Contact Battery Status Indicator Charging the vacuum cleaner with the charger Charging the vacuum cleaner on the charging mount Once the vacuum cleaner is fully charged, the indicator will turn off after 5 minutes, and the vacuum cleaner will then enter the energy-saving mode. -
Page 10: How To Use
How to Use Switching Suction Levels Continuous Mode Press the button to enable Continuous Mode, then press the power button Press the button to cycle through the vacuum cleaner's suction levels of to turn the vacuum cleaner on. To exit Continuous Mode, press the button Eco, Standard, and Turbo. - Page 11 Using Different Accessories High Torque Brush Bar: For cleaning different types of flooring such as wood, Mini Electric Brush: For vacuuming dirt, pet hair, and other stubborn debris from marble, tile, and carpet. sofas, bedding, and other fabric surfaces. Note: The high torque brush bar can be attached directly to the vacuum cleaner.
- Page 12 Using the Mopping Function 3. Attach the high torque brush bar to the water tank by lining up the magnets on them until they snap together. Notes: Do not step on the water tank, as this could permanently damage it. Heavily soiled floors should be vacuumed prior to mopping for a better result.
-
Page 13: Care And Maintenance
Care & Maintenance Maintenance Precautions Cleaning the Dust Compartment, Pre-filter, and Cyclone Assembly Always use genuine parts to keep your warranty from being voided. If the filter, extension rod, or high torque brush bar becomes clogged, the 1. The vacuum cleaner's cleaning ability will be reduced if the dust vacuum cleaner will stop working shortly. - Page 14 3. Pull the dust compartment release switch in the direction illustrated in 2. Press the dust compartment bottom cover release button, then empty the image , then remove the dust compartment from the vacuum cleaner as contents. illustrated in image Dust Compartment Release Switch...
- Page 15 4. Remove the pre-filter first, then lift the handle of the cyclone assembly 5. Rinse the pre-filter, cyclone assembly, and dust compartment with water and turn to counterclockwise until it stops, then pull to lift out the cyclone until they are clean, then set each component aside to thoroughly dry for at assembly.
- Page 16 Installing the Dust Compartment, Pre-filter, and Cyclone 6. Wipe the contact points of the vacuum cleaner with a soft dry cloth if they are dirty. Assembly 1. Insert the cyclone assembly vertically into the dust compartment, and make sure that the handle of the cyclone assembly line up with the slot on the left side of the dust compartment.
-
Page 17: Cleaning The Filter
Cleaning the Filter 3. Slightly tilt the dust compartment so its slot aligns with the clip on the vacuum cleaner. Then gently push the dust compartment until it clicks into place. 1. Remove the dust compartment as shown in the figure. Dust Compartment Release Switch Notes: It is recommended to clean the filter once every 4 to 6 months. -
Page 18: Installing The Filter
2. Remove the filter from the vacuum cleaner by pulling it down in the direction 4. Allow the filter to thoroughly dry for at least 24 hours. shown in the figure. 3. Clean the filter with clean water. Make sure you rotate the filter 360° to Installing the Filter thoroughly remove all dust caught in the filter. - Page 19 Cleaning the High Torque Bush Bar 2. Reinstall the dust compartment. 1. Turn the lock counterclockwise until it stops, then remove the roller brush from the high torque brush bar. 2. Use scissors to cut and pick out any hair or other debris tangled around the roller brush.
- Page 20 3. After extended use, the roller brush may become dirty and should be washed. Cleaning the Mini Electric Brush After washing, allow the roller brush to dry thoroughly by standing it upright 1. Use a proper tool to turn the lock counterclockwise until you hear a click. in a well-ventilated area for at least 24 hours.
- Page 21 Cleaning the Water Tank and Mop Pad 3. After washing, allow the roller brush to dry thoroughly by standing it upright in a well-ventilated area for at least 24 hours. 1. Slide the water tank down to detach it from the high torque brush bar. 4.
- Page 22 Water Dispenser Filter 3. Remove the mop pad from the water tank. The water dispenser filter should be replaced if the water tank dispenses water too slowly or becomes clogged. To ensure optimal mopping effectiveness, it is recommended to replace water dispenser filters once every 3 to 6 months depending on water quality and frequency of use.
-
Page 23: Battery Pack
Battery Pack The vacuum cleaner contains a removable rechargeable lithium-ion battery pack which has a limited number of recharge cycles. After extended use, the battery pack may no longer hold a charge. If this happens, it means the battery pack has reached the end of its life cycle and needs to be replaced. 1. -
Page 24: Specifications
Specifications Cordless Vacuum Cleaner Model B207 Rated Voltage 25.2 V 3000 mAh (Nominal Capacity) Charging Voltage 30.8 V Battery Capacity 2800 mAh (Rated Capacity) Rated Power 425 W Dust Compartment Capacity 0.6 L Charging Time Approx. 4 hours Net Weight 1.7 kg Item Dimensions 1286 ×... -
Page 25: Regulatory Compliance Information
Regulatory Compliance Information EU Declaration of Conformity We, Dreame (Tianjin) Information Technology Co., Ltd., hereby declare that this equipment is in compliance with the applicable Directives and European Norms, and amendments. The full text of the EU declaration of conformity is available at the following internet address: http://www.mi.com/global/service/support/declaration.html For detailed e-manual, please go to www.mi.com/global/service/userguide WEEE Information... -
Page 26: Troubleshooting
Troubleshooting Issue Possible Cause Solution It is out of battery or has low battery. Fully charge the vacuum cleaner, then resume use. It enters into overheat protection mode triggered by Clear any blockages and restart the vacuum cleaner The vacuum cleaner does not work. a blockage. -
Page 27: Error Icon
Error Icon If the vacuum cleaner is not working properly, the screen display will show an error message. Please refer to the table below to find your solution based on the error message. Error Icon Error Message Solution Airway Blocked Check if any blockages caught in the dust compartment, extension rod, and/or high torque brush bar. -
Page 28: Warranty Notice
2. REMEDIES If a hardware defect is found and a valid claim is received by Xiaomi within the Warranty Period, Xiaomi will either (1) repair the product at no charge, (2) replace the product, or (3) refund the Product, excluding potential shipping costs. - Page 29 It is your responsibility to backup any data, software, or other materials you may have stored or preserved on the product. It is likely that the data, software or other materials in the equipment will be lost or reformatted during the service process, Xiaomi is not responsible for such damage or loss.
- Page 30 For further information, please go to www.mi.com Manufactured for: Xiaomi Communications Co., Ltd. Manufactured by: Dreame (Tianjin) Information Technology Co., Ltd. (a Mi Ecosystem company) Address: Room 2112-1-1, South District, Finance and Trade Center, No.6975 Yazhou Road, Dongjiang Bonded Port Area, Tianjin Pilot Free Trade Zone, Tianjin, China Importer: Beryko s.r.o.
Need help?
Do you have a question about the G10 Plus and is the answer not in the manual?
Questions and answers