Blodgett DFG-200 Series Installation Operation & Maintenance
Hide thumbs
Also See for DFG-200 Series:
- Installation operation & maintenance (81 pages) ,
- Installation, operation and maintenance manual (77 pages) ,
- Installation, operation and maintanance (51 pages)
Table of Contents
Advertisement
Quick Links
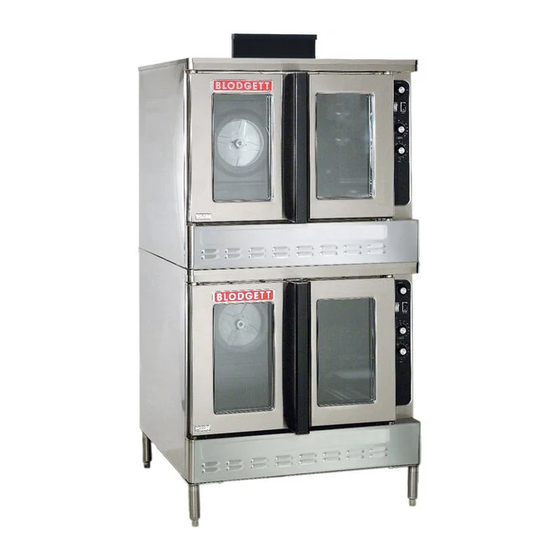
DFG-100 AND DFG-200 SERIES
CONVECTION OVEN
INSTALLATION -- OPERATION -- MAINTENANCE
LA SÉRIE DFG-100 ET DFG-200
FOURS À CONVECTION
MANUEL D'INSTALLATION -- FONCTIONNEMENT -- ENTRETIEN
BLODGETT OVEN COMPANY
www.blodgett.com
44 Lakeside Avenue, Burlington, Vermont 05401 USA Telephone (800) 331-5842, (802) 860-3700 Fax: (802)864-0183
PN 90055 Rev U (1/03)
E 2003 --- G.S. Blodgett Corporation
Advertisement
Table of Contents

Related Manuals for Blodgett DFG-200 Series


Summary of Contents for Blodgett DFG-200 Series
- Page 1 LA SÉRIE DFG-100 ET DFG-200 FOURS À CONVECTION MANUEL D’INSTALLATION -- FONCTIONNEMENT -- ENTRETIEN BLODGETT OVEN COMPANY www.blodgett.com 44 Lakeside Avenue, Burlington, Vermont 05401 USA Telephone (800) 331-5842, (802) 860-3700 Fax: (802)864-0183 PN 90055 Rev U (1/03) E 2003 --- G.S. Blodgett Corporation...
- Page 2 IMPORTANT WARNING: IMPROPER INSTALLATION, ADJUSTMENT, ALTERATION, SERVICE OR MAINTENANCE CAN CAUSE PROPERTY DAMAGE, INJURY OR DEATH. READ THE INSTALLATION, OPERATING AND MAINTENANCE INSTRUCTIONS THOROUGHLY BEFORE INSTALLING OR SERVICING THIS EQUIPMENT AVERTISSEMENT: UNE INSTALLATION, UN AJUSTEMENT, UNE ALTÉRATION, UN SERVICE OU UN ENTRETIEN NON CONFORME AUX NORMES PEUT CAUSER DES DOMMAGES À...
- Page 3 THE REPUTATION YOU CAN COUNT ON UNE RÉPUTATION SUR LAQUELLE VOUS POUVEZ COMPTER For over a century and a half, The Blodgett Oven Company has been building ovens and nothing but ovens. We’ve set the industry’s quality standard for all kinds of ovens for every foodservice operation regardless of size, application or budget.
- Page 4 Model/Modèl: Your Service Agency’s Address: Adresse de votre agence de service: Serial Number/Numéro de série: Your oven was installed by/ Installateur de votre four: Your oven’s installation was checked by/ Contrôleur de l’installation de votre four:...
-
Page 5: Table Of Contents
..Blodgett IQ2T Control ....Contrôle du Blodgett IQ2T ... . Cook and Hold Control . -
Page 6: Introduction
Air Flow Pattern for Blodgett DFG Convection Ovens Figure 1 GAS SPECIFICATIONS -- U.S., Canada and General Export Natural Gas... -
Page 7: Oven Components
Introduction Oven Components Combustion Cover --- provides access to the Rack Supports --- hold oven racks. combustion compartment on gas ovens. Blower Wheel Cover --- located on the back interi- Combustion Compartment --- contains combus- or wall of the oven. Protects the blower wheel. tion burners on gas ovens. -
Page 8: Installation
DELIVERY AND INSPECTION The following clearances must be available for ser- vicing. All Blodgett ovens are shipped in containers to Oven body sides --- 12” (30cm) prevent damage. Upon delivery of your new oven: Oven body back --- 12” (30cm) Inspect the shipping container for external dam- age. -
Page 9: Oven Assembly
Installation Oven Assembly NSF BOLTS 1. Locate the 5/16” bolts that were shipped with the oven. These bolts are required by NSF to block any ex- 2. Install the bolts as shown in Figure 3. posed hole on the back of an oven. This includes: any unit, single or stacked, without a back panel. -
Page 10: Leg Attachment
Installation Oven Assembly LEG ATTACHMENT CASTER ASSEMBLY 1. Push the oven onto a lift with the bottom of the NOTE: Install the locking casters on the front of oven down. the oven. Install the non-locking casters on the back of the oven. 2. -
Page 11: Double Section Assembly
Installation Oven Assembly DOUBLE SECTION ASSEMBLY 3. Attach the stacking brackets using the re- maining 5/16” bolts shipped with the ovens. NOTE: Old style ovens refer to units with painted ex- 4. Drill a clearance hole for a 5/16” bolt in the posed rear angle. -
Page 12: Ventilation
Blodgett oven, please contact Draft Diverter your local distributor. If you do not have a local dis- tributor, please call the Blodgett Oven Company at 0011-802-860-3700. WARNING: Failure to properly vent the oven can be... -
Page 13: Direct Flue Arrangement
Installation Ventilation DIRECT FLUE ARRANGEMENT Installing the draft hood When the installation of a mechanically driven ex- Ovens ordered for direct venting are supplied with haust hood is impractical the oven may be vented a draft hood. Install the draft hood as follows: by a direct flue arrangement. -
Page 14: Utility Connections
If you do not have a local dis- required, and have complied with all requirements tributor, please call the Blodgett Oven Company at of state or local authorities having jurisdiction. 0011-802-860-3700. -
Page 15: Gas Connection
Installation Gas Connection GAS PIPING Maximum Capacity of Iron Pipe in Cubic Feet of Natural Gas Per Hour A properly sized gas supply system is essential for (Pressure drop of 0.5 Inch W.C.) maximum oven performance. Piping should be sized to provide a supply of gas sufficient to meet Nominal Size, Inches Pipe the maximum demand of all appliances on the line... - Page 16 Installation Gas Connection PRESSURE REGULATION AND TESTING Max --- the maximum pressure at which the manufacturer warrants the oven’s operation. DFG-100-3 ovens are rated at 55,000 BTU/Hr. Each oven is supplied with a regulator to maintain (16.2 kW) (58 MJ) per section. DFG-200-L ovens the proper gas pressure.
- Page 17 If you have any questions regarding the prop- er installation and/or operation of your Blodgett oven, please contact your local distributor. If you do not have a local distributor, please call the Blodgett Oven Company at 0011-802-860-3700.
-
Page 18: Electrical Connection
6’ electric supply cord found at the rear of the grounded three prong receptacle. DO oven. NOT cut or remove the grounding prong from this plug. THE BLODGETT OVEN COMPANY CANNOT AS- SUME RESPONSIBILITY FOR LOSS OR DAMAGE SUFFERED AS A RESULT OF IMPROPER INSTAL- LATION. ELECTRICAL SPECIFICATIONS... -
Page 19: Initial Startup
Installation Initial Startup The following is a check-list to be completed by ADJUSTMENTS ASSOCIATED WITH INITIAL qualified personnel prior to turning on the INSTALLATION appliance for the first time. Each oven, and its component parts, have been Open the manual shut-off valve at the rear of thoroughly tested and inspected prior to ship- the oven. -
Page 20: Operation Safety Information
They are the key to the from the unit before removing the restraint successful operation of your Blodgett conveyor cable. Reconnect the restraint after the oven oven. has been returned to its original location.
Need help?
Do you have a question about the DFG-200 Series and is the answer not in the manual?
Questions and answers