Table of Contents
Advertisement
Quick Links
Advertisement
Table of Contents

Related Manuals for AEG BD741P


Summary of Contents for AEG BD741P
- Page 1 BD741P User Manual Oven BPE748380B BPK748380M GB6080P GB6080PT USER MANUAL...
-
Page 2: Table Of Contents
WELCOME TO AEG! THANK YOU FOR CHOOSING OUR APPLIANCE. In our drive to be sustainable, we are reducing paper assets and provide full user manuals online. Access your full user manual at aeg.com/manuals Get usage advice, brochures, trouble shooter, service and repair information at aeg.com/support CONTENTS 1. -
Page 3: Product Description
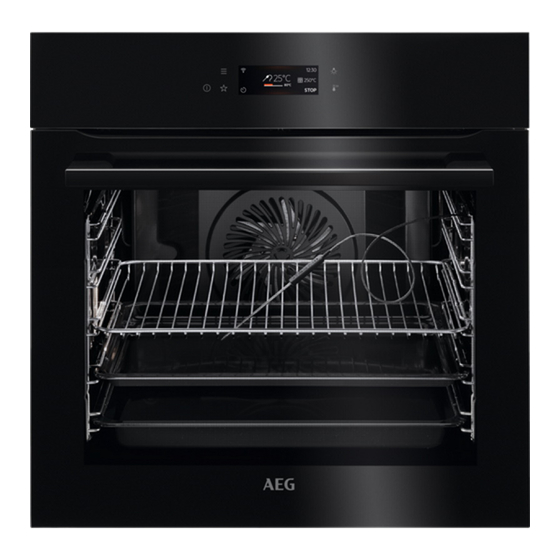
PRODUCT DESCRIPTION 1. PRODUCT DESCRIPTION 1.1 General overview Control panel Display Socket for the food sensor Heating element Lamp Shelf support, removable Shelf positions 2. HOW TO TURN OVEN ON AND OFF 2.1 Control panel ON / OFF Press and hold to turn the oven on and off. Menu Lists the oven functions. -
Page 4: Display
HOW TO TURN OVEN ON AND OFF Press Move Press and hold Touch the surface with finger‐ Slide fingertip over the sur‐ Touch the surface for 3 sec‐ tip. face. onds. 2.2 Display After turning on, the display shows the main 12:30 12:30 screen with the heating function and the default... -
Page 5: Before First Use
BEFORE FIRST USE To go one To confirm the selection / set‐ To undo the To turn the options on and level back in ting. last action. off. the menu. Sound alarm function indicators - when the set time of cooking ends, the signal sounds. The function is on. -
Page 6: Software Licences
BEFORE FIRST USE • Mobile device connected to your wireless network. Step 1 Download the mobile app My AEG Kitchen and follow the instructions for the next steps. Step 2 Turn on the oven. Step 3 Press: . Select: Settings / Connections. -
Page 7: Initial Preheating
DAILY USE 3.5 Initial preheating Preheat the empty oven before the first use. Step 1 Remove all accessories and removable shelf supports from the oven. Step 2 Set the maximum temperature for the function: Let the oven operate for 1 h. Step 3 Set the maximum temperature for the function: Let the oven operate for 15 min. -
Page 8: Heating Functions
DAILY USE Step 2 Press: Step 3 Press: . Enter: Assisted Cooking. Step 4 Choose a dish or a food type. Step 5 Press: 4.3 Heating functions STANDARD Heating function Application Grill: Toasting, grilling Turbo Grilling: Roasting meat, browning True Fan Cooking: Even baking, tenderness, drying Frozen Foods: French fries, potato wedges, spring rolls Conventional Cooking: Traditional baking Pizza Function: Baking pizza... -
Page 9: Notes On: Moist Fan Baking
CLOCK FUNCTIONS Heating function Application Dehydrating: Drying sliced fruit, mushrooms Plate Warming: Preheating plates Defrost: Defrosting Au Gratin: Making gratins, browning Slow Cooking: Preparing tender roast Keep Warm: Keeping food warm Moist Fan Baking: Baking 4.4 Notes on: Moist Fan Baking This function was used to comply with the energy efficiency class and ecodesign requirements according to EU 65/2014 and EU 66/2014. -
Page 10: How To Use: Accessories
HOW TO USE: ACCESSORIES Clock function Application Reminder To set a countdown. Maximum is 23 h 59 min. This function has no ef‐ fect on the operation of the oven. 6. HOW TO USE: ACCESSORIES 6.1 Food Sensor Food Sensor- measures the temperature inside the food. You can use it with every heating function. -
Page 11: Care And Cleaning
CARE AND CLEANING Step 8 Press: When food reaches the set temperature, the signal sounds. You can choose to stop or to continue cooking to make sure the food is well done. Step 9 Remove Food Sensor plug from the socket and remove the dish from the oven. WARNING! There is a risk of burns as Food Sensor becomes hot. -
Page 12: Troubleshooting
TROUBLESHOOTING CAUTION! If there are other appliances installed in the same cabinet, do not use them at the same time as this function. It can cause damage to the oven. Before the Pyrolytic Cleaning: Turn off the oven and wait Remove all accessories and Clean the oven floor and the in‐... -
Page 13: What To Do If
TROUBLESHOOTING 8.1 What to do if... The oven does not turn on or does not heat up Possible cause Remedy The oven is not connected to an electrical sup‐ Check if the oven is correctly connected to the ply or it is connected incorrectly. electrical supply. -
Page 14: How To Manage: Error Codes
TROUBLESHOOTING Problems with Wi-Fi signal Possible cause Remedy New router installed or router configuration To configure oven and mobile device again, re‐ changed. fer to "Before first use" chapter, Wireless con‐ nection. The wireless network signal is weak. Move router as close to the oven as possible. The wireless signal is disrupted by a micro‐... -
Page 15: Service Data
......... Product number (PNC) ......... Serial number (S.N.) ......... 9. ENERGY EFFICIENCY 9.1 Product Information and Product Information Sheet* Supplier's name BD741P 944188585 BPE748380B 944188489 Model identification BPK748380M 944188490 GB6080P 944188424 GB6080PT 944188540 Energy Efficiency Index 61.2 Energy efficiency class Energy consumption with a standard load, conventional 1.09 kWh/cycle... -
Page 16: Energy Saving
ENERGY EFFICIENCY Number of cavities Heat source Electricity Volume 71 l Type of oven Built-In Oven BD741P 34.5 kg BPE748380B 36.0 kg Mass BPK748380M 35.0 kg GB6080P 35.5 kg GB6080PT 35.5 kg * For European Union according to EU Regulations 65/2014 and 66/2014. -
Page 17: Menu Structure
MENU STRUCTURE Keep food warm Choose the lowest possible temperature setting to use residual heat and keep a meal warm. The residual heat indicator or temperature appears on the display. Cooking with the lamp off Turn off the lamp during cooking. Turn it on only when you need it. Moist Fan Baking Function designed to save energy during cooking. -
Page 18: Submenu For: Options
MENU STRUCTURE 10.3 Submenu for: Options Submenu Application Light Turns the lamp on and off. Child Lock Prevents accidental activation of the oven. When the option is on, the text "Child Lock" appears on the display when you turn on the oven. To enable the oven use, choose the code letters in the alphabetical order. -
Page 19: Submenu For: Setup
IT'S EASY! 10.5 Submenu for: Setup Submenu Description Language Sets the oven language. Display brightness Sets the display brightness. Key tones Turns the tone of the touch fields on and off. It is not possi‐ ble to mute the tone for: Buzzer volume Sets the volume of key tones and signals. -
Page 20: Environmental Concerns
IT'S EASY! Start using the oven Quick start Turn on the Step 1 Step 2 Step 3 oven and start cooking with the Press and hold: - select Press: default tempera‐ the preferred ture and time of function. the function. Quick Off Turn off the - press and hold until the oven turns off. - Page 21 21/24...
- Page 22 22/24...
- Page 23 23/24...
- Page 24 www.aeg.com/shop...
Need help?
Do you have a question about the BD741P and is the answer not in the manual?
Questions and answers