AEG BPE748380B User Manual
Hide thumbs
Also See for BPE748380B:
- User manual (356 pages) ,
- User manual (56 pages) ,
- User manual (24 pages)
Table of Contents
Advertisement
Quick Links
Advertisement
Table of Contents

Related Manuals for AEG BPE748380B


Summary of Contents for AEG BPE748380B
- Page 1 BPE748380B User Manual Oven BPE748380T USER MANUAL...
-
Page 2: Table Of Contents
FOR PERFECT RESULTS Thank you for choosing this AEG product. We have created it to give you impeccable performance for many years, with innovative technologies that help make life simpler – features you might not find on ordinary appliances. Please spend a few minutes reading to get the very best from it. - Page 3 My AEG Kitchen app ENGLISH...
-
Page 4: Safety Information
• Children should be supervised to ensure that they do not play with the appliance and mobile devices with My AEG Kitchen . • Keep all packaging away from children and dispose of it appropriately. - Page 5 • This appliance may be used in, offices, hotel guest rooms, bed & breakfast guest rooms, farm guest houses and other similar accommodation where such use does not exceed (average) domestic usage levels. • Only a qualified person must install this appliance and replace the cable.
-
Page 6: Safety Instructions
2. SAFETY INSTRUCTIONS 2.1 Installation Ventilation opening mini‐ 560x20 mm mum size. Opening placed WARNING! on the bottom rear side Only a qualified person must install this Mains supply cable length. 1500 mm appliance. Cable is placed in the right corner of the back side •... - Page 7 • The electrical installation must have an – do not put water directly into the hot isolation device which lets you disconnect appliance. the appliance from the mains at all poles. – do not keep moist dishes and food in The isolation device must have a contact the appliance after you finish the opening width of minimum 3 mm.
- Page 8 2.5 Pyrolytic cleaning all pyrolytic ovens and can be also a source for low level harmful fumes. WARNING! 2.6 Internal lighting Risk of Injury / Fires / Chemical Emissions (Fumes) in Pyrolytic Mode. WARNING! • Before carrying out the pyrolytic cleaning Risk of electric shock.
-
Page 9: Product Description
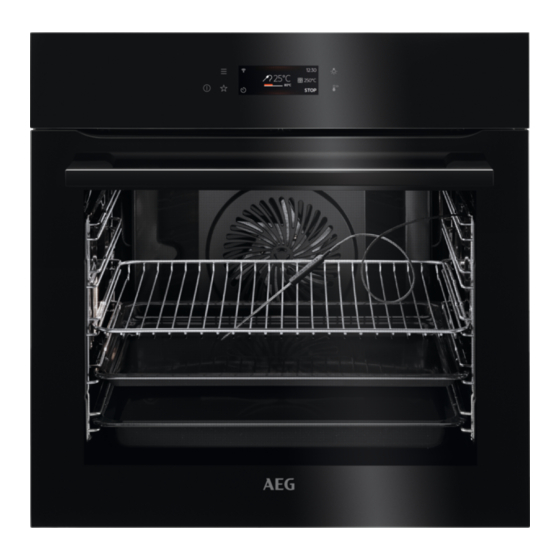
3. PRODUCT DESCRIPTION 3.1 General overview Control panel Display Socket for the food sensor Heating element Lamp Shelf support, removable Shelf positions 3.2 Accessories Wire shelf For cookware, cake tins, roasts. Baking tray For cakes and biscuits. Grill- / Roasting pan To bake and roast or as a pan to collect fat. -
Page 10: Control Panel
Food sensor To measure the temperature inside food. Telescopic runners For inserting and removing trays and wireshelf more easily. 4. CONTROL PANEL 4.1 Control panel overview ON / OFF Press and hold to turn the appliance on and off. Menu Lists the appliance functions. -
Page 11: Before First Use
4.2 Display Display with key functions set. Wi-Fi Time of day 12:30 START/STOP 150°C Temperature 85°C Heating functions Timer START 15min G. Food sensor (selected models only) Display indicators Basic indicators - to navigate on the display. To go one level To undo the last To confirm the selection / setting. - Page 12 Step 1 To download My AEG Kitchen app: Scan the QR code on the rating plate with the camera on your mobile device to be redirected to AEG Homepage. The rating plate is on the front frame of the ap‐...
-
Page 13: Daily Use
5.5 Initial preheating Preheat the empty oven before the first use. Step 1 Remove all accessories and removable shelf supports from the oven. Step 2 Set the maximum temperature for the function: Let the oven operate for 1 h. Step 3 Set the maximum temperature for the function: Let the oven operate for 15 min. - Page 14 Step 2 Press: Step 3 Press: . Enter: Assisted Cooking. Step 4 Choose a dish or a food type. Step 5 Press: 6.3 Heating functions STANDARD Heating function Application To grill thin pieces of food and to toast bread. Grill To roast large meat joints or poultry with bones on one shelf position.
- Page 15 SPECIALS Heating function Application To preserve vegetables (e.g., pickles). Preserving To dry sliced fruit, vegetables and mushrooms. Dehydrating To preheat plates for serving. Plate Warming To defrost food (vegetables and fruit). The defrosting time depends on the amount and size of the frozen food. Defrost For dishes such as lasagna or potato gratin.
-
Page 16: Clock Functions
7. CLOCK FUNCTIONS 7.1 Clock functions description Clock Application function Clock Application function Time exten‐ To extend cooking time. sion Cooking time To set the length of cooking. Maximum Reminder To set a countdown. Maximum is 23 h is 23 h 59 min. 59 min. -
Page 17: How To Use: Accessories
How to delay start of cooking Step 3 Set the cooking time. Step 4 Press: Step 5 Press: Delayed start. Step 6 Choose the value. Step 7 Press: . Repeat the action until the display shows the main screen. How to extend cooking time When 10% of cooking time is left and the food seems not to be ready, you can extend cooking time. - Page 18 Baking tray / Deep pan: Push the tray between the guide bars of the shelf support. 8.2 Food Sensor Food Sensor - measures the temperature inside the food. You can use it with every heating function. There are two temperatures to be set: The oven temperature: minimum 120 °C.
-
Page 19: Additional Functions
Step 4 Plug Food Sensor into the socket at the front of the oven. The display shows the current temperature of: Food Sensor. Step 5 - press to set the core temperature of the sensor. Step 6 - press to set the preferred option: •... -
Page 20: Hints And Tips
Step 5 Press + to add the setting to the list of: Favourites. Press - press to reset the setting. - press to cancel the setting. 9.2 Function lock This function prevents an accidental change of the heating function. Step 1 Turn on the appliance. - Page 21 10.2 Moist Fan Baking For the best results follow suggestions listed in the table below. (°C) (min) Sweet rolls, 16 baking tray or dripping pan 25 - 35 pieces Swiss Roll baking tray or dripping pan 15 - 25 Whole fish, 0.2 kg baking tray or dripping pan 15 - 25 Cookies, 16 pieces...
- Page 22 Baking on one level - baking in tins °C Fatless sponge cake True Fan Cooking 45 - 60 Fatless sponge cake Conventional Cooking 45 - 60 Apple pie, 2 tins Ø20 cm True Fan Cooking 55 - 65 Apple pie, 2 tins Ø20 cm Conventional Cooking 55 - 65 Short bread...
-
Page 23: Care And Cleaning
11. CARE AND CLEANING WARNING! Refer to Safety chapters. 11.1 Notes on cleaning Clean the front of the appliance only with a microfibre cloth with warm water and a mild de‐ tergent. Use a cleaning solution to clean metal surfaces. Clean stains with a mild detergent. - Page 24 11.3 How to use: Pyrolytic Cleaning CAUTION! Clean the oven with Pyrolytic Cleaning. If there are other appliances installed in the same cabinet, do not use them at the WARNING! same time as this function. It can cause There is a risk of burns. damage to the oven.
- Page 25 Step 1 Fully open the door. Step 2 Lift and press the clamping levers (A) on the two door hinges. Step 3 Close the oven door to the first opening position (approximately 70° angle). Hold the door at both sides and pull it away from the oven at an upwards angle. Put the door with the outer side down on a soft cloth on a stable surface.
-
Page 26: Troubleshooting
Top lamp Step 1 Turn the glass cover to remove it. Step 2 Clean the glass cover. Step 3 Replace the lamp with a suitable 300 °C heat-resistant lamp. Step 4 Install the glass cover. Side lamp Step 1 Remove the left shelf support to get ac‐ cess to the lamp. - Page 27 12.1 What to do if... The appliance does not turn on or does not heat up Possible cause Remedy The appliance is not connected to an electrical supply Check if the appliance is correctly connected to the or it is connected incorrectly. electrical supply.
- Page 28 12.2 How to manage: Error codes When the software error occurs, the display shows error message. In this section, you will find the list of the problems that you can handle on your own. Code and description Remedy C2 - the Food sensor is in the appliance cavity during Take out the Food sensor.
-
Page 29: Energy Efficiency
13. ENERGY EFFICIENCY 13.1 Product Information and Product Information Sheet Supplier's name BPE748380B 944188800 Model identification BPE748380T 944188815 Energy Efficiency Index 61.2 Energy efficiency class Energy consumption with a standard load, conventional mode 1.09 kWh/cycle Energy consumption with a standard load, fan-forced mode 0.52 kWh/cycle... -
Page 30: Menu Structure
Cooking with the lamp off When you use this function the lamp Turn off the lamp during cooking. Turn it on automatically turns off after 30 sec. You may only when you need it. turn on the lamp again but this action will reduce the expected energy savings. -
Page 31: S Easy
Submenu Application Digital clock style Changes the format of the displayed time indication. 14.4 Submenu for: Connections Submenu Description Wi-Fi To enable and disable: Wi-Fi. Remote operation To enable and disable remote control. Option visible only after you turn on: Wi-Fi. Auto remote operation To start remote operation automatically after pressing START. -
Page 32: Environmental Concerns
Familiarize yourself with the basic icons on the control panel and the display: ON / OFF Menu Favourites Timer Food sensor Start using the appliance Quick start Turn on the appli‐ Step 1 Step 2 Step 3 ance and start cook‐ ing with the default Press and hold: - select the... - Page 36 www.aeg.com/shop...
Need help?
Do you have a question about the BPE748380B and is the answer not in the manual?
Questions and answers