Vornado 133, 533, 633, 683, 753 - Whole Room Circulator Manual
- Instructions manual (14 pages) ,
- Owner's manual (152 pages) ,
- Owner's manual (28 pages)
Advertisement
SAFETY INSTRUCTIONS

INTENDED USE: This product is intended to circulate the air in indoor living spaces only in the United States. This product (model 683) is intended for floor use only. This product is not intended for commercial or industrial use. The manufacturer assumes no responsibility for damage or injury due to unauthorized use or product modification. Failure to follow these directions will void the product warranty.

Risk to Children and Impaired Persons
Supervision is required during the installation, operation, cleaning and maintenance of this product by children 12 years of age and younger and anyone with reduced physical, sensory or mental capabilities. Children should be supervised to ensure that they do not play with the appliance, its parts and packaging material.
INSTALLATION WARNING

To reduce risk of fire, electrical shock and injury to persons, observe the following:
- Place this product away from curtains, draperies, tablecloths and other fabrics, since they may be drawn into the product, damage the motor and/or cause a fire.
- No part of this product (the appliance, power cord, plug, packaging, etc.) should be placed near furnaces, fireplaces, stoves or other high temperature heat sources. Do not use this product in a window, on an uneven or unstable surface, or near water.
- The appliance, power supply, power cord and plug cannot come into contact with water. Do not use this product on wet surfaces. Do not use this product in a bathtub or shower or position product where it may fall into a bathtub, laundry, swimming pool or other water container. Do not use this product outdoors or expose it to weather or elements.
- Do not run cord under carpeting. Do not cover cord with throw rugs, runners, or similar coverings. Do not route cord under furniture or appliances. Arrange cord away from traffic area and where it will not be tripped over. The cord should not hang over edges of counters or be placed where it can be crimped or closed in doors. Place appliance near an easily accessible outlet so the product can be unplugged quickly during an emergency.
SAFE USE WARNING
To reduce risk of fire, electrical shock and injury to persons, observe the following:
![]()
To reduce likelihood of circuit overload, fire and electric shock, do not operate with a solid state speed device, such as a dimmer control switch.- Do not operate any fan with a damaged cord or plug. Discard fan or return to an authorized service facility for examination and/or repair.
- Do not operate unit if the unit has been dropped or damaged. Do not use this product if it has a damaged power cord or plug. To avoid risk of electrical shock, do not attempt to repair or replace parts. Only original replacement parts may be used. If the power cord is damaged, it must be replaced by the manufacturer, its service agent, or similarly qualified persons in order to avoid a hazard. Contact Vornado Consumer Service at 1-800-234-0604 (phone) or consumerservice@vornado.com (email) for further instructions about replacement and repair.
- Before plugging power cord into electrical outlet, be sure that all electrical information on the rating label, including voltage, is compatible with your outlet's power supply.
- Do not sit or stand on product.
- Never use the cord as a handle or otherwise yank, strain or stretch the power cord.
- While the product is plugged in, do not insert or allow foreign objects to enter any input or output opening as this may cause risk of electric shock or fire, or damage the product.
- A loose fit between wall outlet (receptacle) and plug may cause overheating and distortion of the plug. Discontinue use of the product in this outlet. Contact a qualified electrician to replace loose or worn outlets.
- This appliance has a polarized plug (one blade is wider than the other.) To reduce the risk of electric shock, this plug is intended to fit in a polarized outlet only one way. If the plug does not fit fully in the outlet, reverse the plug. If it still does not fit, contact a qualified electrician. Do not attempt to defeat this safety feature.
- Before moving, repositioning, servicing, cleaning and when not in use, use the product controls to turn off the power and then unplug. To disconnect from outlet, grasp and pull only the plug. Also, power off and unplug if the product will be left unattended for an extended period of time or during electrical storms.
SERVICING WARNING
To reduce risk of fire, electrical shock and injury to persons, observe the following:
- Clean your product regularly, only as is instructed in this manual.
Prior to cleaning, turn off the power on your product and unplug. Do not use gasoline, thinners, solvents, ammonias or other chemicals for cleaning. Refer to the CLEANING instructions provided. - Do not open appliance housing while product is plugged in. To avoid risk of shock, all service and/or repairs must be done by a Vornado Authorized Service Center.
- This product employs overload protection (fuse). A blown fuse indicates an overload or short-circuit situation. If the fuse blows, unplug the product from the outlet. Replace the fuse as per the user servicing instructions (follow product marking for proper fuse rating) and check the product. If the replacement fuse blows, a short-circuit may be present and the product should be discarded or returned to an authorized service facility for examination and/or repair.
User Servicing Instructions
- Using the product controls, turn off the appliance.
- Grasp the plug (not the cord) and disconnect from the outlet.
- Risk of Fire. Replace fuse only with 2.5 Amp, 125 Volt fuse as approved by Vornado Consumer Service. For an authorized replacement fuse, please contact Vornado Consumer Service.
- Once the replacement is received, use a small flat-head screwdriver to slide open the fuse cover (located on the plug) (See next page, Fig. A).
![]()
- Remove fuse by using the screwdriver to gently lift each end of the fuse (See next page, Fig. B).
![]()
- Install the replacement fuse by using the screwdriver to gently push each metal end of the fuse into the receptacle one at a time. Do not push on the center of the fuse—it is fragile and may break.
- Slide the fuse cover closed using the screwdriver. When closed, the cover should fit completely in the plug. No part of the cover should stick out (See next page, Fig. C).
![]()
- Plug your appliance into the outlet and turn the power on.
- If the replacement fuse blows, a short-circuit may be present and the product should be discarded or returned to an authorized service facility for examination and/or repair.


- Risk of fire. Do not replace attachment plug. Contains a safety device (fuse, AFCI, LCDI) that should not be removed. Discard product if the attachment plug is damaged.
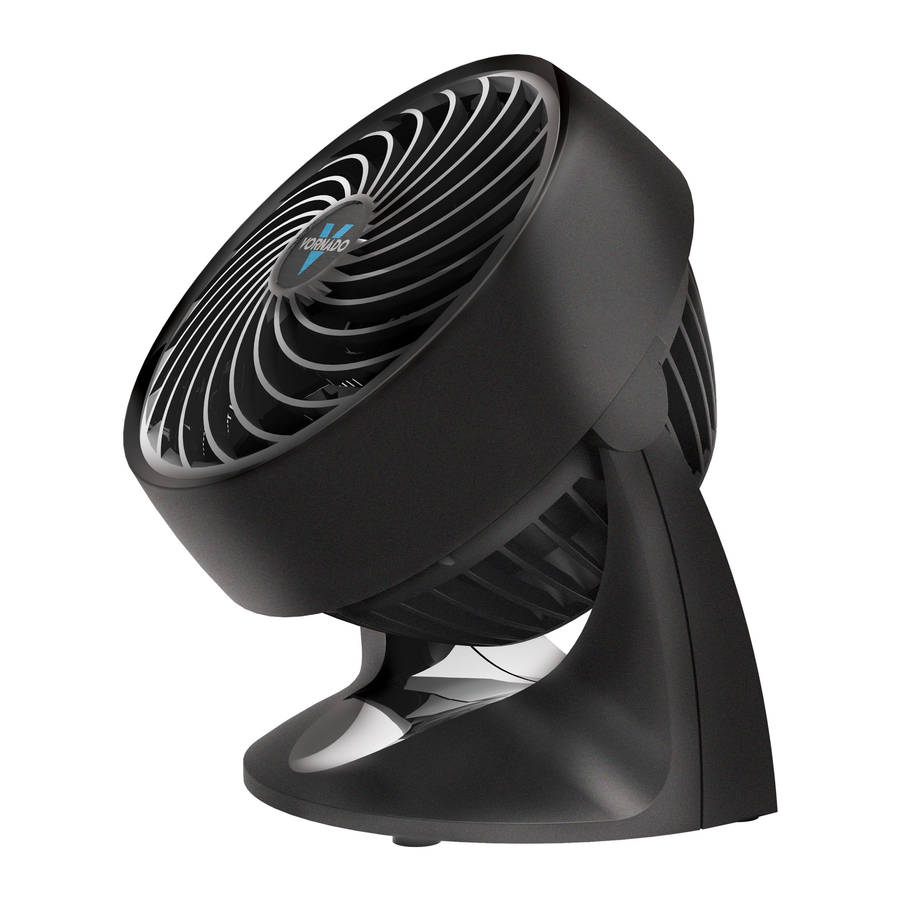
FEATURES
![]() Save energy by maximizing the performance of heating and cooling systems. When you use a Vornado Air Circulator, you will not have to set your summertime thermostat as low or your wintertime thermostat as high.
Save energy by maximizing the performance of heating and cooling systems. When you use a Vornado Air Circulator, you will not have to set your summertime thermostat as low or your wintertime thermostat as high.


DIRECTABLE AIRFLOW
Direct the airflow where you want it.
FINGER FRIENDLY DESIGN
Resists curious fingers.
REMOVABLE GRILLE
For easy cleaning.
AIR INLETS
Signature inlets and powerful motor to move more air.
MULTIPLE SPEEDS
Speed setting for every comfort level.
SILICONE FEET
Non-marking feet added for stability.
Choking Hazard. Keep small parts like silicone feet away from children and pets.
STAND ASSEMBLY & ADJUSTMENT
(MODEL 683) No tools required.
STAND ASSEMBLY

- Insert power cord (A) into the top of Pole and pull through the bottom.
- Push the Circulator Head into the Pole. Push until the Lock Release Button (B) snaps through the Hole (C).
- Remove the Fastening Nut (D) secured on the underside of the base. Rotate Fastening Nut counter-clockwise to remove.
- Assemble Legs onto the base of Pole by pushing each Leg onto the grooves (E). Replace Fastening Nut (D) by rotating clockwise to secure all the Legs in place.
HEIGHT ADJUSTMENT
(32 - 38 INCHES)

- Support the Circulator Head (A) with one hand. Use your other hand to loosen the Adjustment Collar (B) by gently rotating it counter-clockwise.
- Slowly raise or lower the Pole to the desired height and secure into position by rotating the Adjustment Collar clockwise until tight.
Note: Before adjusting the height or rotating the head, check that the power cord is not tangled and able to move freely.
After adjusting height, ensure that the Adjustment Collar is fully tightened and engaged to ensure Circulator Head does not rotate and bind power cord.
CLEANING
GRILLE REMOVAL
(MODEL 133)
Screwdriver required. 
To reduce the risk of electrical shock and injury to persons, unplug the circulator before removing grille.
- Remove the 4 screws located on the back of the inlet grille, at roughly 2, 5, 7 and 10 o'clock positions, to release the Front Grille.

- Dust or wash Front Grille with a mild dishwashing soap. Do not place grille in the dishwasher. The excessive heat can distort the plastic.
- To reattach - position the Front Grille so the Vornado logo in the center of the Front Grille is straight. Replace all the screws.

![]() Use the brush attachment on your household vacuum cleaner to vacuum any accumulated dust off the Front Grille and Air Inlets.
Use the brush attachment on your household vacuum cleaner to vacuum any accumulated dust off the Front Grille and Air Inlets.
(MODELS 533, 633, 683, 753)
Screwdriver required. 
To reduce the risk of electrical shock and injury to persons, unplug the circulator before removing grille.
- Remove the 3 screws located in between the ribs of the inlet grille at roughly 10, 2, and 6 o'clock positions. Screw locations are also indicated with an arrow* (
![]() ) on the circulator. Do Not remove the 2 screws on the pivot arms. Release the Front Grille Clips located at the 2, 5, 7 and 10 o'clock positions.
) on the circulator. Do Not remove the 2 screws on the pivot arms. Release the Front Grille Clips located at the 2, 5, 7 and 10 o'clock positions.

Note: The motor is permanently lubricated and requires no oiling.
*Model 753 does not have arrow indicators. - Dust or wash Front Grille with a mild dishwashing soap. Do not place grille in the dishwasher. The excessive heat can distort the plastic.
- To reattach - align the Front Grille Clips with the holes and firmly snap each clip back into place. Replace all the screws.
 ) on the circulator. Do Not remove the 2 screws on the pivot arms. Release the Front Grille Clips located at the 2, 5, 7 and 10 o'clock positions.
![]() Use the brush attachment on your household vacuum cleaner to vacuum any accumulated dust off the Front Grille and Air Inlets.
Use the brush attachment on your household vacuum cleaner to vacuum any accumulated dust off the Front Grille and Air Inlets.
BLADE REMOVAL
Pliers required. 
To reduce the risk of electrical shock and injury to persons, unplug the circulator before removing blade.
- First, remove the nut from the shaft by turning the nut clockwise to loosen. Pull the blade straight out from the shaft.

- Wipe the Blade with a damp cloth. If your circulator is used in a greasy environment, such as a kitchen, mild soap or a common household cleaner may be necessary. Do not use solvents. Do not place blade in the dishwasher. The excessive heat can distort the plastic.
- To reattach - be certain the flat side of the shaft aligns directly with the corresponding flat side on the blade's socket. Push the blade all the way on the shaft until it bottoms out. Do not use a hammer as this could result in bearing damage. Reinstall nut.

TROUBLESHOOTING
| PROBLEM | POSSIBLE CAUSE AND SOLUTION |
| The unit fails to power on. | Unit is not plugged in. Plug Power Cord into electrical outlet. Ensure unit fan speed setting is selected. Plug fuse has blown. Replace fuse (See USER SERVICING INSTRUCTIONS). Unit is damaged or in need of repair. Cease usage and unplug. Contact Consumer Service for assistance. The outlet is worn or damaged. Try another outlet or contact a qualified electrician. |
| Airflow is weak or slow. | Unit set to a low speed setting. Adjust to a higher speed setting. Airflow is blocked. Remove obstruction. Adjust direction of airflow towards the user. |
| GFCI has tripped. | Under certain conditions, it is possible for a reset GFCI (Ground Fault Circuit Interrupter) outlet to trip when the user is changing speeds on a Vornado circulator. In this event, change to an outlet that is not connected to a GFCI device. It could also indicate a weak or defective GFCI outlet. Contact a qualified electrician to check the GFCI outlet. |
vornado.com
800-234-0604
help@vornado.com

Documents / Resources
References
Download manual
Here you can download full pdf version of manual, it may contain additional safety instructions, warranty information, FCC rules, etc.
Download Vornado 133, 533, 633, 683, 753 - Whole Room Circulator Manual
Advertisement


Need help?
Do you have a question about the 133 and is the answer not in the manual?
Questions and answers