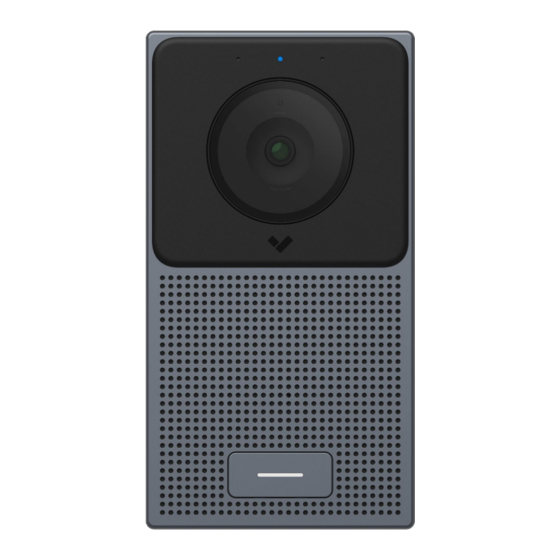
Summary of Contents for Verkada TD52
- Page 1 Install Guide TD52 Video Intercom Verkada Inc. 405 E 4th Ave, San Mateo, CA 94401 All specifications are subject to change without notice sales@verkada.com Copyright © 2022 Verkada Inc. All rights reserved.
-
Page 2: Document Details
Note: Video, audio, and intercom performance were not evaluated by UL. Additionally, PoE+ functionality (extended temperature range) was not evaluated by UL. Verkada Inc. 405 E 4th Ave, San Mateo, CA 94401 All specifications are subject to change without notice sales@verkada.com... -
Page 3: Technical Specifications
Flush mount plate (included), surface mount box (separate accessory), angle mount box Mounting Options (separate accessory), trim plate (separate accessory), rain hood (separate accessory) Verkada Inc. 405 E 4th Ave, San Mateo, CA 94401 All specifications are subject to change without notice sales@verkada.com... - Page 4 After connecting the TD52 to network and power, visit: verkada.com/start For detailed installation instructions, visit: verkada.com/support Verkada Inc. 405 E 4th Ave, San Mateo, CA 94401 All specifications are subject to change without notice sales@verkada.com Copyright © 2022 Verkada Inc. All rights reserved.
- Page 5 Solid Blue Intercom is managing doors and connected to the server. Flashing Pink Identify. Verkada Inc. 405 E 4th Ave, San Mateo, CA 94401 All specifications are subject to change without notice sales@verkada.com Copyright © 2022 Verkada Inc. All rights reserved.
- Page 6 Intercom can connect to Twillio’s server and register with SIP Intercom has all required ports enabled Intercom has a valid receiver and is ready to make a call Verkada Inc. 405 E 4th Ave, San Mateo, CA 94401 All specifications are subject to change without notice sales@verkada.com...
- Page 7 Ethernet port located in the cable bay on the back of the device. Serial Number Verkada Inc. 405 E 4th Ave, San Mateo, CA 94401 All specifications are subject to change without notice sales@verkada.com Copyright © 2022 Verkada Inc. All rights reserved.
- Page 8 Please note: The supplied screws are intended to cover most possible install cases. Be sure to use the best screws for your specific job. Verkada Inc. 405 E 4th Ave, San Mateo, CA 94401 All specifications are subject to change without notice sales@verkada.com...
- Page 9 T10 Torx Security screws on the cable bay door to access the ethernet and I/O ports. Verkada Inc. 405 E 4th Ave, San Mateo, CA 94401 All specifications are subject to change without notice sales@verkada.com Copyright © 2022 Verkada Inc. All rights reserved.
- Page 10 Remove the grommet punch and Insert the RJ-45 ethernet cable into the PoE port. Verkada Inc. 405 E 4th Ave, San Mateo, CA 94401 All specifications are subject to change without notice sales@verkada.com...
- Page 11 Pin 8 Pin 9 Pin 10 IN 1 IN 2 Output RS-485 Input Verkada Inc. 405 E 4th Ave, San Mateo, CA 94401 All specifications are subject to change without notice sales@verkada.com Copyright © 2022 Verkada Inc. All rights reserved.
- Page 12 Secure the cable bay doors by tightening the four T10 Torx Security screws at each corner. Verkada Inc. 405 E 4th Ave, San Mateo, CA 94401 All specifications are subject to change without notice sales@verkada.com Copyright © 2022 Verkada Inc. All rights reserved.
- Page 13 Attach the device to the mount plate to the wall using the four provided machine screws. Verkada Inc. 405 E 4th Ave, San Mateo, CA 94401 All specifications are subject to change without notice sales@verkada.com Copyright © 2022 Verkada Inc. All rights reserved.
- Page 14 Tighten the two T10 Torx Security screws on the bottom edge of the device. Verkada Inc. 405 E 4th Ave, San Mateo, CA 94401 All specifications are subject to change without notice sales@verkada.com Copyright © 2022 Verkada Inc. All rights reserved.
-
Page 15: Wiring Instruction
Wiring Instruction Reader The TD52 is rated to power Verkada readers at 12V and 250mA via the (+) and (-) connection. It is recommended that the drain wire be connected to earth ground at the reader side. Note: 12V power should not to be used to power other peripheral devices, as it has latch-off current limiting. - Page 16 Wiring Instruction Output The TD52 has one dry form C relay output, which can be configured as an access controller by connecting an access power controller to the output terminal as detailed below. The output relay can also be used as a general purpose output. For fail safe locks, + should be connected to NC to be locked by default.
- Page 17 (1) le dispositif ne doit pas produire de brouillage préjudiciable, et (2) ce dispositif doit accepter tout brouillage reçu, y compris un brouillage susceptible de provoquer un fonctionnement indésirable. Verkada Inc. 405 E 4th Ave, San Mateo, CA 94401 All specifications are subject to change without notice sales@verkada.com...
- Page 18 Appendix Support Thank you for purchasing this Verkada product. If for any reason you're experiencing issues or need assistance, please contact our 24/7 Technical Support Team immediately. Sincerely, The Verkada Team verkada.com/support Verkada Inc. 405 E 4th Ave, San Mateo, CA 94401 All specifications are subject to change without notice sales@verkada.com...


Need help?
Do you have a question about the TD52 and is the answer not in the manual?
Questions and answers