NEC MultiSync FE991SB User Manual
Hide thumbs
Also See for MultiSync FE991SB:
- User manual (50 pages) ,
- Manual (17 pages) ,
- Specifications (4 pages)
Table of Contents
Advertisement
Quick Links
Advertisement
Table of Contents

Related Manuals for NEC MultiSync FE991SB


Summary of Contents for NEC MultiSync FE991SB
- Page 1 MultiSync FE791 /FE991 User’s Manual...
-
Page 2: Declaration Of The Manufacturer
686-1, Nishioi Oi-Machi Ashigarakami-gun Kanagawa 258-8533, Japan Product NERGY As an E Partner, NEC-Mitsubishi Electronics Display of America, Inc. has determined that this NERGY product meets the E guidelines for energy efficiency. The E emblem does not represent NERGY NERGY EPA endorsement of any product or service. - Page 3 WARNING TO PREVENT FIRE OR SHOCK HAZARDS, DO NOT EXPOSE THIS UNIT TO RAIN OR MOISTURE. ALSO, DO NOT USE THIS UNIT'S POLARIZED PLUG WITH AN EXTENSION CORD RECEPTACLE OR OTHER OUTLETS UNLESS THE PRONGS CAN BE FULLY INSERTED. EFRAIN FROM OPENING THE CABINET AS THERE ARE HIGH VOLTAGE COMPONENTS INSIDE. REFER SERVICING TO QUALIFIED SERVICE PERSONNEL.
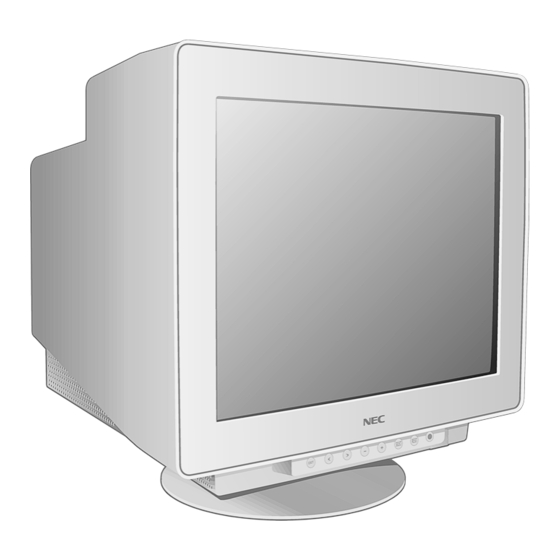
- Page 4 Contents Your new MultiSync FE monitor box* should contain the following: • MultiSync FE Monitor with tilt/swivel base • Power Cord • Captive Signal Cable • User’s Manual • Sales Office List • CD ROM with Setup Software, complete User’s Manual and other helpful files. To see the User’s Manual, Acrobat Reader 4.0 must be installed on your PC.
-
Page 5: Quick Start
Quick Start To attach the MultiSync FE monitor to your system, follow these instructions: 1. Turn off the power to your computer. 2. If necessary, install the display card into your system. For more information, refer to the display card manual. - Page 6 Quick Start – continued Power Outlet Power Cord Figure C.1 Power Button Figure D.1 6 User’s Manual...
-
Page 7: Brightness/Contrast Controls
Controls OSM (On-Screen Manager) control buttons on the front of the monitor function as follows: s t i s t i g i l g i l f e l r / t f e l r / t . s l –... -
Page 8: Geometry Controls
Controls – continued Color Control System Colour presets selects the desired colour setting. The bar is replaced by the colour setting choice. Each colour setting is adjusted at the factory to the stated Kelvin. If a setting is adjusted, the name of the setting will change from Kelvin to Custom except sRGB mode. - Page 9 Controls – continued Tools 2 Language: OSM controls menus are available in 6 languages. OSM Position: You can choose where you would like the OSM controls menu to appear on your screen. Selecting OSM Position allows you to manually adjust the OSM controls menu position from among Center, Top left, Top right, Bottom left and Bottom right.
-
Page 10: Recommended Use
Recommended Use Safety Precautions and Maintenance FOR OPTIMUM PERFORMANCE, PLEASE NOTE THE FOLLOWING WHEN SETTING UP AND USING THE MULTISYNC FE COLOUR MONITOR: • DO NOT OPEN THE MONITOR. There are no user serviceable parts inside and opening or removing covers may expose you to dangerous shock hazards or other risks. - Page 11 Recommended Use – continued CORRECT PLACEMENT AND ADJUSTMENT OF THE MONITOR CAN REDUCE EYE, SHOULDER AND NECK FATIGUE. CHECK THE FOLLOWING WHEN YOU POSITION THE MONITOR: • Adjust the monitor height so that the top of the screen is at or slightly below eye level.
-
Page 12: Specifications
Specifications : l a ° 0 e l f e l l c t i e l l - i t l - i t c i t t n i i t i i t a c i t i t i i t a i t i... - Page 13 Specifications – continued : l a ° 0 e l f e l l c t i e l l - i t l i t n c i t t n i i t i i t a c i t i t i i t a i t i...
- Page 14 Features SuperBright Diamondtron CRT: This patented flat aperture grille CRT delivers an exceptional viewing experi- ence with unprecedented brightness and contrast and a virtually flat image that reduces distortion and glare so that what you see on-screen is what you get on your printed output. The state-of-the-art Mitsubishi PX-DBF electron gun and tight 0.25 mm grille pitch delivers precise focus for crisp, clear text and images.
-
Page 15: Troubleshooting
Troubleshooting No picture • Display card should be completely seated in its slot. • Power Button and computer power switch should be in the ON position. • Signal cable should be completely connected to display card/computer. • Check connector for bent or pushed-in pins. Image is scrolling or unstable •... -
Page 16: Why Do We Have Environmentally Labelled Computers
TCO’99 MultiSync FE791 / FE991 Congratulations! You have just purchased a TCO’99 approved and labeled product! Your choice has provided you with a product developed for professional use. Your purchase has also contributed to reducing the burden on the environment and also to the further develop- ment of environmentally adapted electronics products. - Page 17 TCO’99 – continued TCO’99 demand requires that plastic components weighing more than 25 grams must not contain flame retar- dants with organically bound chlorine and bromine. Flame retardants are allowed in the printed circuit boards since no substitutes are available. Lead** Lead can be found in picture tubes, display screens, solders and capacitors.
Need help?
Do you have a question about the MultiSync FE991SB and is the answer not in the manual?
Questions and answers