Table of Contents
Advertisement
Quick Links
Instruction Manual For Induction Hob
Επα
Návod k použití pro induk ní varnou desku
Instrukcja u ytkowania indukcyjnej p yty
grzejnej
Indukciós főzőlap felhasználói kézikönyv
Thank you for purchasing the CANDY induction hob. Please read this instruction manual
carefully before using the hob and keep it in a safe place for future reference.
/
Ε
α
/
α
α
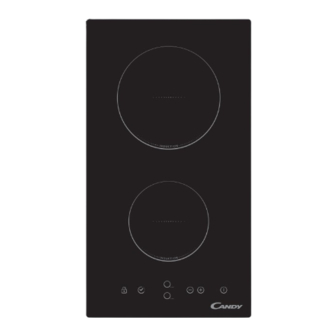
CDI 3 0
ENGLISH
UK
BULGARIA
GREECE
RUSSIAN
CECK
POLISH
MAGYAR
Advertisement
Table of Contents

Related Manuals for Candy CDI 30


Summary of Contents for Candy CDI 30
- Page 1 Instrukcja u ytkowania indukcyjnej p yty POLISH grzejnej MAGYAR Indukciós főzőlap felhasználói kézikönyv CDI 3 0 Thank you for purchasing the CANDY induction hob. Please read this instruction manual carefully before using the hob and keep it in a safe place for future reference.
-
Page 2: Safety Warnings
By placing the CE mark on this product, we are confirming compliance to all relevant European safety, health and environmental requirements which are applicable in legislation for this product. Safety Warnings Your safety is important to us. Please read this information before using your hob. - Page 3 • Switch the hob off at the wall before cleaning or maintenance. • Failure to follow this advice may result in electrical shock or death. • This appliance complies with electromagnetic safety standards. Health Hazard • However, persons with cardiac pacemakers or other electrical implants (such as insulin pumps) must consult with their doctor or implant manufacturer before using this appliance to make sure that their implants will not be affected by the electromagnetic...
- Page 4 • Do not allow children to play with the appliance or sit, stand, or • Do not store items of interest to children in cabinets above the climb on it. appliance. Children climbing on the cooktop could be seriously • Do not leave children alone or unattended in the area where the injured.
-
Page 5: Product Overview
Congratulations on the purchase of your new Induction Hob. We recommend that you spend some time to read this Instruction / Installation Manual in order to fully understand how to install correctly and operate it. For installation, please read the installation section. Read all the safety instructions carefully before use and keep this Instruction / Installation Mnual for future reference. -
Page 6: A Word On Induction Cooking
A Word on Induction Cooking Induction cooking is a safe, advanced, efficient, and economical cooking technology. It works by electromagnetic vibrations generating heat directly in the pan, rather than indirectly through heating the glass surface. The glass becomes hot only because the pan eventually warms it up. iron pot magnetic circuit ceramic glass plate... -
Page 7: Choosing The Right Cookware
Choosing the right Cookware • Only use cookware with a base suitable for induction cooking. Look for the induction symbol on the packaging or on the bottom of the pan. • You can check whether your cookware is suitable by carrying out a magnet test. -
Page 8: Using Your Induction Hob
Using your Induction Hob To start cooking 1. Touch the ON/OFF control. After power on, the buzzer beeps once, all displays show “ – “ or “ – – “, indicating that the induction hob has entered the state of standby mode. 2. - Page 9 If the display flashes alternately with the heat setting This means that: • you have not placed a pan on the correct cooking zone or, • the pan you‟re using is not suitable for induction cooking or, • the pan is too small or not properly centered on the cooking zone. No heating takes place unless there is a suitable pan on the cooking zone.
-
Page 10: Locking The Controls
4. Beware of hot surfaces H will show which cooking zone is hot to touch. It will disappear when the surface has cooled down to a safe temperature. It can also be used as an energy saving function if you want to heat further pans, use the hotplate that is still hot. -
Page 11: Auto Shutdown Protection
Auto Shutdown Protection Auto shut down is a safety protection function for your induction hob. It shuts down automatically if ever you forget to turn off your cooking. The default working times for various power levels are shown in the below table: Power level Default working timer (hour) When the pot is removed, the induction hob stops heating immediately and the... -
Page 12: Setting The Timer To Turn One Cooking Zone Off
3. Set the time by touching the “-“ or “+” control of the timer. Hint: Touch the “-“ or “+” control of the timer once to decrease or increase by 1 minute. Hold the “-“ or “+” control of the timer to decrease or increase by 10 minutes. If the setting time exceeds 99 minutes, the timer will automatically return to 00 minute. - Page 13 2. Touch timer control, the minder indicator starts flashing and “10” is shown in the timer display. 3. Set the time by touching the”-“ or”+” control of the timer. Hint: Touch either the “-“ or “+” control of the timer once, time decreases or increases by 1 minute.
-
Page 14: Cooking Guidelines
6. When cooking timer expires, the corresponding cooking zone will be switched off automatically. Other cooking zone will keep operating if they are turned on previously. Cooking Guidelines Take care when frying as the oil and fat heat up very quickly, particularly you‟re using... -
Page 15: Heat Settings
hot pan and then lower the meat onto the hot pan. 4. Turn the steak only once during cooking. The exact cooking time will depend on the thickness of the steak and how cooked you want it. Times may vary from about 2 –... -
Page 16: Care And Cleaning
• searing • bringing soup to the boil • boiling water Care and Cleaning The settings below are guidelines only. The exact setting will depend on several factors, including your cookware and the amount you are cooking. Experiment with the hob to find the settings that best suit you. What? How? Important! -
Page 17: Hints And Tips
4. Wipe the area completely with a paper towel. 5. Switch the power to the cooktop back on. Hints and Tips Problem Possible causes What to do The induction hob No power. Make sure the induction hob is cannot be turned on. connected to the power supply and that it is switched on. -
Page 18: Failure Display And Inspection
Fan noise coming A cooling fan built into your This is normal and needs no action. from the induction induction hob has come on to Do not switch the power to the hob. prevent the electronics from induction hob off at the wall while overheating. -
Page 19: Technical Specification
The above are the judgment and inspection of common failures. Please do not disassemble the unit by yourself to avoid any danger and damages to the induction hob. Technical Specification Cooking Hob CDI 30 Cooking Zones 2 Zones Supply Voltage 220-240V~ 50/60Hz... - Page 20 A(mm) B(mm) C(mm) D(mm) E(mm) F(mm) 268+4 500+4 50 mini 50 mini 50 mini 50mini Under any circumstances, make sure the Induction cooker hob is well ventilated and the air inlet and outlet are not blocked. Ensure the Induction cooker hob is in good work state.
-
Page 21: Before Locating The Fixing Brackets
contact separation in all poles (or in all active [phase] conductors if the local wiring rules allow for this variation of the requirements). • the isolating switch will be easily accessible to the customer with the hob installed. • you consult local building authorities and by-laws if in doubt regarding installation. -
Page 22: Connecting The Hob To The Mains Power Supply
2. The hob will not be installed directly above a dishwasher, fridge, freezer, washing machine or clothes dryer, as the humidity may damage the hob electronics. 3. The induction hotplate shall be installed such that better heat radiation can be ensured to enhance its reliability. - Page 23 • If the cable is damaged or to be replaced, the operation must be carried out the by after-sale agent with dedicated tools to avoid any accidents. • If the appliance is being connected directly to the mains an omnipolar circuit-breaker must be installed with a minimum opening of 3mm between contacts.
Need help?
Do you have a question about the CDI 30 and is the answer not in the manual?
Questions and answers