Table of Contents
Advertisement
Quick Links
INTRODUCTION
This service manual is intended as a reference for
the installer, user, and service agent of this
Scotsman ice dispenser. It includes the necessary
information to install, start up, operate, clean and
maintain this unit.
INTRODUCTION · · · · · · · · · · · · · · · · · · · · · · · · · · · · · · · · · · · · · · · · · Page 1
SPECIFICATIONS · · · · · · · · · · · · · · · · · · · · · · · · · · · · · · · · · · · · · · · · Page 2
FOR THE INSTALLER · · · · · · · · · · · · · · · · · · · · · · · · · · · · · · · · · · · · · · Page 3
INSTALLATION · · · · · · · · · · · · · · · · · · · · · · · · · · · · · · · · · · · · · · · · · · Page 4
WATER GLASS FILLER KIT · · · · · · · · · · · · · · · · · · · · · · · · · · · · · · · · · · · Page 5
WATER GLASS KIT - CONTINUED · · · · · · · · · · · · · · · · · · · · · · · · · · · · · · · Page 6
ICE DIVERTER KIT · · · · · · · · · · · · · · · · · · · · · · · · · · · · · · · · · · · · · · · · Page 7
INITIAL START UP · · · · · · · · · · · · · · · · · · · · · · · · · · · · · · · · · · · · · · · · Page 8
GATE RESTRICTOR PLATE · · · · · · · · · · · · · · · · · · · · · · · · · · · · · · · · · · · Page 9
CLEANING AND SANITIZING · · · · · · · · · · · · · · · · · · · · · · · · · · · · · · · · · · Page 10
CLEANING AND SANITIZING · · · · · · · · · · · · · · · · · · · · · · · · · · · · · · · · · · Page 11
TROUBLESHOOTING · · · · · · · · · · · · · · · · · · · · · · · · · · · · · · · · · · · · · · Page 12
This manual contains important information, read it before beginning installation or operation.
Keep it for future reference.
Table of Contents
May 2002
Page 1
ID150, ID200, ID250
Advertisement
Table of Contents

Related Manuals for Scotsman ID150


Summary of Contents for Scotsman ID150
- Page 1 INTRODUCTION This service manual is intended as a reference for the installer, user, and service agent of this Scotsman ice dispenser. It includes the necessary information to install, start up, operate, clean and maintain this unit. INTRODUCTION · · · · · · · · · · · · · · · · · · · · · · · · · · · · · · · · · · · · · · · · · Page 1 SPECIFICATIONS ·...
-
Page 2: Specifications
ID250B-1A 30 x 30 x 39 5/8 Note: Dispenser height includes cover (1 5/8”). Options: Water glass filler kit (KWGFID). Diverter kit for Scotsman Nugget Ice (KNUGDIV) Adapters: Adapters are required for placing an ice machine onto the top of this dispenser. See sales literature for adapter information. -
Page 3: For The Installer
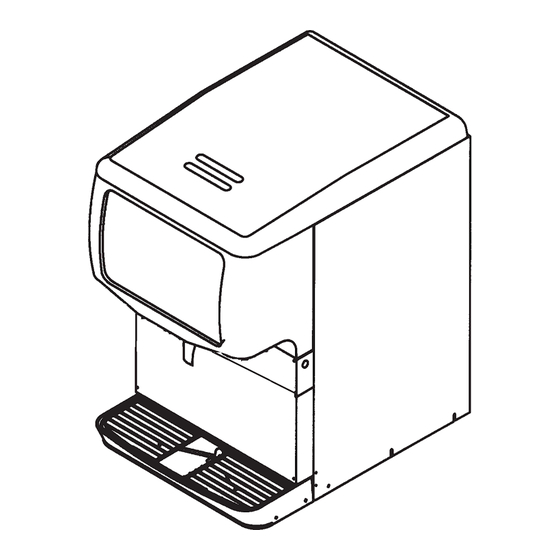
If bagged ice is used, it must be carefully and completely broken into small, cube-sized pieces before filling into the dispenser hopper. ID150, ID200, ID250 DESCRIPTION Designed to be manually filled with ice from any remote ice-making source, these dispensers will dispense cubes (up to 1-1/4”... -
Page 4: Installation
ID150, ID200, ID250 INSTALLATION 1. Locate the ice dispenser on the counter. Allow vertical clearance above unit for the removal of the cover, and for pouring ice into the hopper. 2. Plan the unit drain. A 1” I.D. drain tube is required for draining. -
Page 5: Water Glass Filler Kit
Apply water pressure and check all connections for leaks. Check faucet for proper operation. Check that tubing assembly does not interfere with wiring or electrical components. 4. Carefully reinstall panels on unit. ID150, ID200, ID250 May 2002 Page 5... -
Page 6: Water Glass Kit - Continued
ID150, ID200, ID250 WATER GLASS KIT - CONTINUED ID150 4” 2.5” ID200, ID250 6 1/8” 3 1/8” Water inlet can be routed either from the back or from underneath the dispenser. If from the back, remove the back and bottom access panels. -
Page 7: Ice Diverter Kit
ICE DIVERTER KIT NOTE: For dispensing Scotsman Nugget Ice: 1. Disconnect power to dispenser. 2. Remove Merchandiser from dispenser. 3. Remove ice chute and discard gate restrictor. 4. Install ice diverter on gate mounting plate as shown below. 5. Apply RTV to back surface of ice diverter, to seal to gate mounting plate. -
Page 8: Initial Start-Up
ID150, ID200, ID250 INITIAL START UP 1. Sanitize the ice storage system as instructed on page 11. 2. Fill hopper with sanitary ice. 3. Plug the unit’s power cord into an electrical outlet and the lighted sign should come on. -
Page 9: Gate Restrictor Plate
ID150, ID200, ID250 GATE RESTRICTOR PLATE CAUTION: Disconnect power to dispenser before installing, removing or adjusting restrictor. ADJUSTMENT This plate may be adjusted as shown to reduce or increase the dispensing rate of ice, especially desirable when using glasses or other containers with small openings. -
Page 10: Cleaning And Sanitizing
ID150, ID200, ID250 CLEANING AND SANITIZING The sink, grill and splash panel area should be cleaned daily. The following dispenser maintenance should be performed at the intervals indicated: DAILY (or as required) Remove foreign material from vending area drip tray to prevent drain blockage. - Page 11 Allow to air dry. 10. Re-assemble ice chute assembly. ID150, ID200, ID250 11. Using a mechanical spray bottle filled with sanitizing solution, spray the inside of the ice chute. Allow to air dry.
-
Page 12: Troubleshooting
ID150, ID200, ID250 TROUBLESHOOTING IMPORTANT: Only qualified personnel should service internal components or electrical wiring. Should your unit fail to operate properly, check that there is power to the unit and that the hopper contains ice. If the unit does not dispense, check the following chart under the appropriate symptoms to aid in locating the defect.
Need help?
Do you have a question about the ID150 and is the answer not in the manual?
Questions and answers